Managing Users
You must have a role with the User and/or UserOption permissions to manage user record
Use the Tools menu to do the following:
To open a user's details:
Navigate to Tools > Admin > User/Role Security.
The Security Overview screen is displayed.
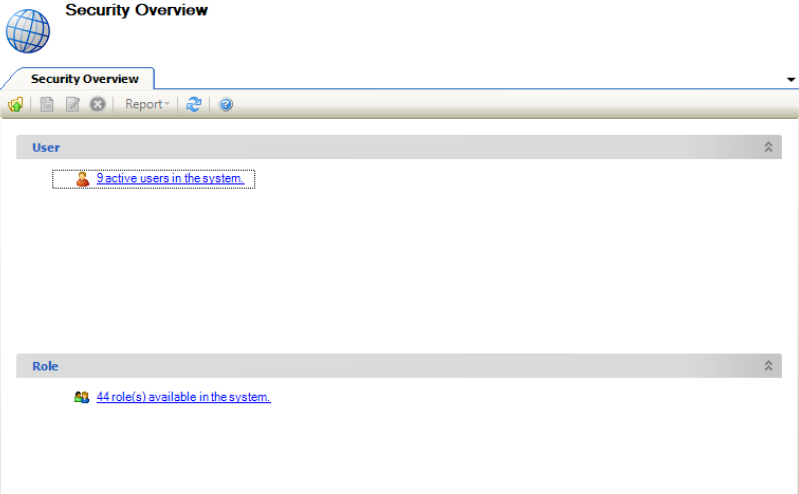
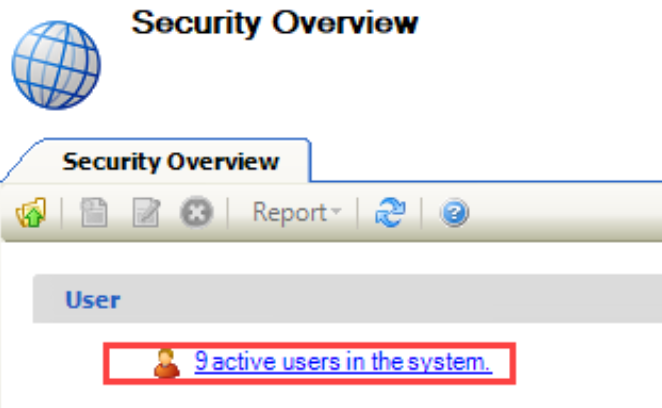
Click the <Number> active users in the system link.
The User List screen is displayed.

Double-click the relevant user record to open its summary.
Refer to Create a User for information on the fields in the User Editor.
To create a new user:
Navigate to Tools > Admin > User Role/Security.
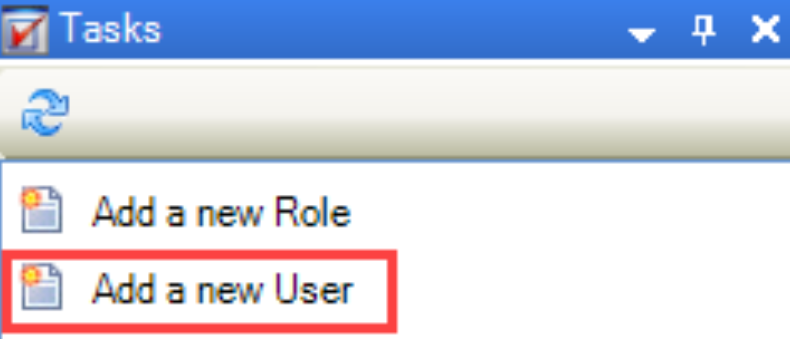
Click the Add a new User option in the Tasks menu.
The User Editor is displayed.
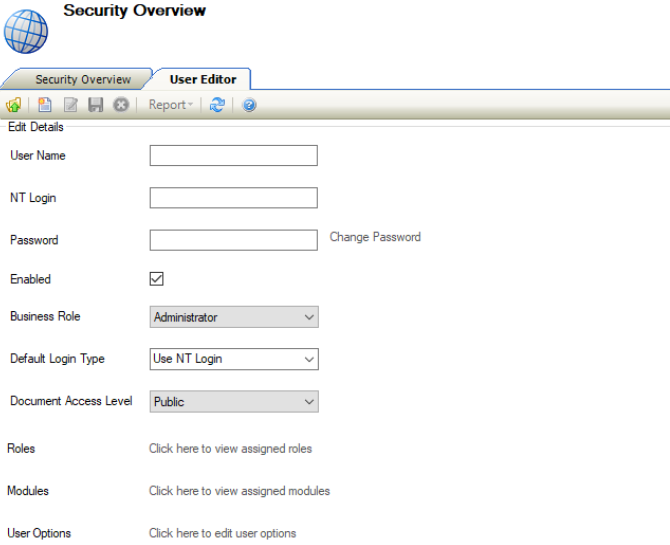
Enter the relevant details.
The fields on the User Editor are described in the following table.
This field… | Holds this information... |
|---|---|
User Name | The user's username. This field is mandatory. |
NT Login | The NT login, if required. The domain name is also needed (for example domain\john.smith). |
Password | The password, if AM authentication is required. The Change Password link is enabled on saving. Refer to Change a user's password for further information. |
Enabled | Whether the user's account is enabled. If this is deselected, the user cannot log into K2. |
Business Role | The user's business role. This is only used for information purposes and does not affect the system. |
Default Login Type | The default login type. |
Document Access Level | Whether the user can view public, restricted or confidential documents. |
Roles | The roles assigned to the user. The record must be saved before this field is enabled. Refer to Assign Roles to a user for further information. |
Modules | The modules are assigned to the user. The record must be saved before this field is enabled. Refer to Assign Modules to a user for further information. |
User Options | The user's options. The record must be saved before this field is enabled. Refer to Assign Notifications to another user for further information. |
Click Save.
To assign roles to a user:
Open the relevant user's record in the User Editor. Refer to View a user's details for further information.
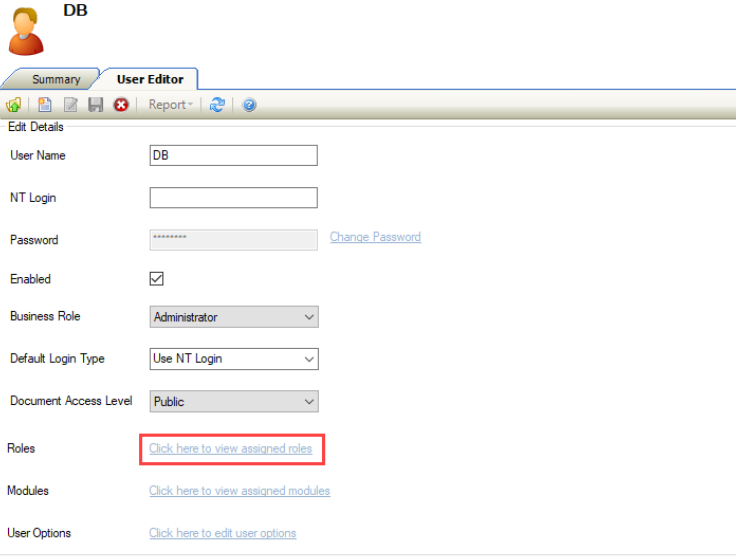
Click the View Assigned Roles link.
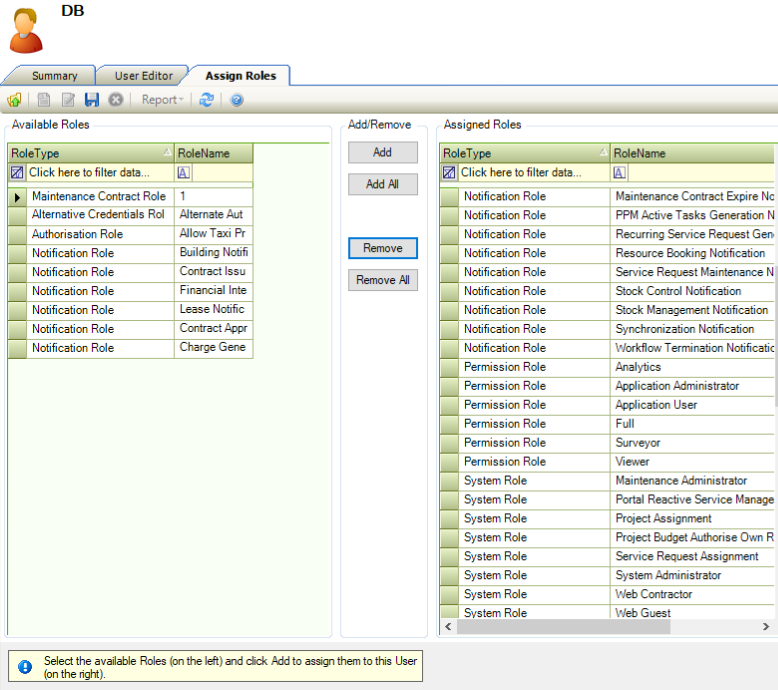
The Assign Roles screen is displayed. The left-hand panel displays all of the roles that can be assigned, and the right-hand panel displays the roles that have been assigned to the user.
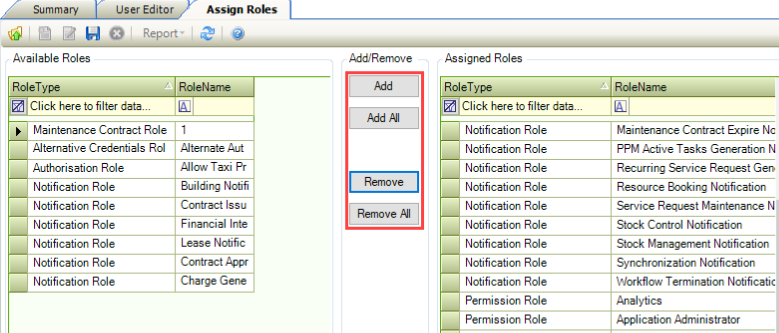
Select the relevant role(s) and use the Add, Add All, Remove, and Remove All buttons to assign roles to the user.
You can select multiple records using Shift-click (for a series of records), Ctrl-click (for individual records), or Ctrl-A (for all records).
Click Save.
To assign modules to a user:
Open the relevant user's record in the User Editor. Refer to View a user's details for further information.
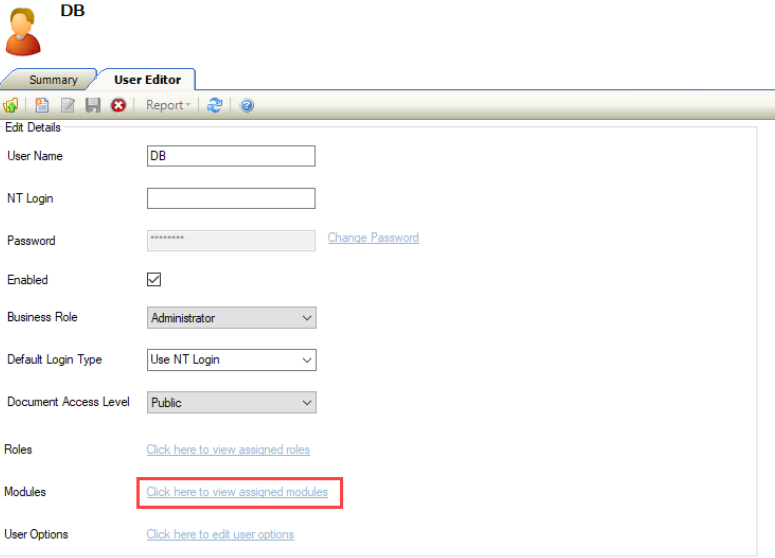
Click the Assigned Modules link.
The Assign Modules screen is displayed. The left-hand panel displays all of the modules that can be assigned, and the right-hand panel displays the modules that have been assigned to the user.
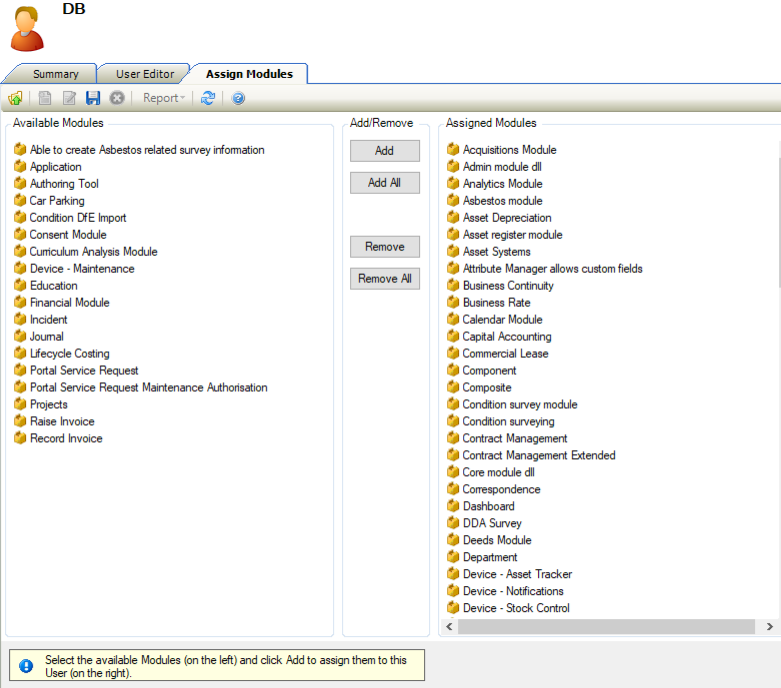
Select the module(s) and use the Add, Add All, Remove, and Remove All buttons to assign the users to the role.
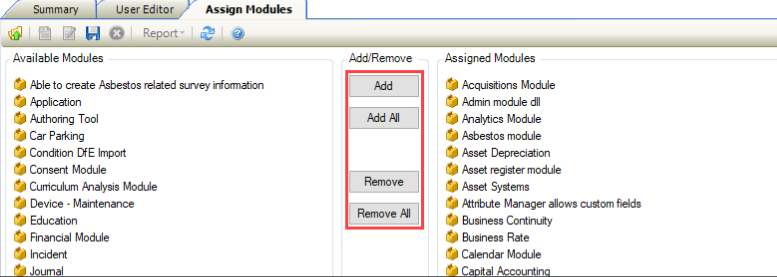
You can select multiple records using Shift-click (for a series of records), Ctrl-click (for individual records), or Ctrl-A (for all records).
Click Save.
You can link Business Units to Users so that users can access them.
To link a business unit to a user:
Open the relevant user's record. Refer to View a user's details for further information.
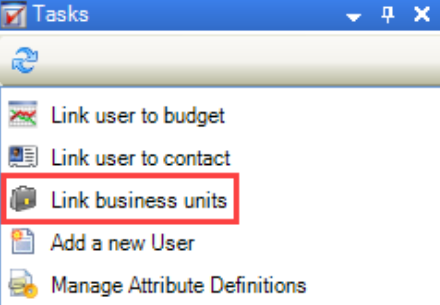
Click the Link business units option in the Tasks panel.
The Linked Business Units screen is displayed.
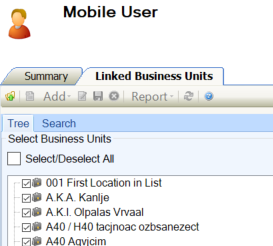
Select or deselect the relevant units. Alternatively, use the Select/Deselect All check box.
Click Save.
Alternatively:
Select Search tab.
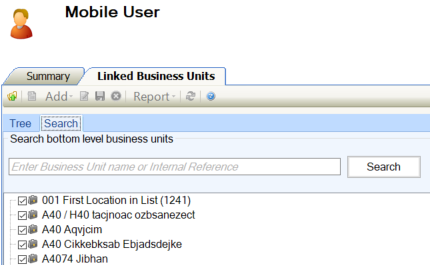
Enter search criteria.
Click Search.
A list of all lowest level Business Units will be returned that match the search criteria.
Select or deselect the relevant units.
Click Save.
Contacts can be linked to a K2 user record.
This enables an additional level of information recorded against the contact record that is not recorded against the user record (for example email addresses, employee details, contact addresses, and so on).
This function can be used in many situations, for example: to record contact details for users if it is necessary to email or call them.
Each user of the Portal module requires a contact record created for Tribal to update them on the status of their help desk requests.
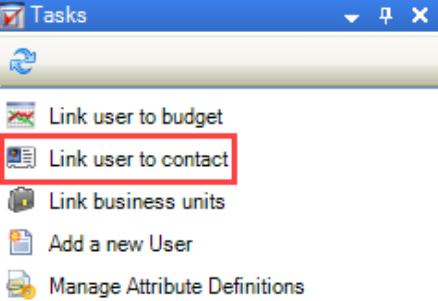
The Linking items window is displayed.
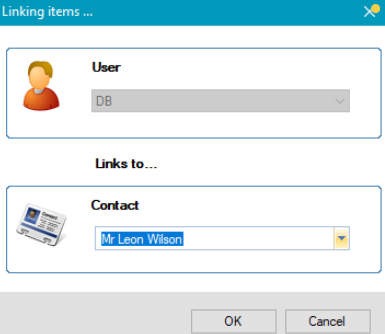
Select the Contact from the drop-down list, and then click OK.
Refer to Adding or Editing a Contact for further information on adding contacts.
To change a user's password:
Open the relevant user's record in the User Editor. Refer to View a user's details for further information.
Click the Change Password link.
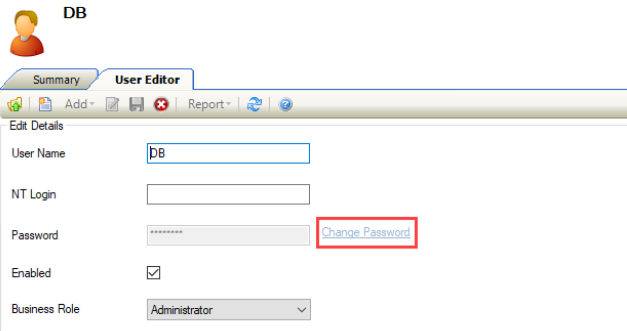
The Change Password window is displayed.
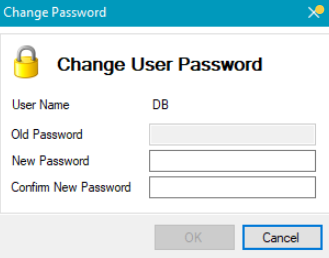
Enter the relevant old and new passwords, and then click OK.
If the password is required to be strong (as defined by the Enforce Strong Password option in System Options), it must contain at least three of the following:
An upper case character (that is: A-Z)
A lowercase character (that is: a-z)
A numeric character (that is: 0-9)
A special character (for example: #, $, !, @ and so on)
No sequences of three characters or more (for example aaa, 123, ABC, and so on)
It must also not be a previously chosen password.
You can assign a user's notifications to another user or users with a specific role for a pre-determined period.
To assign notifications to another user:
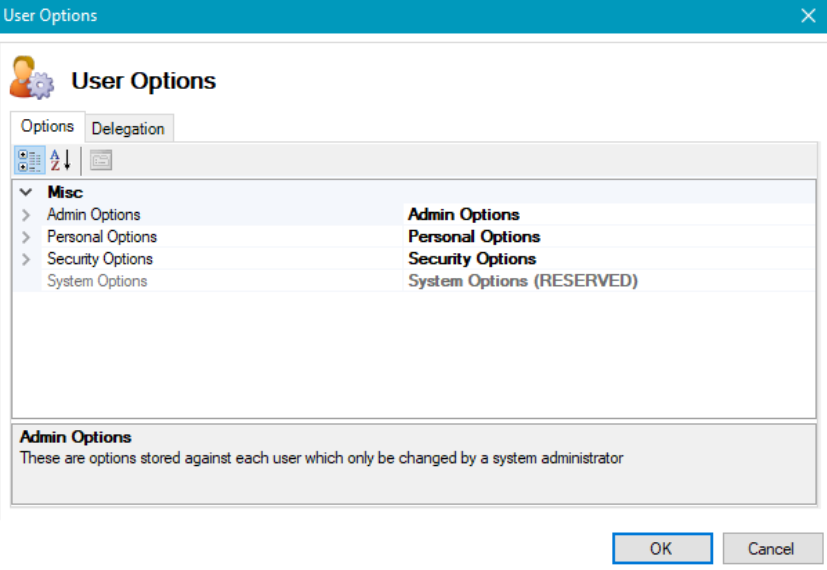
Navigate to Tools > User Options.
Alternatively, open the relevant user's record in the User Editor and then click the Click here to edit user options link. Refer to View a user's details for further information.

The User Options window is displayed.
Select the Delegation tab, and then click the New button.
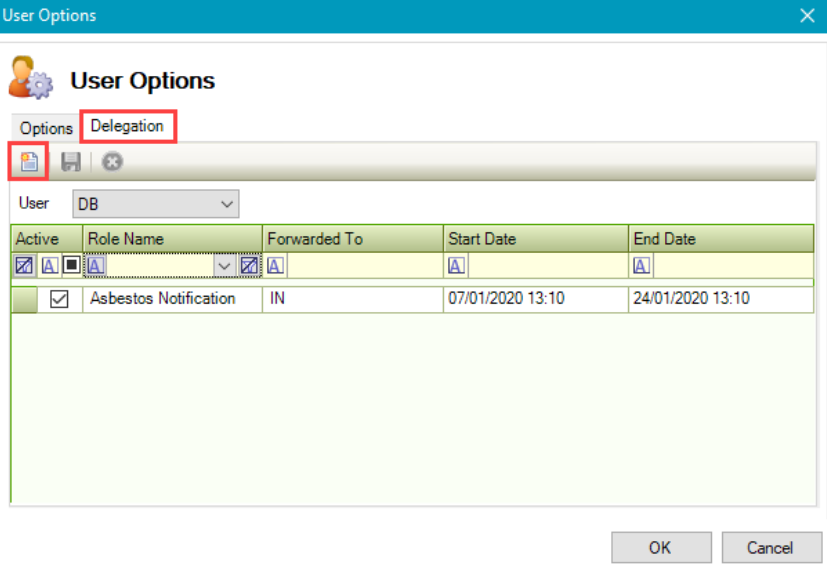
Alternatively, double-click an existing record to open it.
The Notification Delegation window is displayed.
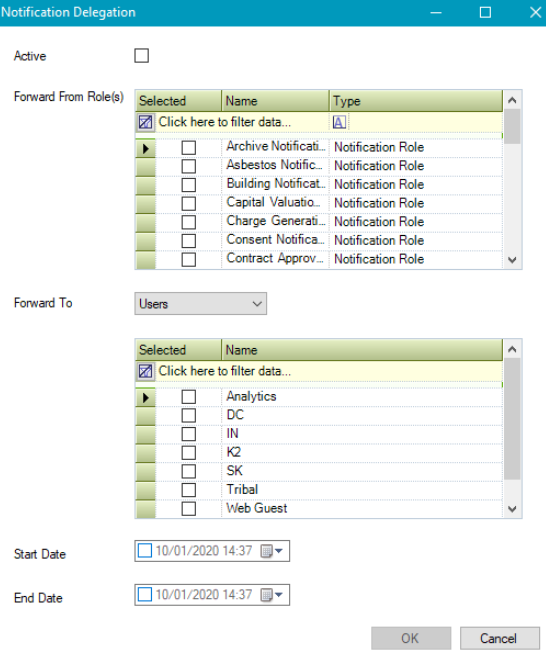
Enter or edit the relevant details.
The fields on the Notification Delegation window are described in the following table.
This field… | Holds this information... |
|---|---|
Active | Whether the delegation is active. |
Forward From Role(s) | The notifications that you want to forward on. |
Forward To | The recipients that you want to forward the notifications to. You can select individual users or all users that have a specific role. |
Start Date | The date that you want the delegation to start. |
End Date | The date that you want the delegation to end if required. |
Click OK on the Notification Delegation window, and then on the User Options window.
To delete a user's record:
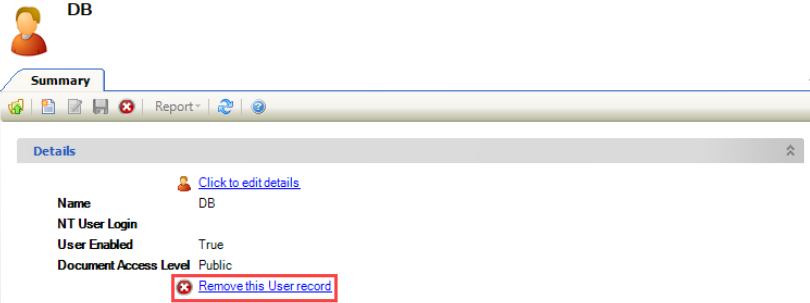
Open the relevant user's record on the Summary screen. Refer to View a user's details for further information.
Click the Remove this User record link.
A confirmation message is displayed.
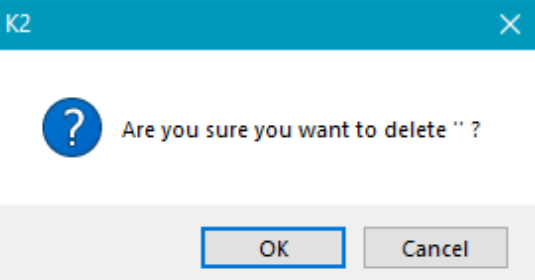
Click OK.
The record is deleted.
