Components and Composites
The Components module allows the recording and management of components against physical locations.
To add or edit a component, do one of the following:
Navigate to Functions > Component > New Component.
Search for and open an existing Component, and then click the Click to edit details button in the Summary tab.
Click the Component option in the Tasks panel of a component record.
The Component Editor (or Component System Editor if an existing asset system is opened) is displayed.
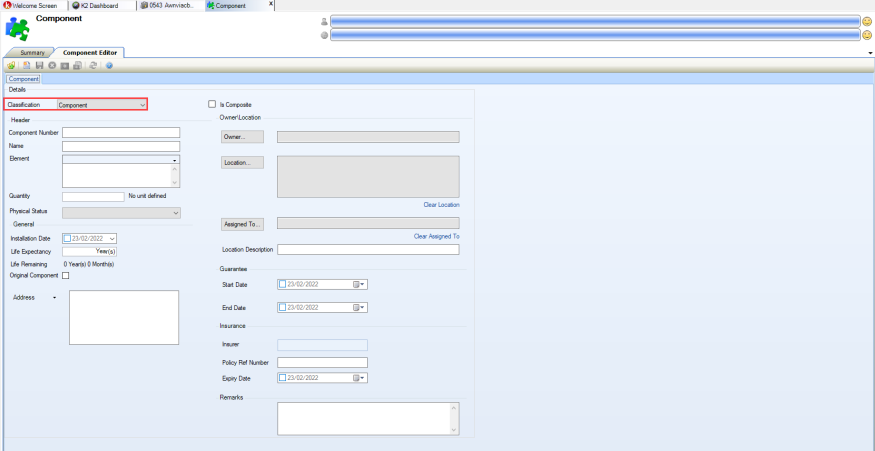
Enter or edit the details as required.
The fields on the Component Editor tab are described in the following table:
This field… | Holds this information... |
|---|---|
Classification | Whether the item is an asset or component. |
Is Composite | Whether the record is a header for the component system. This allows you to record components against an asset system. Selecting this check box enables the Composite Details section at the top of the screen, and renames the screen Composite Editor. |
Component Number | A unique reference number for the component. |
Name | The name of the component. |
Element | The element which the component is to be set against. This field is mandatory. These can be defined in Component Reference Data (accessed by navigating to Functions > Component > Component). |
Quantity | Number of Units to be defined. |
Physical Status | The physical Status of the component. These can be defined in Physical Status Reference Data (accessed by navigating to Functions > Core > Reference Data > Core). |
Installation Date | Date of installation. |
Life Expectancy | The life expectancy of components. |
Life Remaining | The remaining lifespan of the asset. This is calculated automatically based on the Installation Date and Life Expectancy fields.. |
Original Component | Selecting this check box confirms that this will be the original component. |
Address | The address of Component. |
Owner | The owning business unit. This field is mandatory. 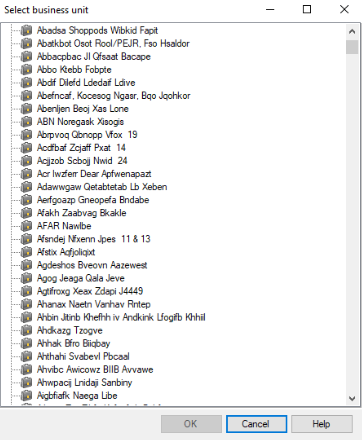 |
Location | The location where the link to the component is required. This field is mandatory. 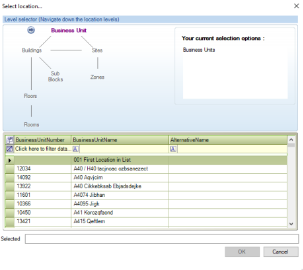 Use the level selector to select the relevant room, floor, zone, building, site or business. |
Assigned To | The agency or contact that the Component is assigned to. |
Location Description | Specific details of the component's location |
Start Date | The start date of the guarantee. |
End Date | The end date of the guarantee. |
Insurer | The name of the insurer. Refer to Adding or Editing an Agency record to set up an Insurer |
Policy Ref Number | The policy reference number. |
Expiry Date | The expiry date of the insurance. |
Remarks | Any comments regarding the component. |
Click Apply.
An Attribute can be added to a Component or an Element linked to a Component.
To add an attribute to a Component, do the following:
Select Tasks then Manage Attribute Definitions
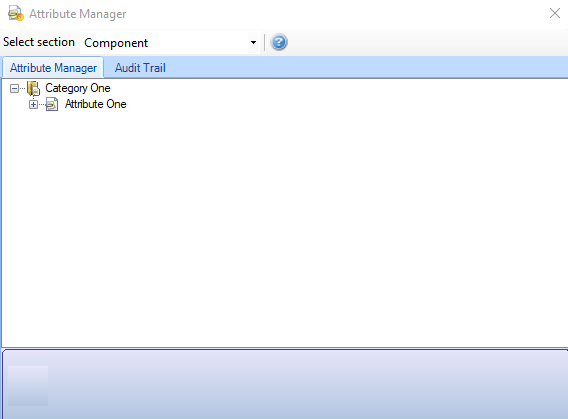
Refer to Attribute Manager for further details on how to create attributes.
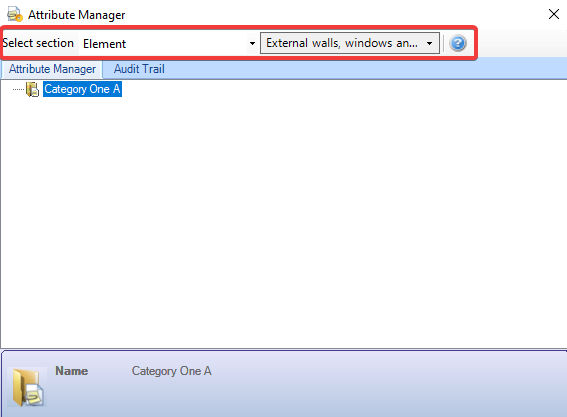
To link an attribute to a component with a selected element, do the following:
Select Tools then Attribute Manager
The Attribute Manager field appears.
Select Element from the Select Section drop down then the element it is to be linked to.
To add a Component refer to Components for further details.
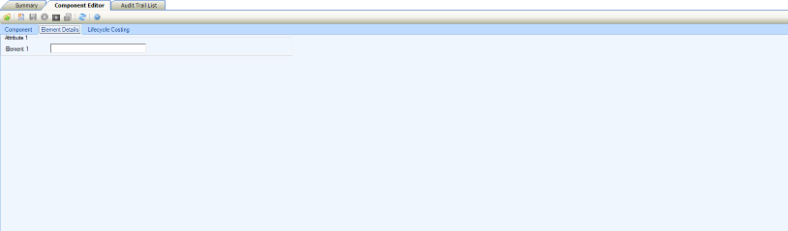
The Element Details tab is displayed in Component Editor if the element selected against the component has an attribute.
To add or edit a composite, do one of the following:
Navigate to Functions > Component > New Component.
The Component Editor page is displayed.
Click the Component option in the Tasks panel of a component record.
The Component Editor (or Composite Editor if an existing composite is opened) is displayed.
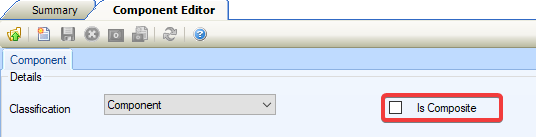
Select the Is Composite tick box.
The Composite Editor page is displayed.
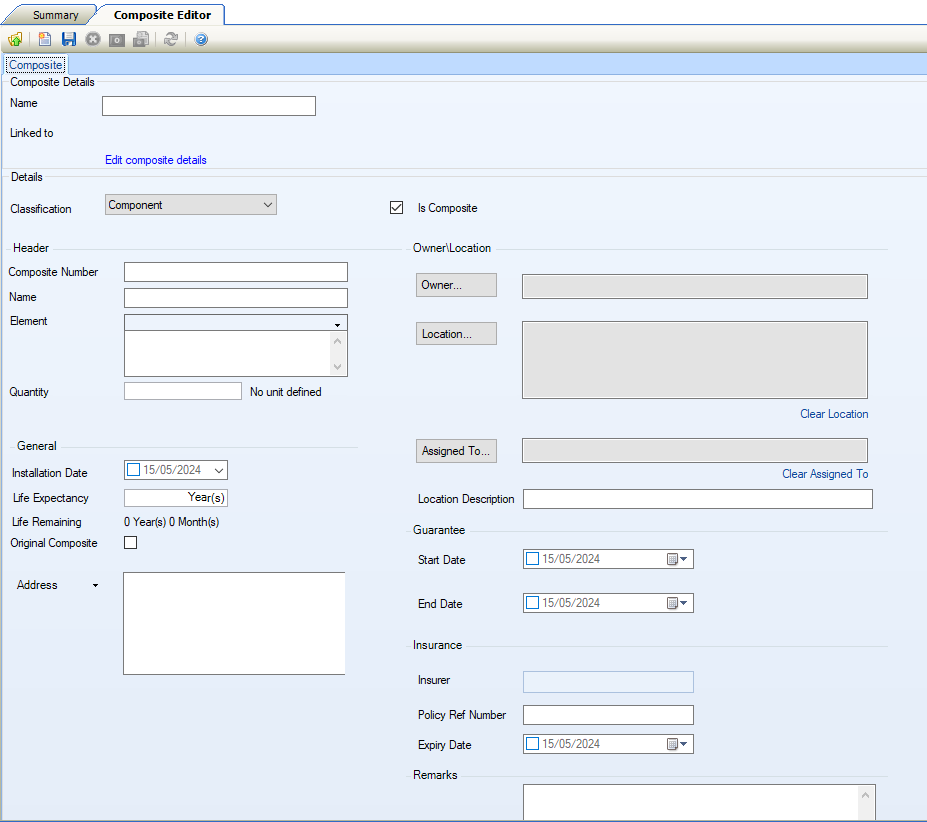
Enter or edit the details as required.
The fields on the Composite Editor tab are described in the following table:
This field… | Holds this information... |
|---|---|
Name | The name of the composite. This field is mandatory. |
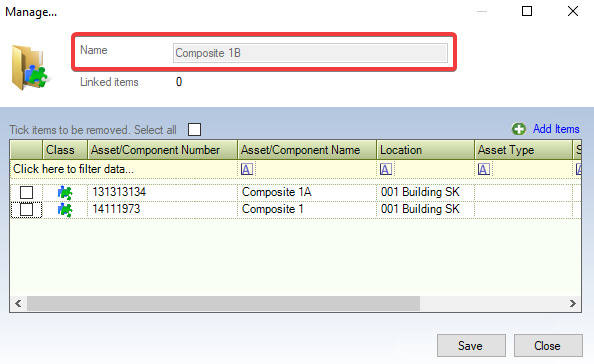
Linked to | Displays a count of linked components. |
Edit Composite Details | Allows composite details to be edited when clicked on. Clicking the Edit Composite Details the Manage Composite window is displayed and allows more Components to be added to the Composite. 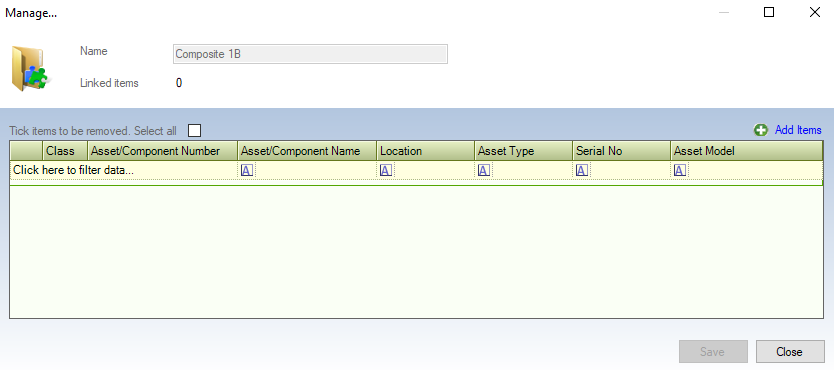 |
Classification | Whether the item is an asset or component. If Is Composite has been ticked then classification is set to a component by default. |
Is Composite | Whether the record is a header for the component system. This allows you to record components against a composite. |
Composite Number | A unique reference number for the composite. |
Owner | The owning business unit. This field is mandatory.  |
Name | The name of the composite. |
Element | The element which the composite is to be set against. This field is mandatory. These can be defined in Component Reference Data (accessed by navigating to Functions > Component > Component). |
Location | The location where the link to the composite is required. This field is mandatory. Use the level selector to select the relevant room, floor, zone, building, site or business. |
Quantity | The number of defined units. |
Assigned To | The agency or contact that the composite is assigned to. |
Installation Date | Date of installation. |
Life Expectancy | The life expectancy of composite. |
Location Description | Specific details of the composite's location |
Life Remaining | The remaining lifespan of the composite. This is calculated automatically based on the Installation Date and Life Expectancy fields.. |
Original Composite | Selecting this check box confirms that this will be the original composite. |
End Date | The end date of the guarantee. |
Insurer | The name of the insurer. Refer to Adding or Editing an Agency record to set up an Insurer |
Policy Ref Number | The policy reference number. |
Expiry Date | The expiry date of the insurance. |
Remarks | Any comments regarding the composite |
Click on Save.
Search for and open an existing Composite, and then click the Edit Composite details link in the Composite tab.
The Manage Composite window is displayed.
Click on Add Items.
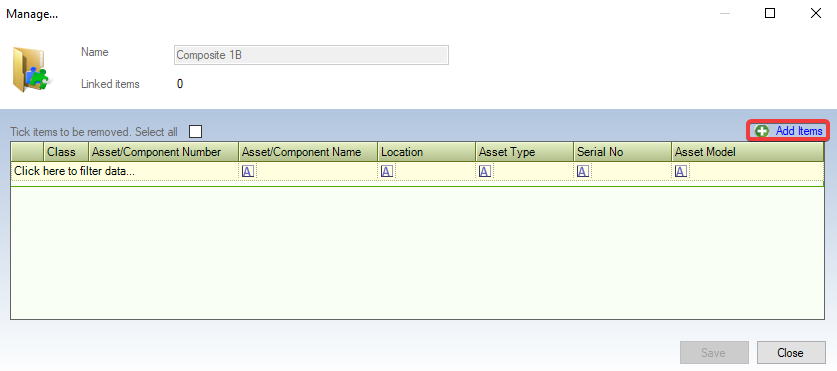
The Select Items window is displayed.
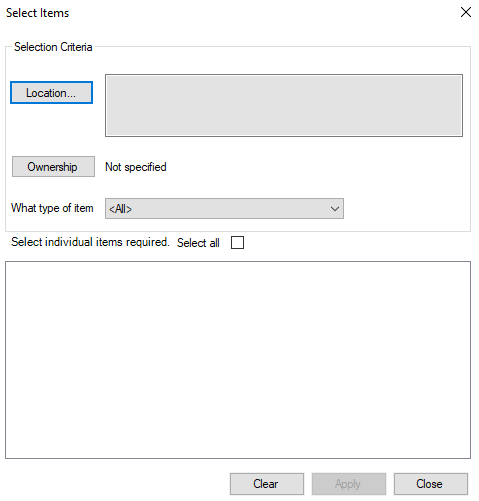
The fields on the Select Items window are described in the following table:
This field… | Holds this information... |
|---|---|
Location | The location where the link to the component is required. This field is mandatory. Use the level selector to select the relevant room, floor, zone, building, site or business. |
Ownership | The owning business unit. |
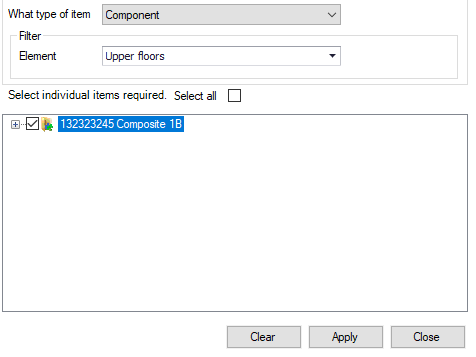
What Type of Items | Displays the following items.
Select a component from the drop-down. |
Element | The element which the composite is to be set against. This field is mandatory. These can be defined in Component Reference Data (accessed by navigating to Functions > Component > Component). |
Select All | When ticked all Individual Items Required are selected. 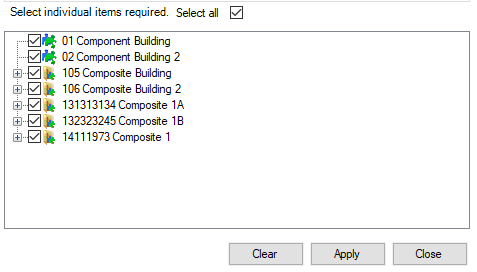 |
Select the Individual Items Required.
It is not possible to link the Composite to itself.
Click on Apply.
The selected composite appears in the Manage Composite.
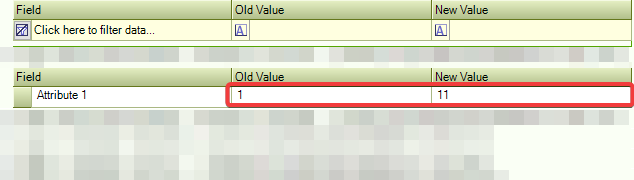
To view the Audit Details, do the following
Click on the Associated Items then Audit Trail
The audit trail displays the element details.
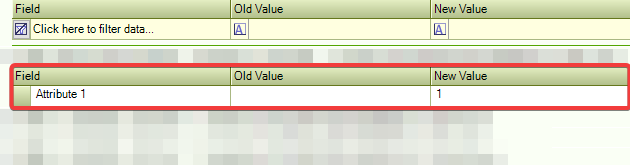
Update the details in the element.
The audit trail displays the updated details.