
Journal
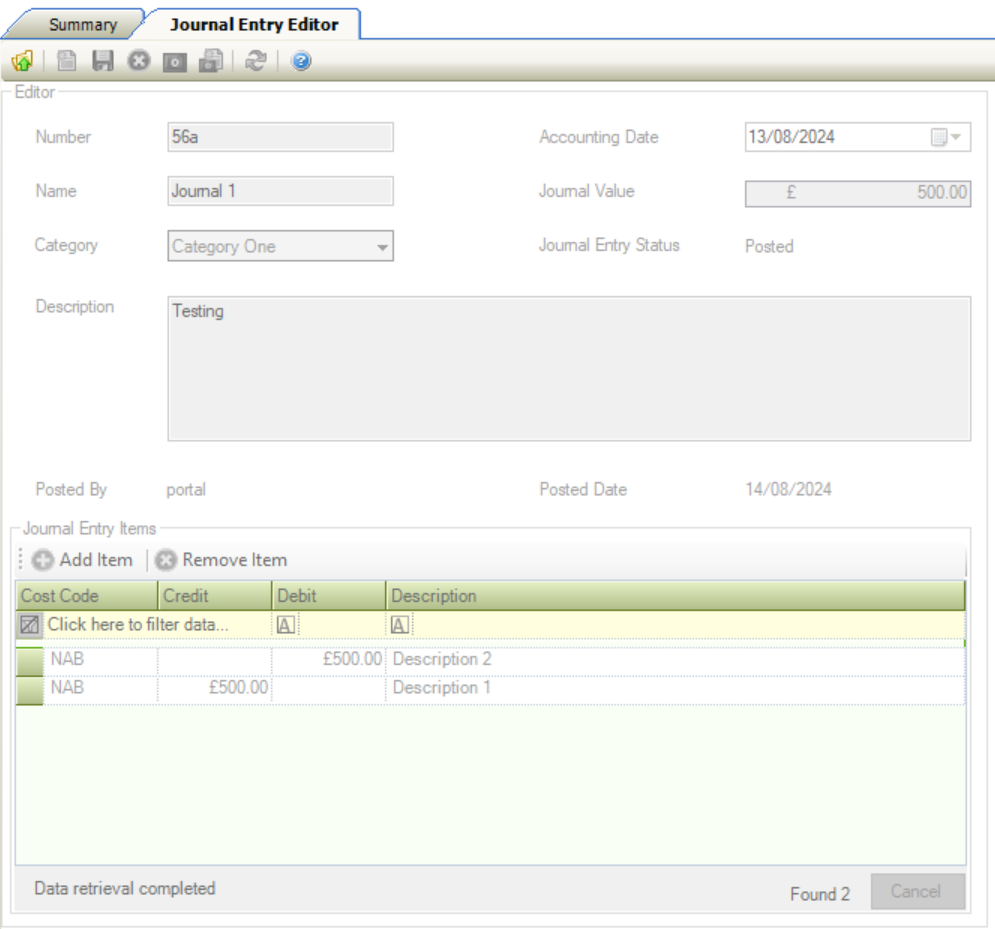
The Journal Entry Editor allows you to add a new journal entry or edit an existing one.
The Journal Entry Editor allows you to add a new journal entry or edit an existing one.
To create a new Journal Entry:
Navigate to Finance > Journal > New Journal Entry.
Alternatively, search for and open the relevant Journal Entry Editor.
The Journal Entry Editor is displayed.
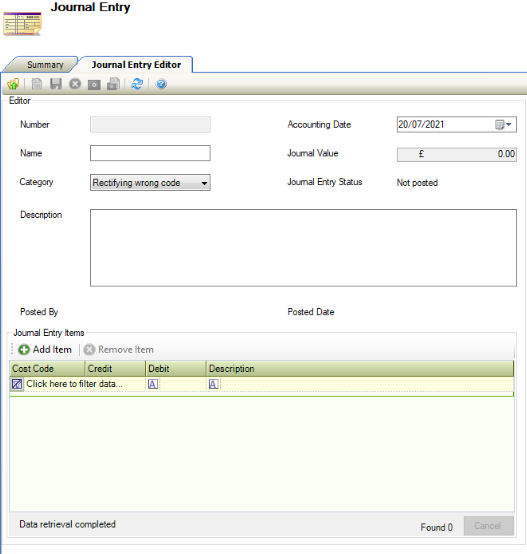
Enter details of the journal entry.
The fields on the Journal Entry Editor tab are described in the following table:
This Field… | Holds This Information |
|---|---|
Number | The unique journal entry number. |
Name | The individual associated with the journal entry. |
Category | The journal category. These can be defined in Category Reference Data (accessed by navigating to Finance > Journal > Journal ). |
Description | The description of the journal entry. |
Posted By | The individual posting the journal entry. |
Accounting Date | The accounting date. |
Journal Value | The journal value. |
Journal Entry Status | The journal entry status. |
Posted Date | The date that the journal entry was posted. |
Journal Entry Items | Items associated with the journal entry. |
Click Add Item to add an item to the journal entry.
The Edit Journal Entry Item window is displayed.
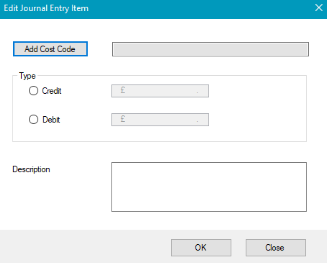
Enter details of the journal entry item.
The fields on the Edit Journal Entry Item window are described in the following table:
This Field… | Holds This Information |
|---|---|
Edit Cost Code | The cost code associated with the journal entry. This field is mandatory. |
Credit | The journal entry credit amount. This field is mandatory. |
Debt | The journal entry debit amount. This field is mandatory. |
Description | The description of the journal entry. This field is mandatory. |
Click Add Cost Code to apply a cost code to the journal entry item.
The Cost Code Editor window is displayed
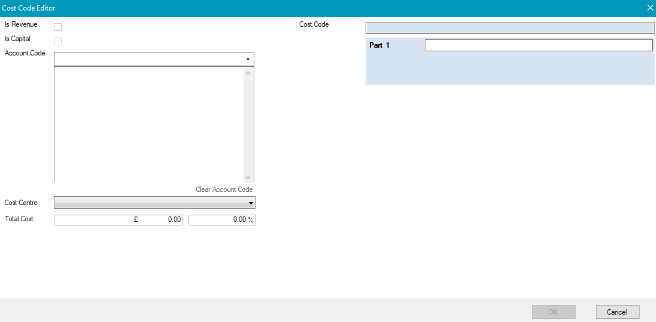
The fields on the Cost Centre Editor window are described in the following table:
This Field… | Holds This Information… |
|---|---|
Is Revenue | Whether the cost is related to revenue. |
Account Code | The account code. |
Cost Centre | The cost centre. These can be defined in Core Reference Data(accessed by navigating to Functions > Core > Reference Data > Core). |
Total Cost | The total cost |
Cost Code | The cost code |
Click OK.
Click Save.
Other Tasks/Associated Items:
A Posted Journal represents a record that is ready to be stored as a financial entry in the ledger. This action will work similar to authorisation, where the record is locked down and cannot be further updated. To Post a Journal entry:
Search for an existing journal entry.
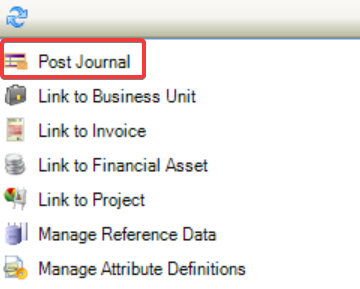
You cannot post a journal that has been created by the same person. Post Journal will appear inactive within the Tasks menu.
Click on Post Journal.
The following message is displayed.
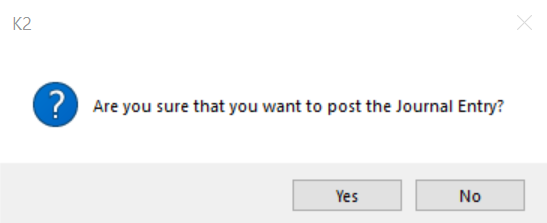
Click on Yes.
The status of the journal has changed to Posted.

The details display the Posted By and Posted Date on the Summary tab.
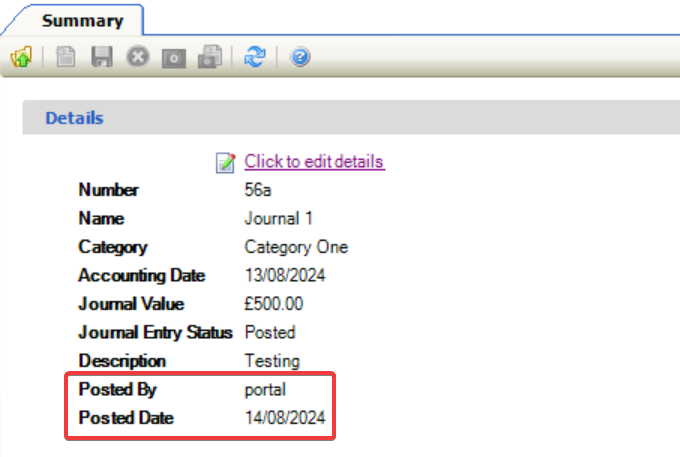
Click on Click to Edit Details.
The journal has been posted and cannot be edited.
To link a Journal to a Business Unit:
Open the relevant Journal record.
Click the Link to Business Unit option in the Tasks panel.

The Select Business Unit to Add window is displayed.
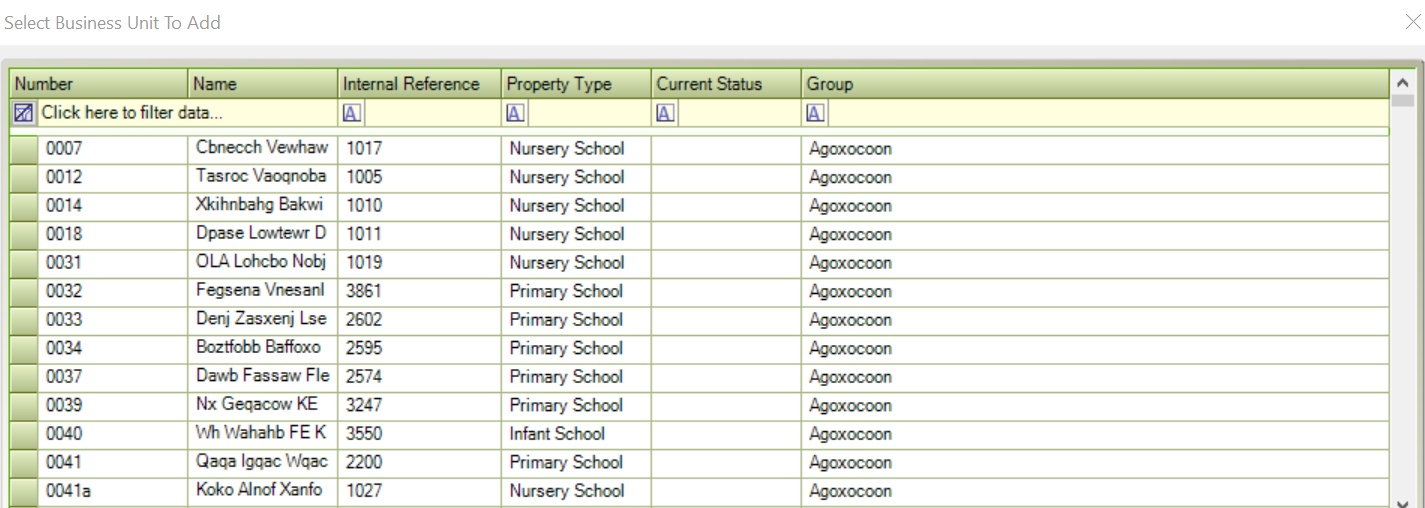
Select the relevant Business Unit and then click OK.
To link a Journal to an Invoice:
Open the relevant Journal record.
Click the Link to Invoice option in the Tasks panel.
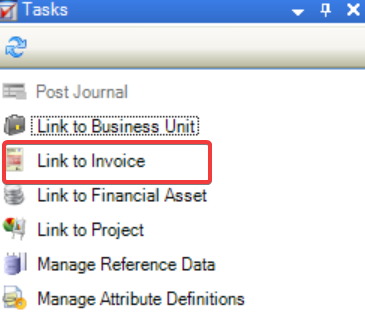
The Select Invoice to Add window is displayed.
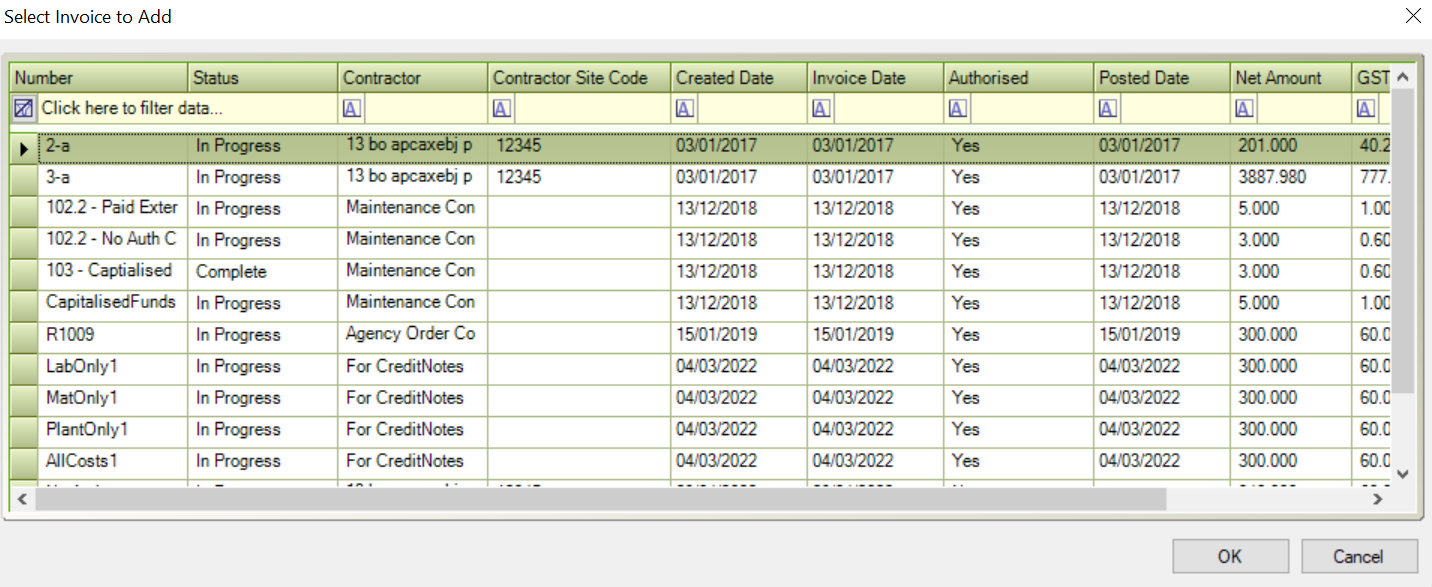
Select the relevant Invoice and then click OK.
To link a Journal to a Financial Asset:
Open the relevant Journal record.
Click the Link to Financial Asset option in the Tasks panel.
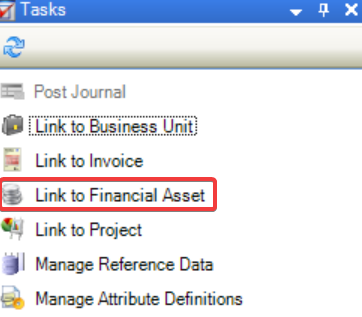
The Select Financial Asset to Add window is displayed.
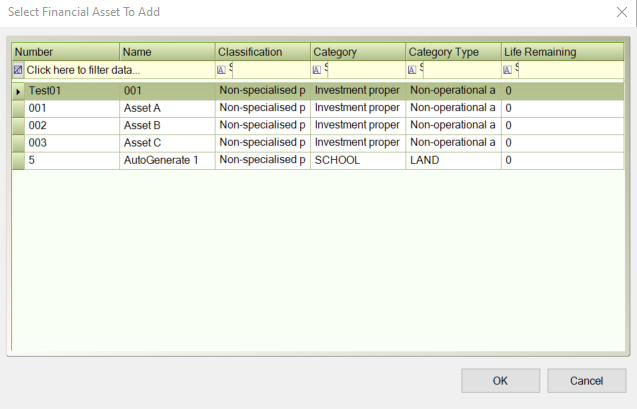
Select the relevant Financial Asset and then click OK.
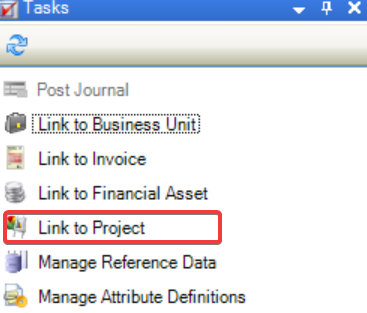
To link a Journal to a Project:
Open the relevant Journal record.
Click the Link to Project option in the Tasks panel.
The Select Project to Add window is displayed.
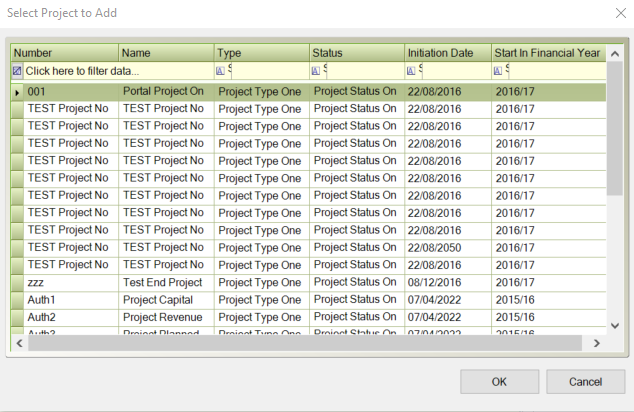
Select the relevant Project and then click OK.