Job Allocation
To allocate a job navigate to Operational Services > Job Allocation.
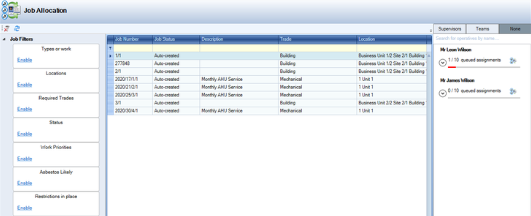
Use the Job Allocation screen to assign jobs to operatives and manage their work queue.
You need a role with the JobAssignmentManagement and OperativeAssignmentManagement permissions to use this screen.
It can be accessed by navigating to Maintenance > Operational Services > Job Allocation.
By default, the grid displays all job records except for those where:
The job status is 'Is Closed' or 'Is Cancelled'
The originating Service Request Maintenance record has a status of 'Is Closed' or 'Is Cancelled'
The originating Active PPM Task is 'Complete'
You can filter the Job Allocation grid by clicking on the headers.
Click a header within the job allocation grid.
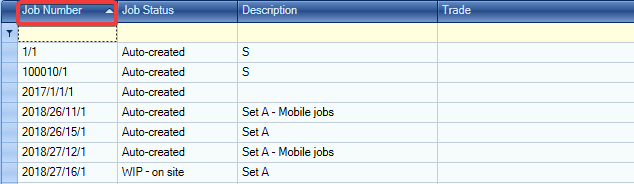
The column is placed in either alphabetical or numerical order.
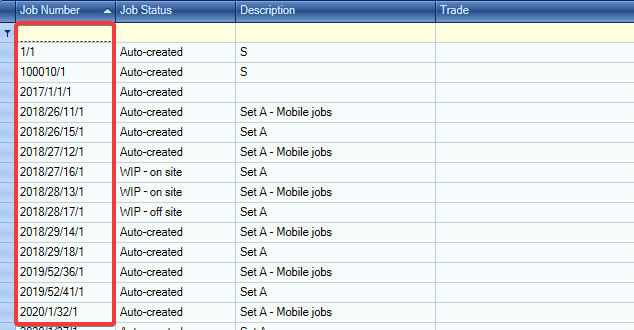
Individual or group records can be filtered by clicking the arrow next to the column header.
Click on the arrow next to the column header.
A drop-down is displayed with all available records.
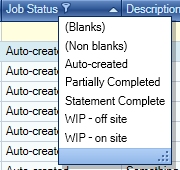
Select a record from the drop-down.
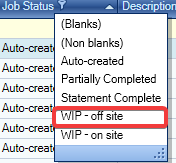
The grid displays the selected records.

You can use the Job Filters panel to apply filters to the grid.
Click the Enable button on the relevant category to display the filters that can be applied to the grid, and then select or deselect the relevant check boxes. The number of jobs is displayed in brackets. Changes are applied immediately to the grid.
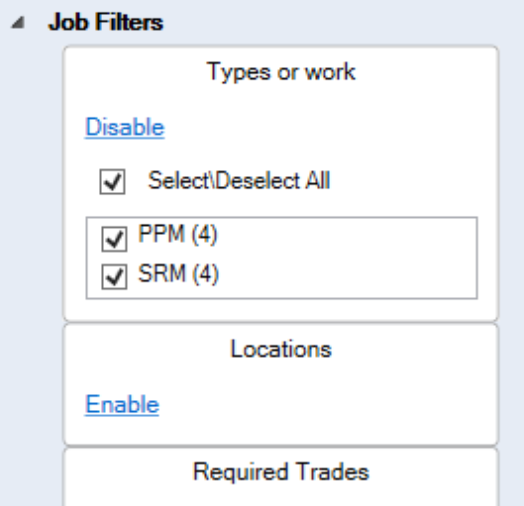
PPM (planned preventative maintenance) jobs that have multiple locations are grouped to the highest common location (for example: if a PPM job is in multiple rooms on the same floor, then the floor is shown as the location. If a PPM task is at multiple rooms, on multiple sites, then the Business Unit is shown as the location).
You can also use the filter fields at the top of the grid to narrow the job records if required.

You can enable or disable the filter by clicking the Filtered check box at the bottom of the grid.

To assign a job to an Operative:
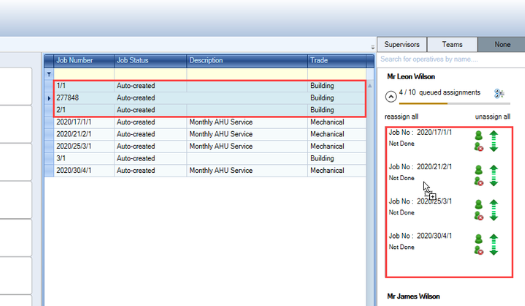
Locate the relevant Job(s) in the grid.
You can select multiple records using Shift-click (for a series of records), Ctrl-click (for individual records), or Ctrl-A (for all records).
Search for the operative from the right-hand panel by doing one of the following:
Click the Supervisors tab to display all operatives grouped by the supervisor that they work under
Click the Teams tab to display all operatives by the Operative Sub Team that they are assigned to
Click the None tab to display all operatives and supervisors
Use the search box
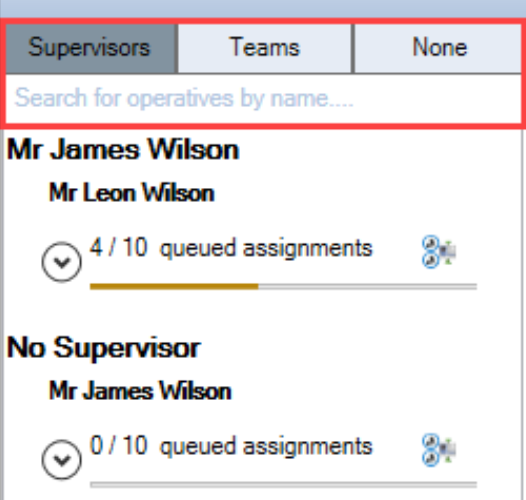
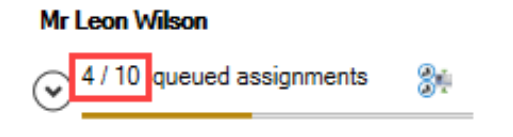
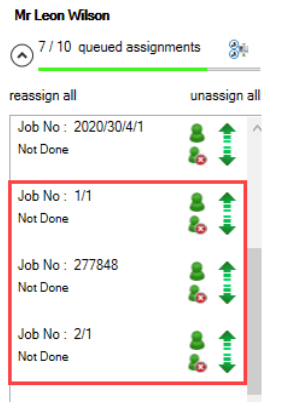
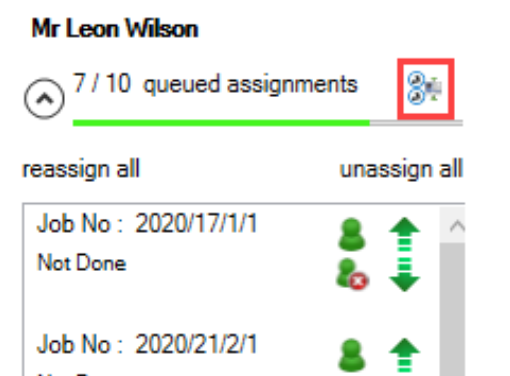
Each operative or supervisor has a status bar that represents the size of their job queue. The first number is the current number of jobs assigned to the operative, the second number is the number of jobs that they can potentially have visible on K2 Mobile (which is defined by the Restrict Phone Queue setting in Mobile Options).
An operative's queue in K2 can be greater than the number of jobs they will receive on the phone.
If an operative has few jobs, the status bar is orange, but if the operative has a lot of jobs, the status bar is green.
Expand the user's record by clicking the Expand/Contract arrow.
Click and drag the relevant job(s) from the grid into the operative's queue.
The jobs are allocated to the operative and the number of queued assignments is updated.
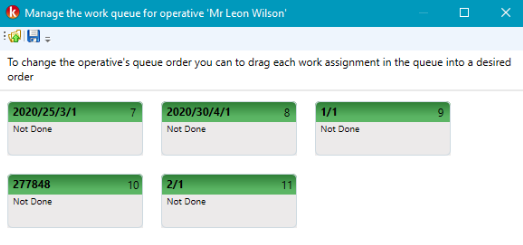
Managing the operative’s job queue as required.
Click Save.
You can use the right-hand panel to do the following:
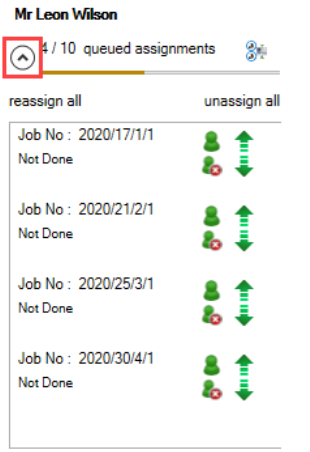
Reassign all of the operative's jobs to another operative by clicking the Reassign all button.
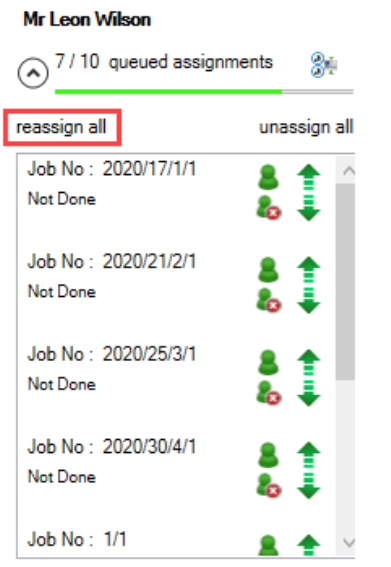
This displays the Select Operative window, where you can select the operative to assign the jobs to.

Remove all of the operative's jobs by clicking the Unassign all button.

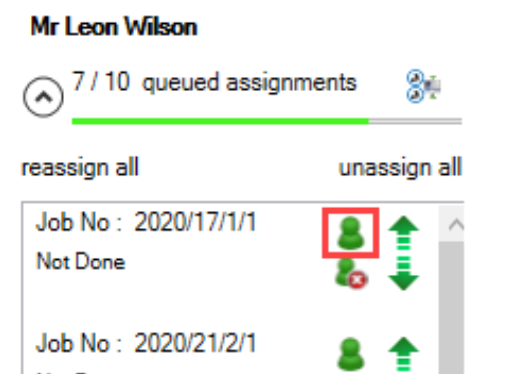
Reassign a specific job to the operative's supervisor by clicking the Re-assign to their supervisor button.
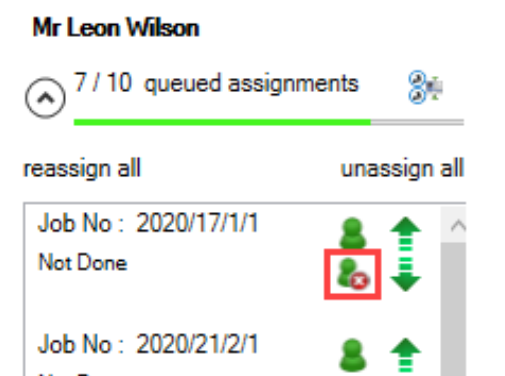
Unassign a specific job by clicking the Un-assign this job button.
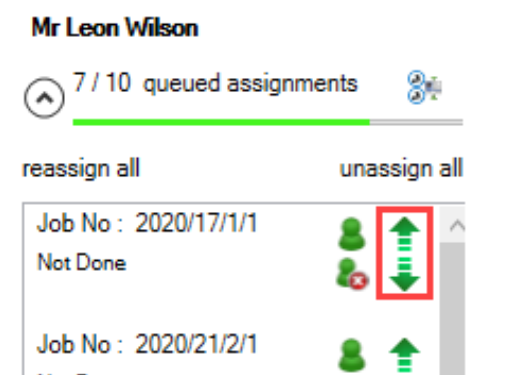
Change the priority order of jobs by using the up and down arrow buttons.
Manage an operative's queue by clicking the Manage the operative's assignment queue button.
This displays the Manage the work queue for operative window, where you can view the job queue more clearly and drag jobs in the order that they should be carried out.