Manage Voids
A void record contains checklist items created from the checklist template which can be managed in Units reference data. A list of events can be added against a void and displayed in the Calendar.
Note: You must have a role with the Void permission to manage voids.
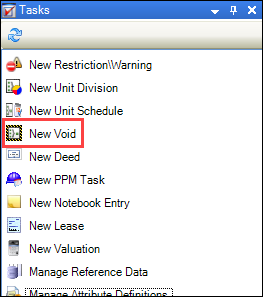
After searching for and opening the relevant unit record, click the New Void option in the Tasks panel to add a void.
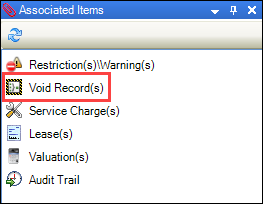
Alternatively, click the Void Record(s) option in the Associated Items panel, and then double-click the relevant existing record in the Void List.
The Void Editor is displayed.
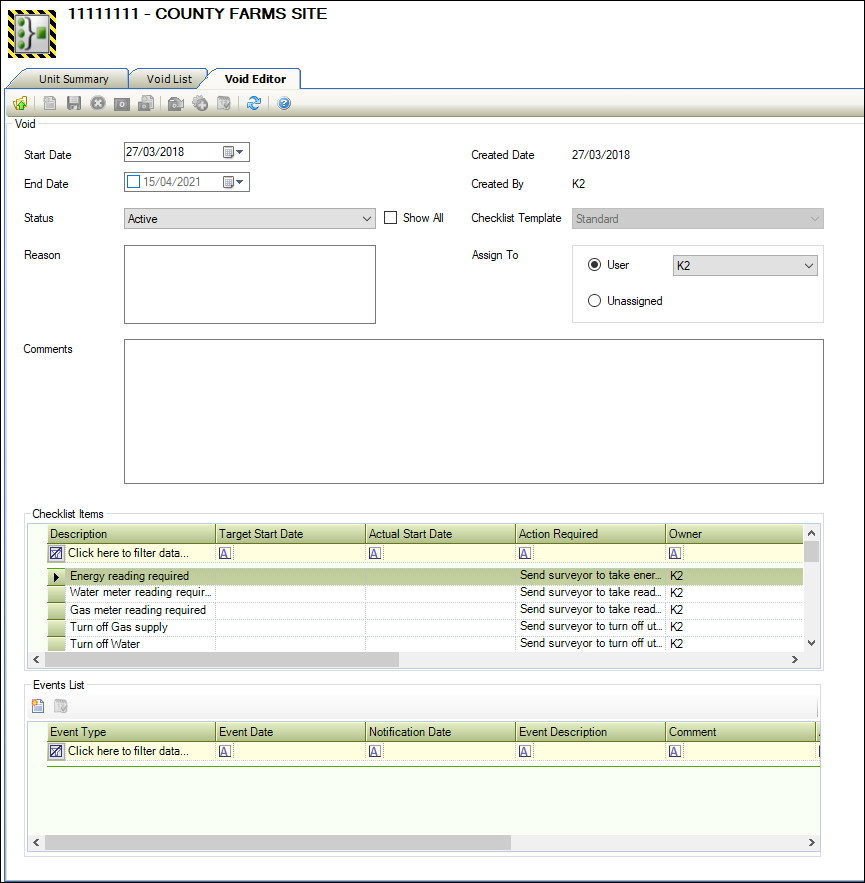
Use the Void Editor to:
The fields on the Void Editor are described in the following table.
| This field | Holds this information... |
|---|---|
| Start Date | The void start date. |
| End Date | The void end date. |
| Status |
The status of the void (for example: active, closed or pending). Note: These can be defined in Void Status reference data (accessed by navigating to Estates > Valuation > Valuation). |
| Reason | The reason for the void. |
| Created Date | The date the void record was created. This is automatically populated with today's date on saving and cannot be edited. |
| Created By | The user who created the void record. This is automatically populated with the logged-in user and cannot be edited. |
| Checklist Template |
The template of checklist items. These are then displayed in the Checklist Items section on saving. This field cannot be edited after saving. Note: These can be managed in Void Checklist Template reference data (accessed by navigating to Estates > Valuation > Valuation). |
| Assign To |
The person responsible for the void. Select from the drop-down list or select the Unassigned radio button. Note: Editing this field updates all records in the Checklist Items grid on saving. A confirmation message is displayed. |
| Comments | Any comments relating to the void. |
Once saved, the Checklist Items and Events List sections are enabled.
Once a void is added to a unit, a black and yellow border is also added to the unit icon.

The Checklist Items section is populated with the items defined in the selected Checklist Template.

Note: The Checklist Items grid is only enabled on saving the void record.
-
Double-click a record in the Checklist Items grid to display the Edit Checklist Item window.
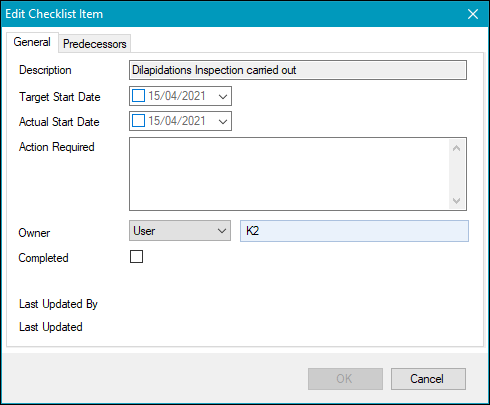
- Edit the fields on the General tab as required.
The fields on the General tab are described in the following table.
| This field | Holds this information... |
|---|---|
| Description | A description of the checklist item. |
| Target Start Date | The date that the checklist item should start to be addressed. |
| Actual Start Date | The date that the checklist item was addressed. |
| Action Required | Further details of the action required. |
| Owner | The person responsible for the checklist item. Select the type of person (that is: user, contact or free text if the person is not recorded in the system) and enter or select the relevant person from the adjacent field. |
| Completed | Whether the checklist item has been completed. |
| Last Updated By | The user who last updated the checklist item. This is automatically populated with the logged-in user and cannot be edited. |
| Last Updated | The date the checklist item was last updated. This is automatically populated with today's date on saving and cannot be edited. |
-
Select the Predecessors tab, and then click the Add button or double-click an existing predecessor record to edit it.

Note: You can also select a record and click the Remove button to delete it.
The Predecessor Link window is displayed.
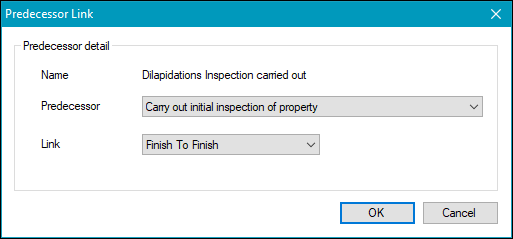
- Select the predecessor item from the Predecessor drop-down list.
-
Select the link type from the Link drop-down. You can select from the following:
- Finish To Finish - the predecessor must end before the successor ends
- Finish To Start - the predecessor must end before the successor starts
- Start To Finish - the predecessor must start before the successor ends
- Start To Start - the predecessor must start before the successor starts
- Repeat this process for as many predecessors as necessary, and then click OK.
- Click OK on the Edit Checklist Item window to return to the Void Editor.
Use the Events List section to add or edit one-off or recurring events.
To add or edit events:
-
Click the New button to add an event.

Alternatively, double-click an existing record.
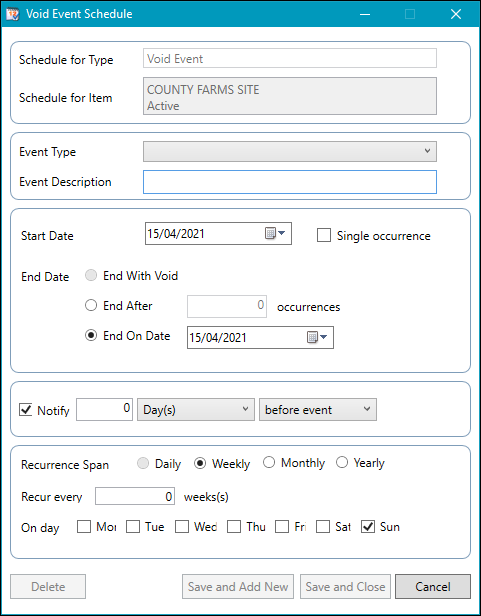
The Void Event Schedule window is displayed.
-
Enter or edit the relevant details.
The fields on the Void Event Schedule window are described in the following table.
| This field | Holds this information... |
|---|---|
| Schedule for Type | This defaults to 'Void Event' and cannot be edited. |
| Schedule for Item | This defaults to the unit that the event schedule is for and cannot be edited. |
| Event Type |
The type of event. Note: These can be defined in Void Event Type reference data (accessed by navigating to Organisation > Unit > Units). |
| Event Description | A description of the event. |
| Start Date | The start date. |
| Single Occurrence | Whether the event is a one-off occurrence. |
| End Date | The end date. Select whether there is no end date, whether the event is to end after a specific number of occurrences, or whether to end on a specific date. |
| Notify | Whether a notification is required for the event(s). Enter the details of how far in advance of or after the event(s) that the notifications are displayed. |
| Recurrence Span | The frequency that the event recurs. |
-
Do one of the following:
- Click Save and Add New to save the event and add another one
- Click Save and Close to save the event and close the Event Schedule window
- Click Cancel to cancel the schedule
- Click Delete to delete the schedule