Skip table of contents

Managing Workflow Triggers

You can view and manage triggers in the Workflow Triggers panel. Workflow triggers determine what initiates a workflow and when.

A trigger can host multiple workflows. Triggers store workflow information and determine how and when it is initiated.

Use Workflow Manager to:

Submit a Workflow with a Product Trigger

You can use product triggers (also known as product hooks) to submit attached workflows to the queue for processing.

Only triggers that are included in your licence are displayed in the Workflow Triggers section.

  • Add a schedule trigger

You can schedule triggers so that tasks are automatically submitted to the queue at a specific date and time.

To create a new schedule trigger:

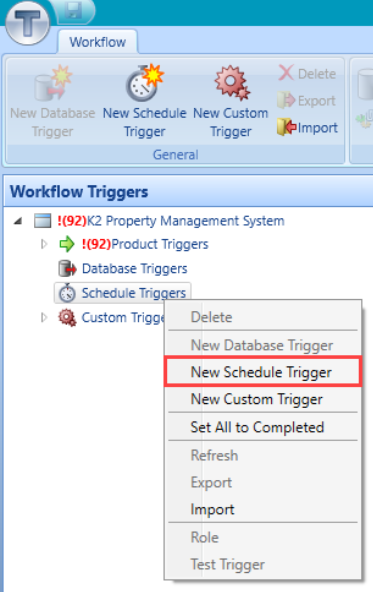
  • Right-click in the Workflow Triggers panel and select New Schedule Trigger from the drop-down list.

image-20240313-120603.png

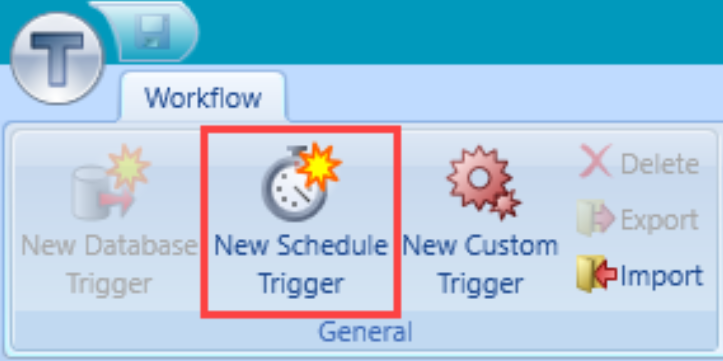
Alternatively, click the New Schedule Trigger button on the Workflow Commands ribbon.

image-20240313-120728.png

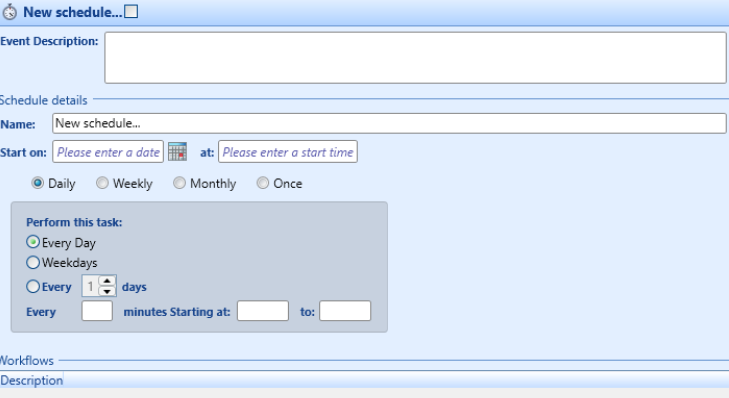
The New schedule panel is displayed.

image-20240313-120840.png
  • Enter the details for the new schedule trigger.

The following fields are available:

  • Event Description - a description of the trigger

  • Schedule details

    • Name - the name of the new schedule

    • Start on - the start date for the trigger

    • at - the start time for the trigger

    • Daily/Weekly/Monthly/Once - the frequency of the workflow

    • Perform this task - specifies the characteristics of the task schedule

  • Workflows - workflows included in the trigger

    • Description - the name of the workflow

    • Enabled - whether the workflow is enabled, only enabled workflows can be triggered

  • Click Save

Add Custom Triggers

You can use custom triggers to manually submit an unplanned workflow.

To create a custom trigger:

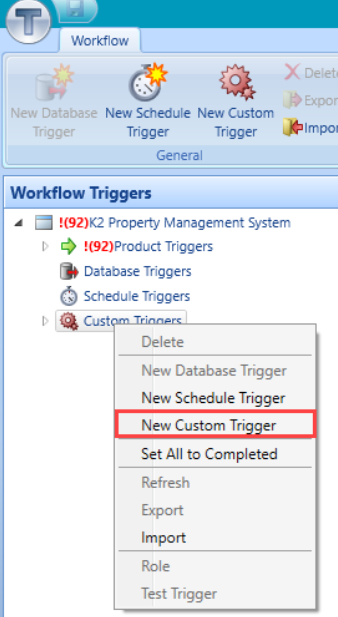
  • Right-click the Custom Triggers tree and select New Custom Trigger from the drop-down list.

image-20240313-121037.png
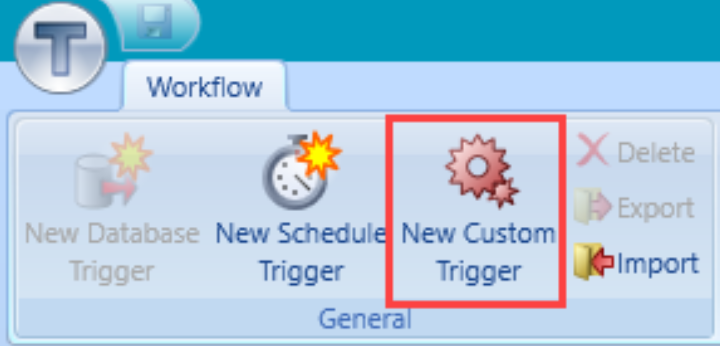
  • Alternatively, click the New Custom Trigger button on the Workflow Commands ribbon.

image-20240313-121132.png
  • The New custom panel is displayed.

image-20240313-121250.png
  • Enter the details for the new custom trigger.

    The following fields are available:

    • Event details

      • Name - the name of the custom trigger

    • Workflows - workflows included in the trigger

      • Description - The name of the workflow

      • Enabled - whether the workflow is enabled, only enabled workflows can be triggered

  • Click Save.

Delete a Trigger

To delete a trigger:

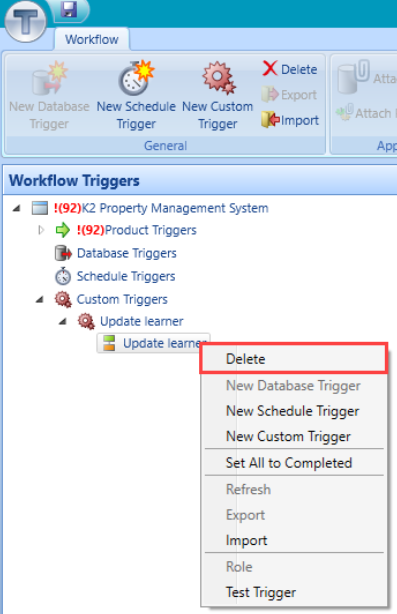
  • Right-click the relevant trigger in the Workflow Triggers panel, and then select Delete from the drop-down list.

image-20240313-121423.png

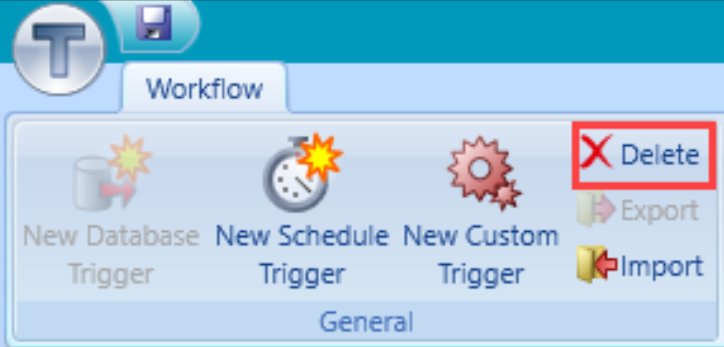
Alternatively, select the trigger and click the Delete button on the Workflow Commands ribbon.

image-20240313-121514.png

A confirmation message is displayed.

image-20240313-121616.png
  • Click Yes.

The trigger and all associated workflows are deleted.

JavaScript errors detected

Please note, these errors can depend on your browser setup.

If this problem persists, please contact our support.