Skip table of contents

Workflow Manager

The K2 Workflow Manager module enables you to automate repeatable processes that, when triggered, action a sequence of activities.

The K2 Workflow module is comprised of the following interacting components:

  • K2 Master - stores requests, messages, workflow definitions, and tracking information

    • Workflows that become idle (while waiting for external factors) will be persisted in the database and later retrieved for continuing the workflow process

    • Historical workflow processing and tracking information is stored

From 2.2.1.0 the workflow database has been merged with K2_Master. You may need to re-import workflows that terminate and rerun the latest object scripts for some interfaces.

  • K2 Workflow Runtime Host Service - a Microsoft Windows service that resides on the same server as the application service for K2

  • K2 Workflow Manager Application – creates and manages workflows

  • K2 Web services - queues and queries requests and messages

The following diagram illustrates the interaction between K2 Workflow components.
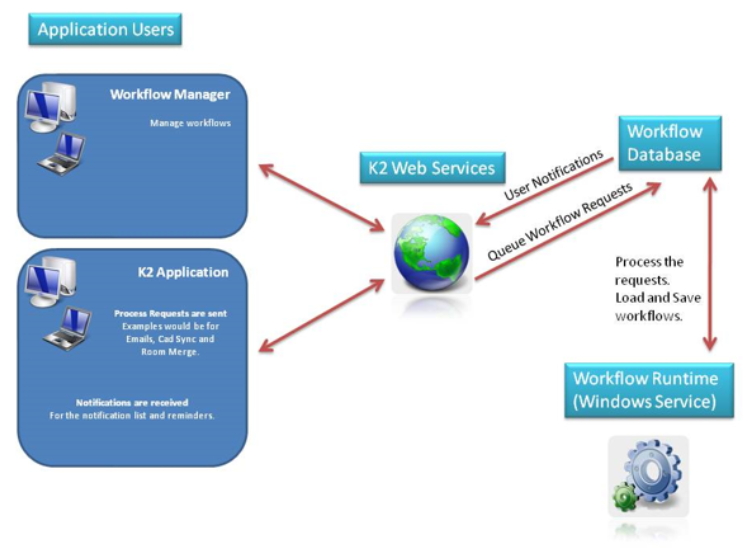
image-20240313-122912.png
Workflow Screen

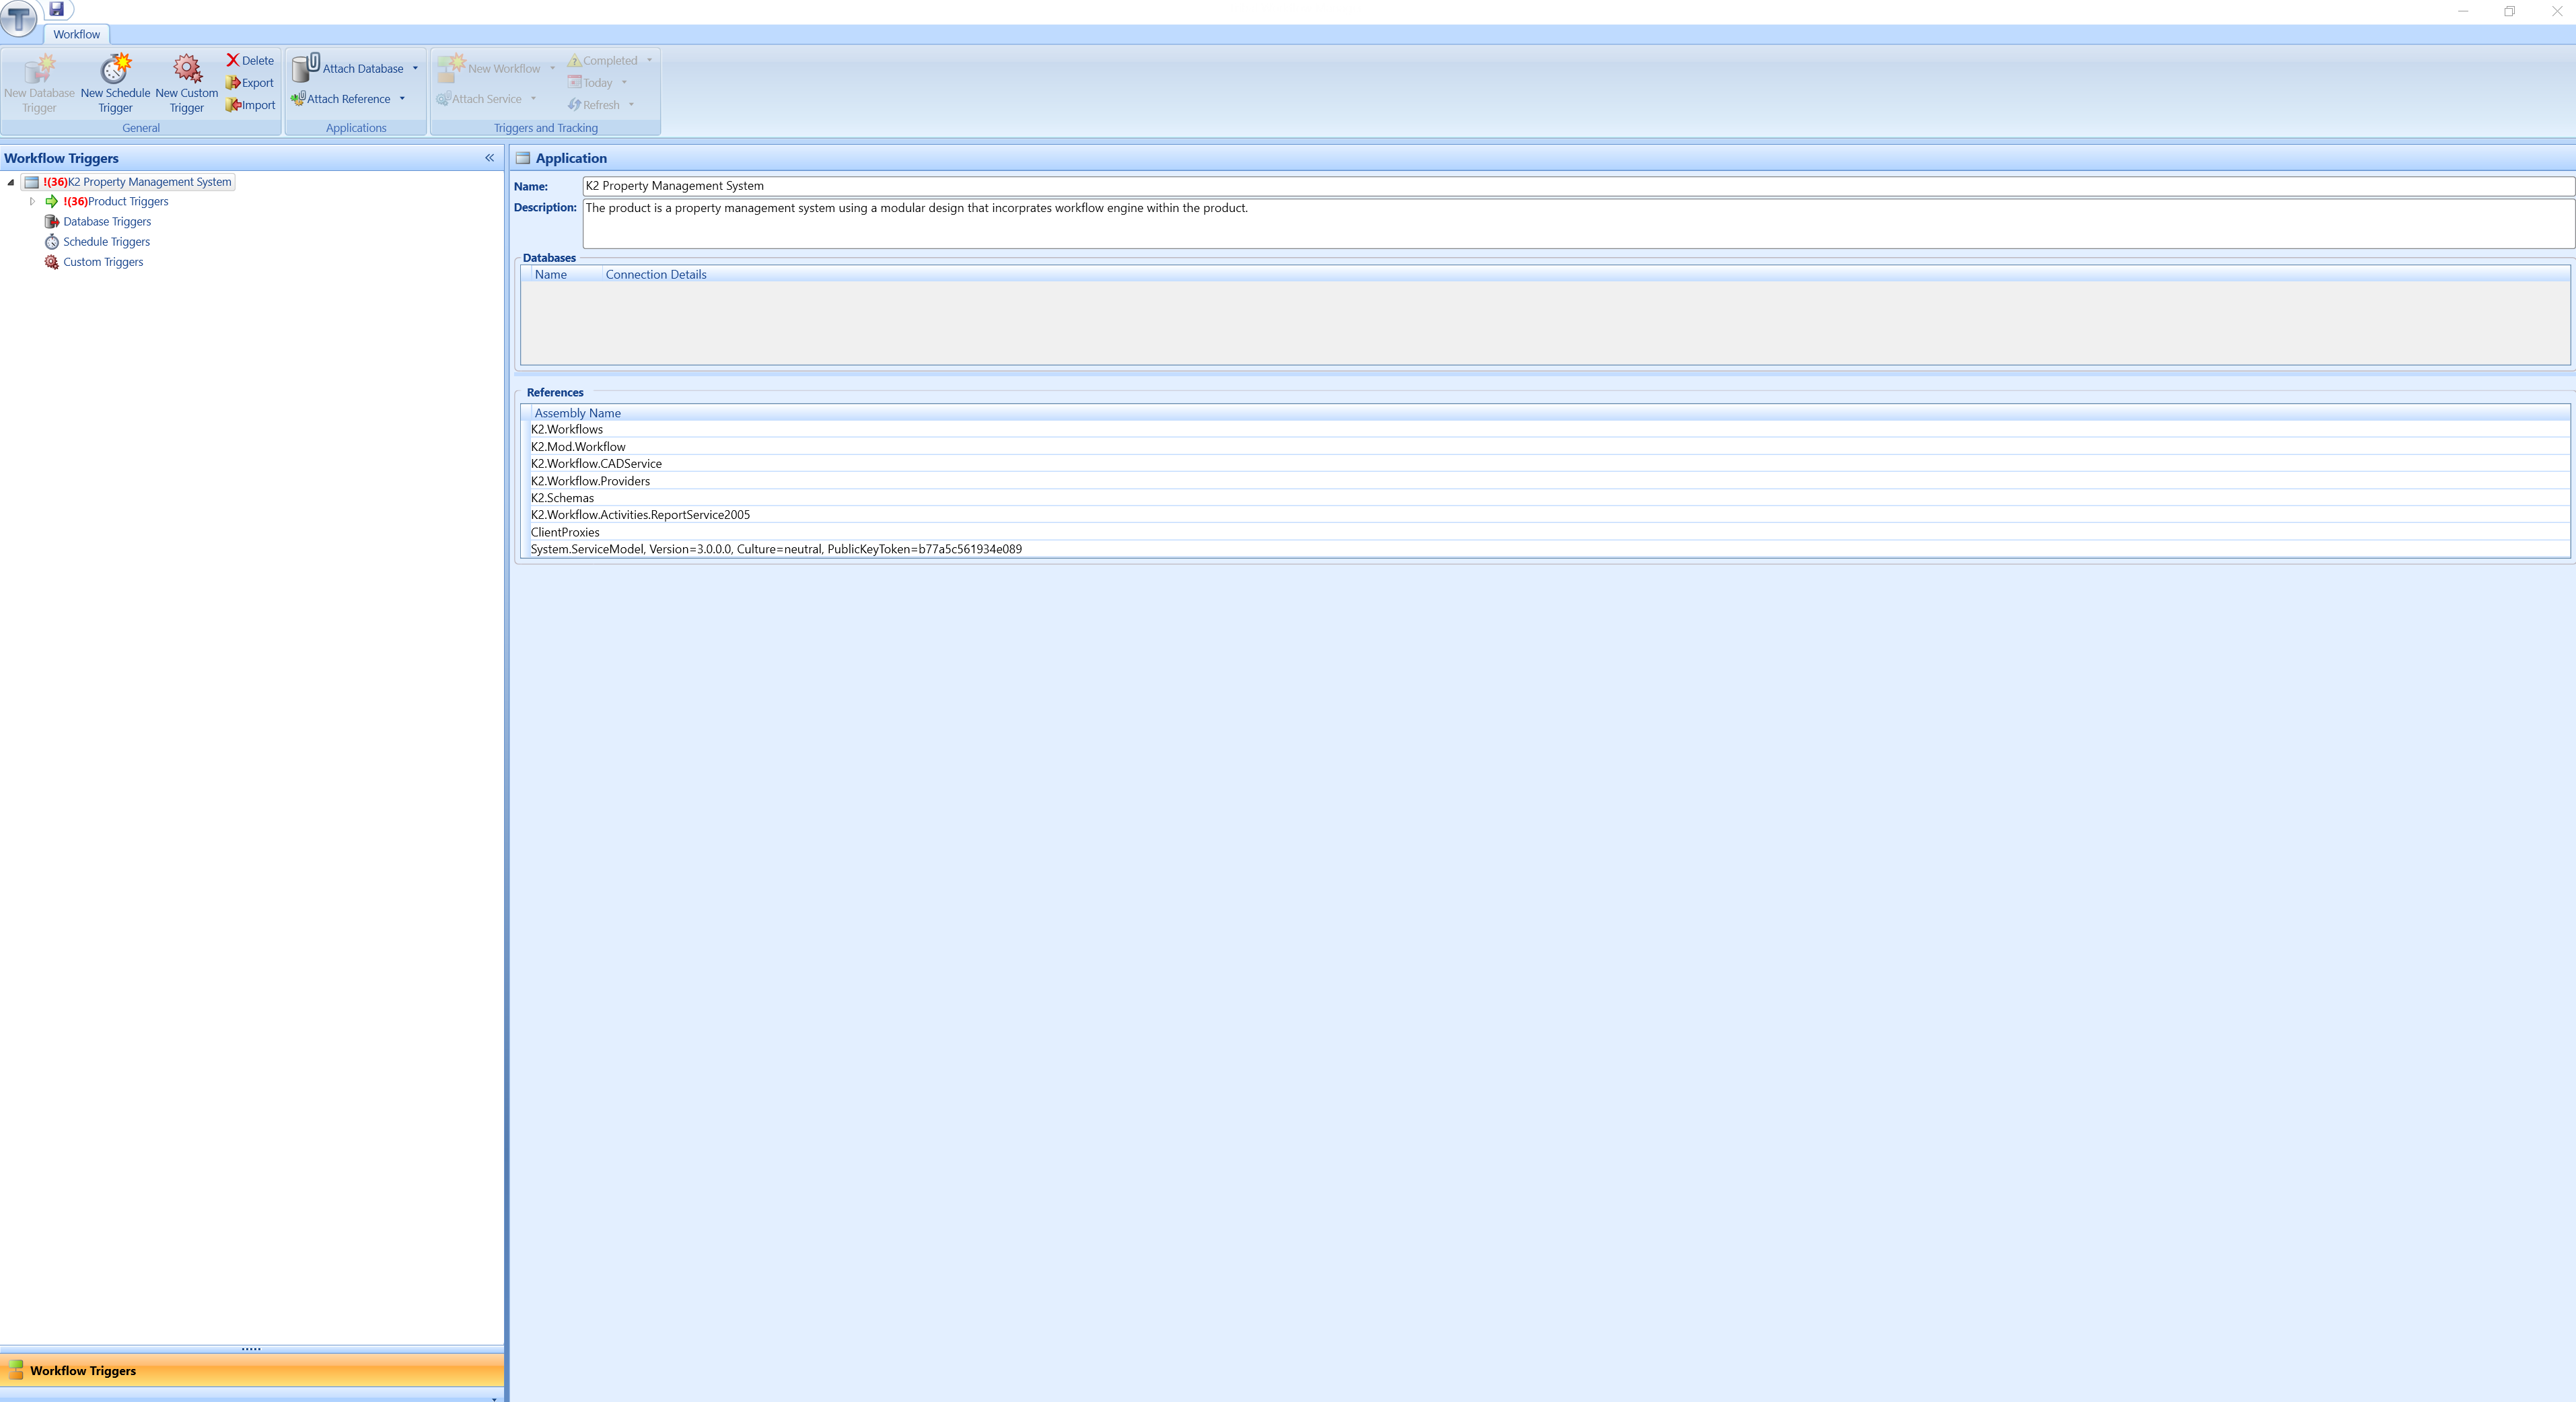
The Workflow screen:

image-20240313-154028.png

The fields on the Workflow screen are described in the following table:

This field…

Holds this information...

Workflow Triggers

The workflow trigger structure.

The structure includes the following trigger categories:

  • Product - pre-installed workflows that can be submitted to the queue for processing

  • Database - used to insert, update, or delete records from a table within a SQL (Structured Query Language) database

  • Schedule - automatically submits tasks to the queue at a specific date and time.

  • Custom - bespoke, customer-configured triggers, manually submitted to the queue for processing

Name

The name of the application associated with Workflow Manager.

Description

The description of the application associated with Workflow Manager.

Databases

The database connection details.

References

The database references.

Workflow Screen Ribbon

The Workflow screen ribbon contains the following buttons:

The buttons on the Workflow screen ribbon are described in the following table:

This button…

Does this...

New Database Trigger

Adds a new database trigger. Refer to Adding a Database trigger for more information.

New Schedule Trigger

Adds a new scheduled trigger. Refer to Adding a Schedule trigger for more information.

New Custom Trigger

Adds a new custom trigger. Refer to Adding a Custom trigger for more information.

Delete

Deletes the selected item.

Export

Exports a workflow trigger and associated workflows and conditions to the Serialise SER file format. Refer to Export a workflow trigger for more information.

Import

Imports a workflow trigger in the Serialise SER file format. Refer to Import a workflow trigger for more information.

Attach Database

Attaches a Database The adjacent arrow button allows you to remove a database.

Attach Reference

Attaches a Reference The adjacent arrow button allows you to remove a reference.

New Workflow

Builds a new workflow.

The adjacent arrow button displays the following options:

  • Edit Workflow - edits the selected workflow

  • Attach Workflow - attaches a workflow to the trigger

  • Attach/Edit Condition - attaches or edits a condition added to the workflow

  • Remove Condition - removes a condition from the workflow

  • Attach Parameter - attaches a parameter to the workflow

  • Remove Parameter - removes a parameter from the workflow

  • TestTrigger - tests the workflow trigger

  • View Workflow Xaml - opens the Workflow Xaml window

  • Clone Workflow - clones the selected workflow

  • Rebuild - rebuilds triggers and workflows

Attach Service

Attaches a service to a workflow. The adjacent arrow button allows you to remove a service.

Completed

Filters the workflow tracking status.

The adjacent arrow button displays the following options:

  • Show All - displays all tracking records

  • Running - displays records for workflows that are currently executing

  • Completed - displays records for workflows that have been completed

  • Terminated - displays records for workflows that have failed in execution

  • Closed Terminated - preserves error data, but does not affect the error flagging

  • Created - displays created workflows

  • Suspended - displays suspended workflows

  • Cancelling - displays workflows that are currently cancelling

  • Cancelled - displays cancelled workflows

Today

Filters the workflow tracking dates.

The adjacent arrow button reveals the following options:

  • Calendar - displays tracking information for a specific day

  • Show All - displays all available tracking information

  • Today - displays tracking information for the current date

  • Week - displays tracking information for the week

  • Two Weeks - displays tracking information for the past two weeks

  • Three Weeks - displays tracking information for the past three weeks

  • Month - displays tracking information for the past month

  • Two Months - displays tracking information for the past two months

  • Six Months - displays tracking information for the past six months

  • Year - displays tracking information for the past year

Refresh

Refreshes the workflow tracking data.

The adjacent Arrow button reveals the following options:

  • Refresh - reloads the display

  • Close Terminated - changes the status of a terminated workflow to 'Closed Terminated'

  • Cancel - stops the execution of a currently running workflow

  • Rerun - resubmits the selected workflow with the parameters against the selected workflow

  • Resume - restarts a suspended workflow

Using Workflow Manager

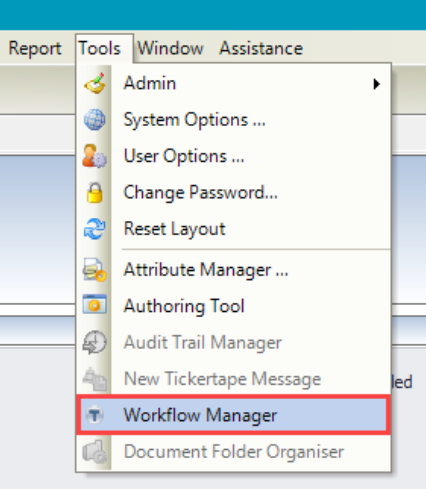
To use Workflow Manager, navigate to Tools > Workflow Manager.

The Workflow splash screen is displayed, providing version information.

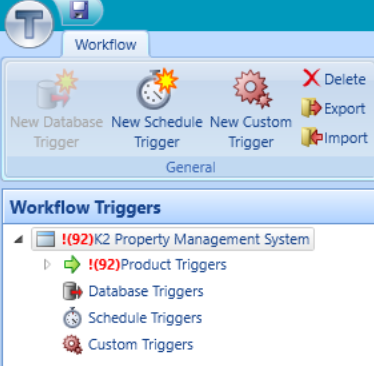
The Workflow screen is then displayed, with two main sections:

Building a Workflow

The Workflow Builder is used to configure your workflow.

To add or edit a workflow:

  • Select a trigger from the Workflow Triggers panel.

image-20240313-105211.png
  • Click the New Workflow button in the Workflow ribbon.

image-20240313-105314.png

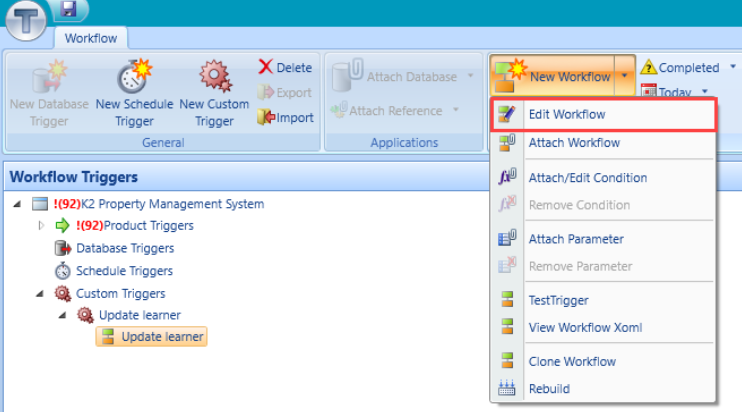
Alternatively, select an existing workflow, and then select Edit Workflow from the New Workflow drop-down.

image-20240313-105429.png

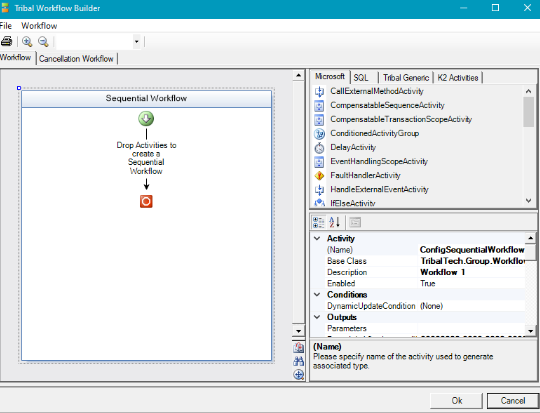
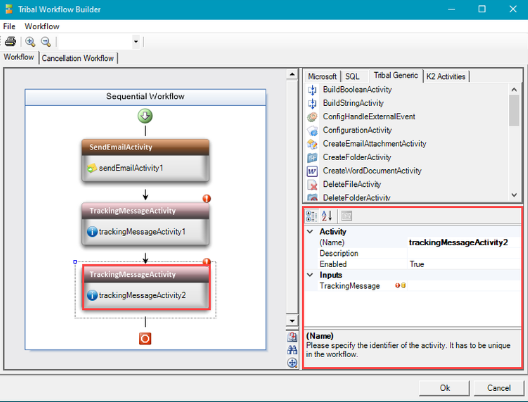
The Tribal Workflow Builder screen is displayed.

image-20240313-105601.png

The Workflow Builder screen consists of three main sections where you can configure the workflow:

  • Designer canvas - contains the Sequential Workflow container where you can build and order the sequence of your workflow

  • Activity panel- the activities that can be included within a workflow, including:

    • Microsoft - contains all the Microsoft standard workflow activities

    • SQL - Structured Query Language (SQL) workflow activities

    • Tribal Generic - Tribal workflow activities

    • K2 Activities - K2 workflow activities

  • Panel properties - defines the properties of each activity

The buttons in the Tribal Workflow Builder are described in the following table:

This button…

Does this...

File

The File button displays the following options:

  • Page Setup - displays the Page Setup window

  • Print Preview - displays a print preview of the workflow

  • Print - displays the print window

  • Exit - exits the Tribal Workflow Builder

Workflow

The Workflow button displays the following options:

  • Expand - expands activities within the Sequential Workflow container

  • Collapse - collapses activities within the Sequential Workflow container

  • Zoom Levels - displays the zoom level

  • Navigation Tools - displays the navigation tools

Print

Displays the Print window.

Zoom In

Displays a magnifying glass icon enabling the user to zoom in within the Sequential Workflow container.

Zoom Out

Displays a magnifying glass icon enabling the user to zoom out within the Sequential Workflow container.

Print Preview

Displays a print preview of the workflow.

Zoom Level

The zoom level.

Pan

Toggles the display to fit to screen or workflow size.

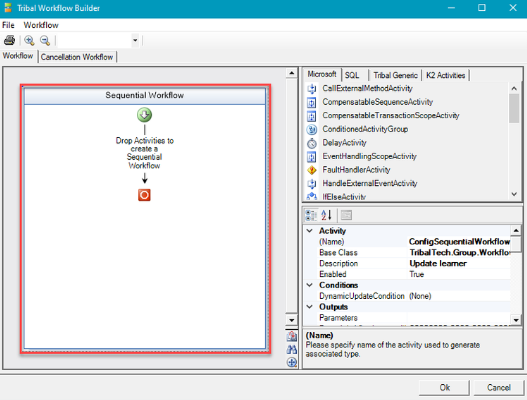
The Designer Canvas section of the Workflow Builder contains a Sequential Workflow container that stores the activities included in your workflow.

image-20240313-105754.png
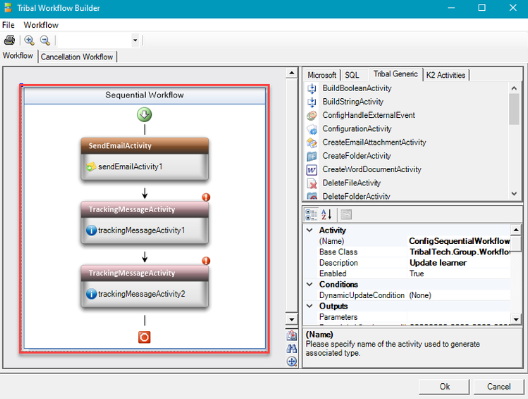
  • To add activities to a workflow, select the relevant activity from the Activity panel and drag and drop it into the Sequential Workflow con

image-20240313-105927.png

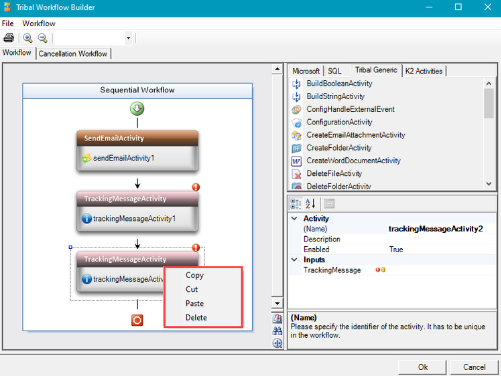
You can copy, cut, paste, or delete activities from a sequence by right-clicking the item and selecting from the drop-down list.

image-20240313-114545.png

You can also re-order the workflow items by dragging and dropping between the sequence arrows as required.

To set the properties of an activity

  • Select an item from the Sequential Workflow container and adjust the relevant fields in the Panel properties.

image-20240313-115428.png
  • Click OK to save and exit the Tribal Workflow Builder.

Related Topics

Click the links below to navigate to the following related topics:

Use caution when building or editing a workflow. For further advice or to arrange training, contact your professional services consultant.

JavaScript errors detected

Please note, these errors can depend on your browser setup.

If this problem persists, please contact our support.