Managing Sites
Select from the following to manage site records:
To open a site record:
Open the Business Unit Record to which the site belongs.
Do one of the following:
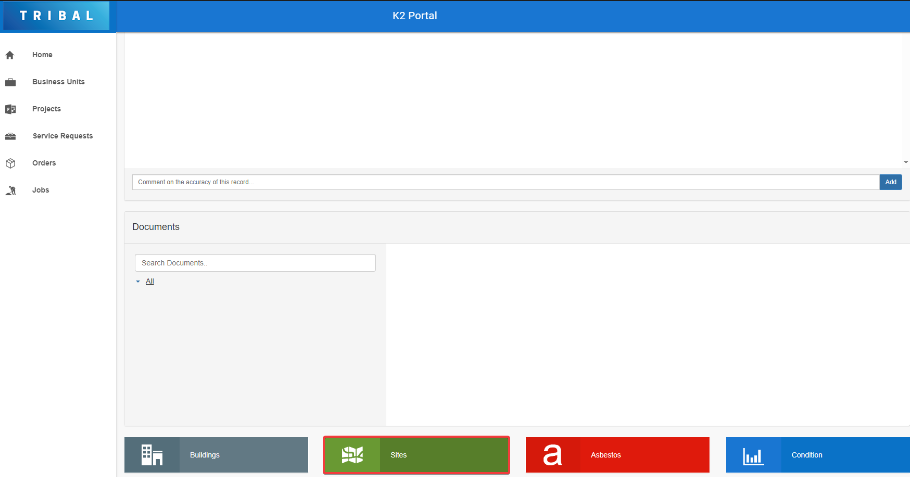
Click the Sites button at the bottom of the screen.
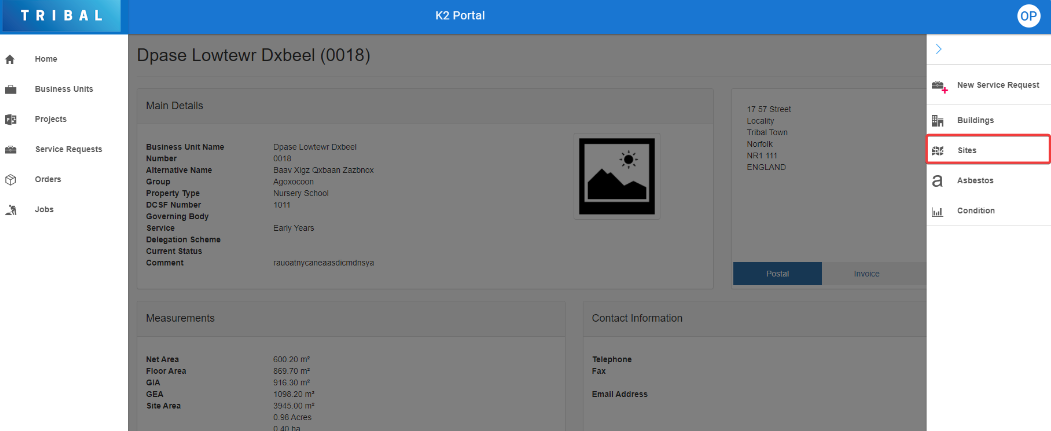
Click the Sites button in the right-hand panel.
Check that the Sites screen is displayed.

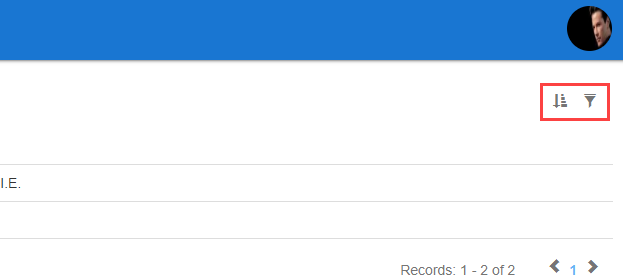
Locate and click the relevant site to open it. If required, use the sort and filter options in the top right-hand corner of the screen to sort or narrow the results.
Check that the site details screen is displayed.
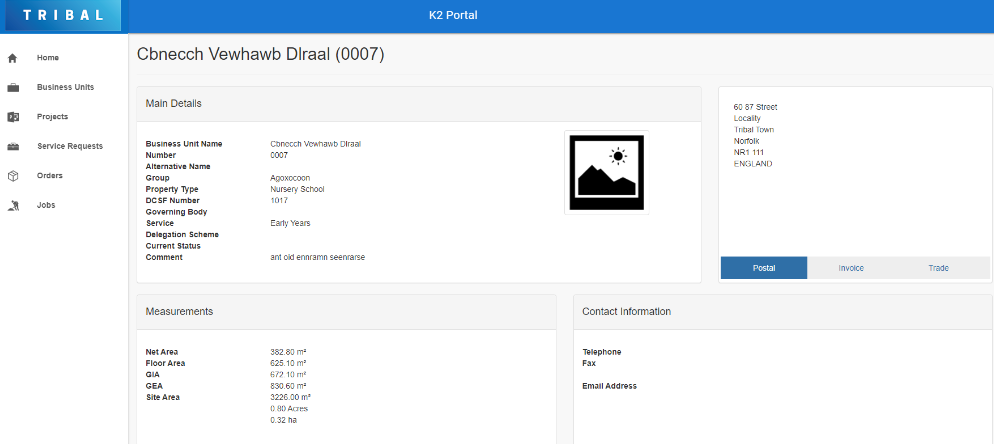
The fields on the Site Details screen are described in the following table:
This field… | Holds this information... |
|---|---|
Site Description | A description of the site. |
Physical Status | The physical status of the site (for example: In Use). These can be defined in Physical Status Reference Data (accessed by navigating to Functions > Core > Reference Data > Core in K2). |
Environmental Factor | The site's environmental factor. These can be defined in Environmental Factor Reference Data (accessed by navigating to Functions > Core > Reference Data > Core in K2). |
Tenure | The site's tenure (for example: Freehold). These can be defined in Tenure Reference Data (accessed by navigating to Functions > Core > Reference Data > Core) in K2. |
Estates Terrier Number | The number that relates to associated legal documentation of the site. |
Alternative Name | An alternative name for the site. |
Has Heritage Designation | Whether the site has a heritage designation. |
Is Conservation Area | Whether the site is a conservation area. |
Is Contaminated Land | Whether the land is contaminated. |
Is Tree Preservation Order | Whether the site has a tree preservation order. |
Is Site of Special Scientific Interest | Whether the site is of special scientific interest. |
Is Ancient Monument | Whether the site contains an ancient monument. |
Application Resource | Whether to allow the creation of applications for the site (for example: an application to use a site for a specific purpose). |
Global Analysis | The category of the site. These can be defined in Global Analysis Reference Data (accessed by navigating to Functions > Core > Reference Data > Core). |
Comments | Any relevant comments regarding the site. |
Physical | The site's physical address. |
Site Area | The area of the site. |
Site Net Area | The net area of the site. |
Perimeter | The perimeter of the site. |
If the Enable Portal RCI Event option in Portal Options (accessed by navigating to Tools > System Options and then clicking the Portal Options button) is set to True, the Data Accuracy panel is displayed. Live issues are marked with a flag, while resolved issues are marked with a tick.
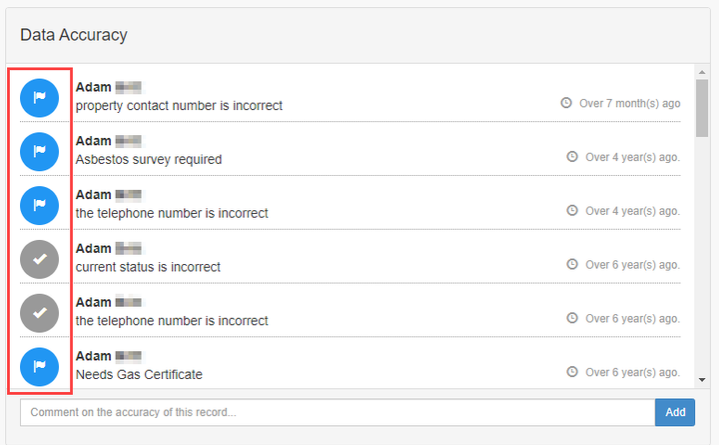
You can raise potential data inaccuracies by entering a comment and clicking the Add button.
This creates a record in the Record Confidence Indicator in K2 with an Application Name of 'Portal'.
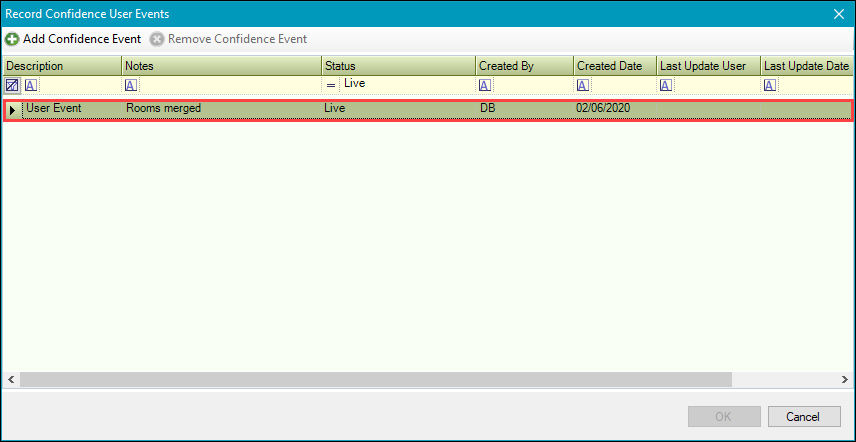
It also reduces the user confidence level by one-sixth.
The Documents panel lists all documents attached to the record.
The user's view of documents is limited by the document protection level set against their user record. There are three levels – Public, Restricted and Confidential. If a user is set to 'Restricted' then they cannot view confidential documents.
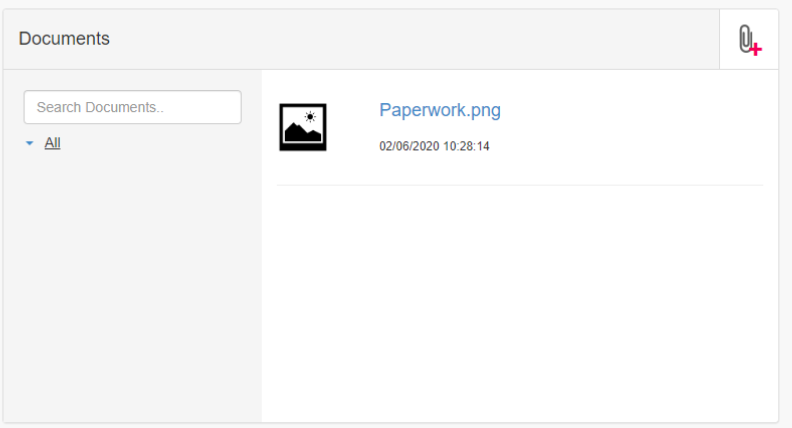
Use the panel to do the following:
Click the Add Document button to upload a new document.

Use the Search Documents field to locate an existing document.

Click a document file name link to open the file.

Condition records can be opened from any location record.
To open a condition record:
Click the Condition button in the right-hand panel when a location record is open.

Click the Condition button at the bottom of the location record.
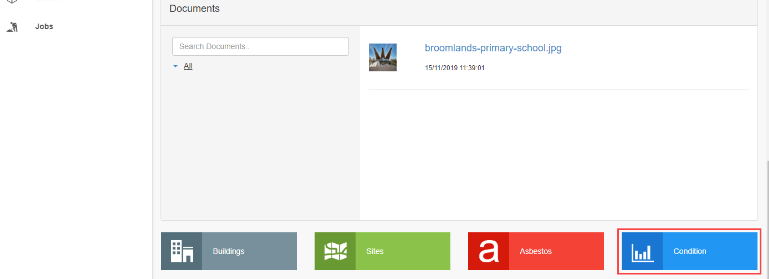
The Condition screen is displayed, which lists all of the condition records for the selected location.

Search for and select the relevant condition record.
If required, use the sort and filter options in the top right-hand corner of the screen to sort or narrow the results.
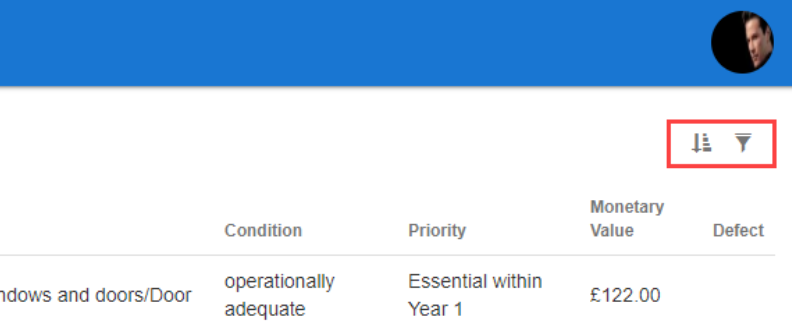
Check that the Condition Details screen is displayed.
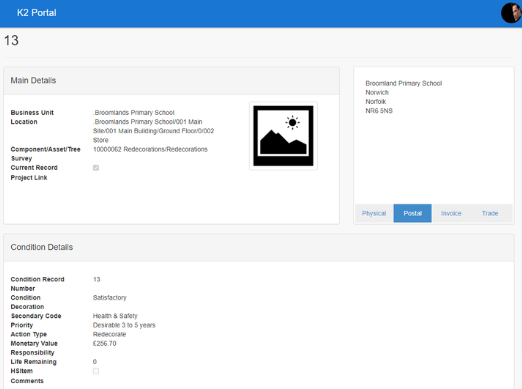
The fields on the Condition Details screen are described in the following table:
This field… | Holds this information... |
|---|---|
Business Unit | The business unit to which the item belongs. |
Location | The location of the item. |
Component/Asset/Tree | The component, asset or tree to which the condition relates. |
Survey | The survey to which the condition relates. |
Current Record | Whether this is a current condition record. |
Project Link | A project reference which has been manually entered into K2. |
Physical | The physical address of where the condition item is located. |
Postal | The postal address of where the condition item is located. |
Invoice | The invoice address of where the condition item is located. |
Trade | The trade address of where the condition item is located. |
Condition Record Number | The record number for the condition. |
Condition | The condition status of the item surveyed. |
Decoration | The condition status of the decoration. |
Secondary Code | An additional code to further define the priority of the condition record. |
Priority | The priority of the item being surveyed. |
Action Type | The action required for the condition item. |
Monetary Value | The value of the condition item. |
Responsibility | The party responsible for the condition of the item. |
Life Remaining | The number of years remaining that the item has in its current condition. |
HSItem | Whether the item is a health and safety item. |
Comments | Any comments on the condition item. |
Service Requests linked to a Site can be viewed from a record.
To view a service request:
Open the Site record that the service record is linked to.
Do one of the following:
Click the Service Requests button at the bottom of the screen.
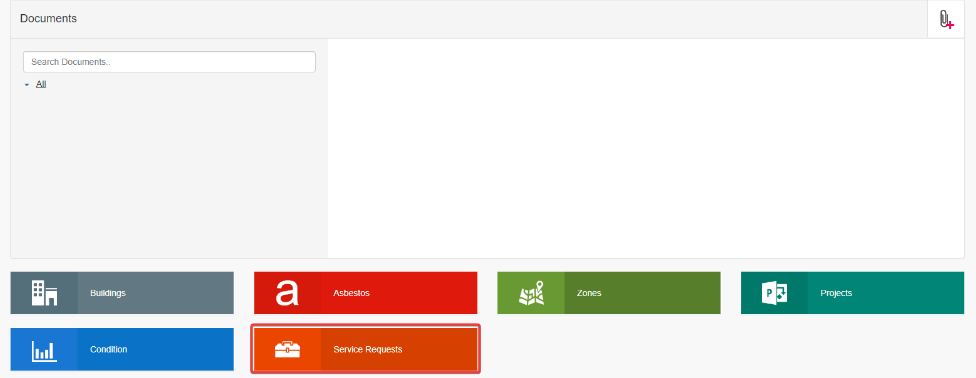
Click on Service Requests on the right-hand panel.
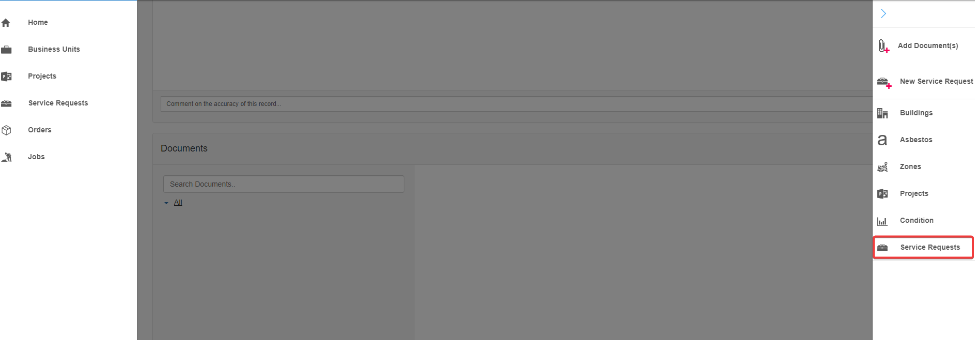
Check that the Service Requests grid has opened.

The number of requests displayed and days shown can be set to between 1 and 30 in Portal Options > Service Request Maintenance > Location Service Request Grid Limit (days) setting.
A new service request record can be created by raising a Service Request against an existing Site record.
To create a new service request refer to Managing Service Request for further information.
To add a new service request from a site record do one of the following:
Click on New Service Request on the right-hand panel.

The Service Request fault page has opened with the site name and location populated.

The location displayed is linked to the site record and is now associated with the new service request.
To close or cancel a service request refer to Managing Service Requests and scroll down to Close or Cancel a Service Request for further information.
