
Using the Services Manager
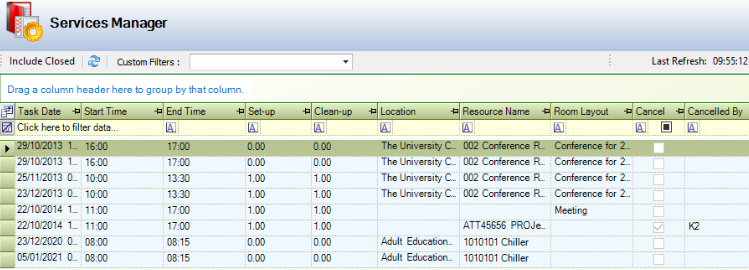
The Resource Services Manager is used as a tool to manage the delivery of services for bookings. All outstanding services are shown on a single screen where filters can be applied and saved so only services relevant to the team that is delivering them are displayed. Once the service has been delivered the record is closed and removed from the list.
Services Manager
It can be accessed by navigating to Resource Booking > Services Manager.
By default, only open services are displayed. You can toggle whether to include closed items by clicking the Include/Exclude Closed button.

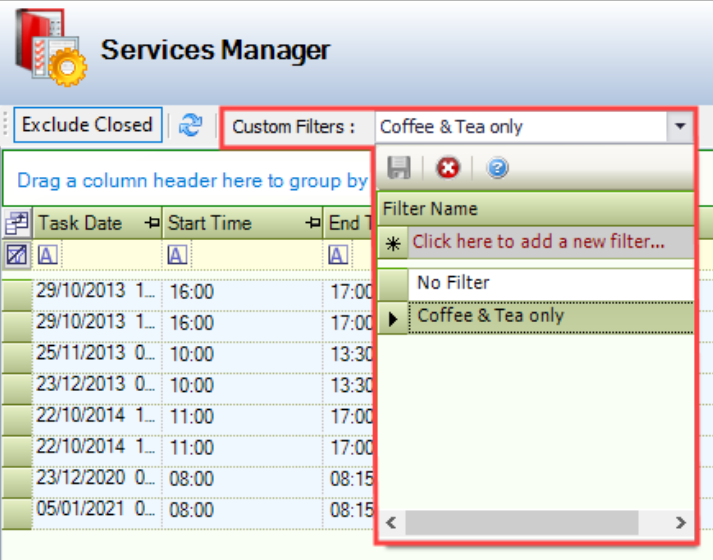
Add a Custom Filter
Use the Services Manager to:
Selecting from the Custom Filters drop-down allows you to select a filter set to apply to the grid, or create one by entering a name and clicking the Save button. This saves the current selection of filters and sorting.
Edit the Resource Booking Item Details
To edit the resource booking item details:
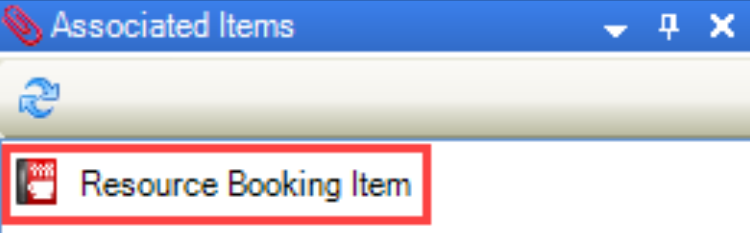
Select the relevant service item in the Services Manager grid.
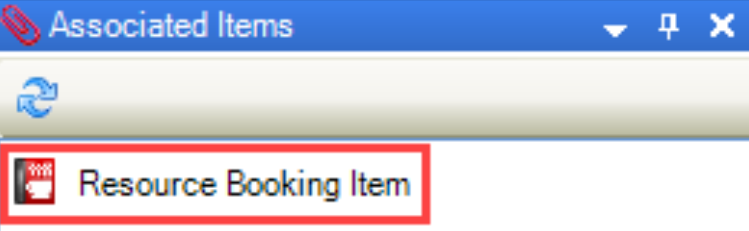
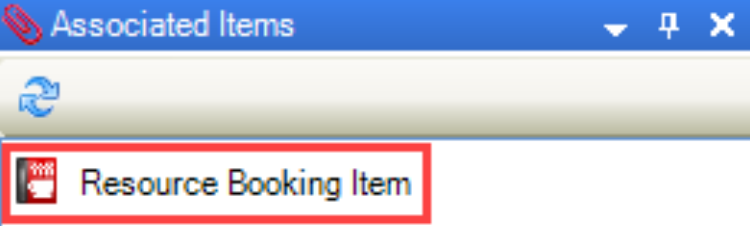
Click the Resource Booking Item option in the Associated Items panel.
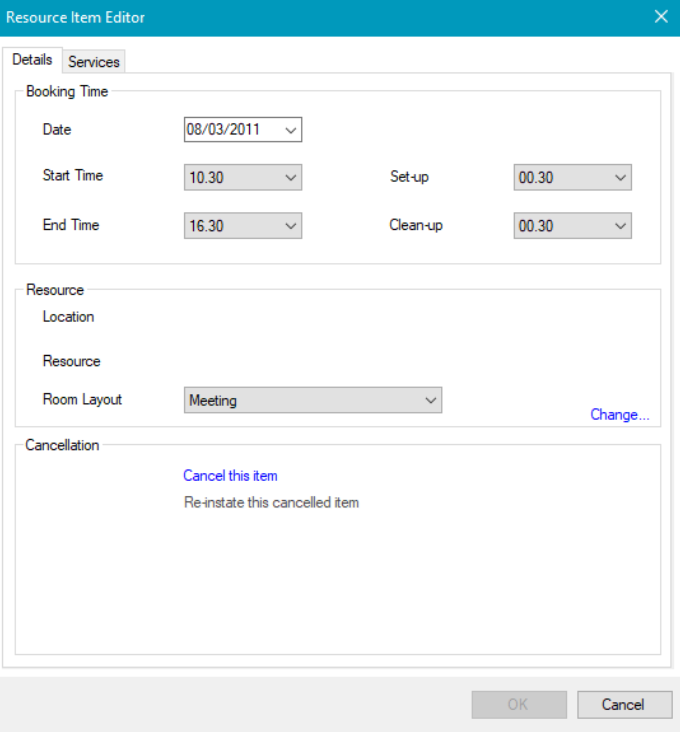
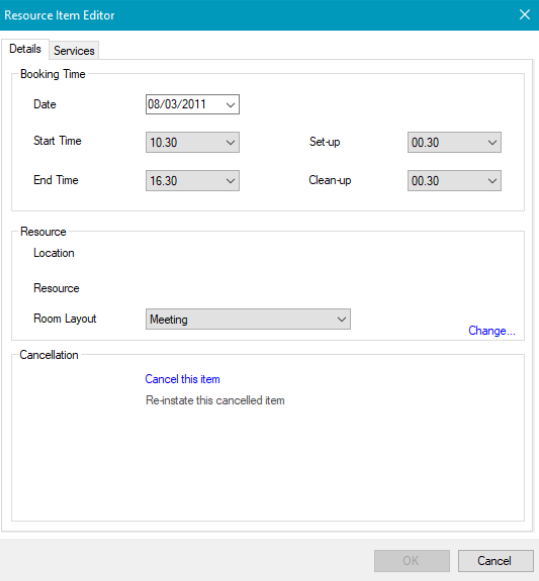
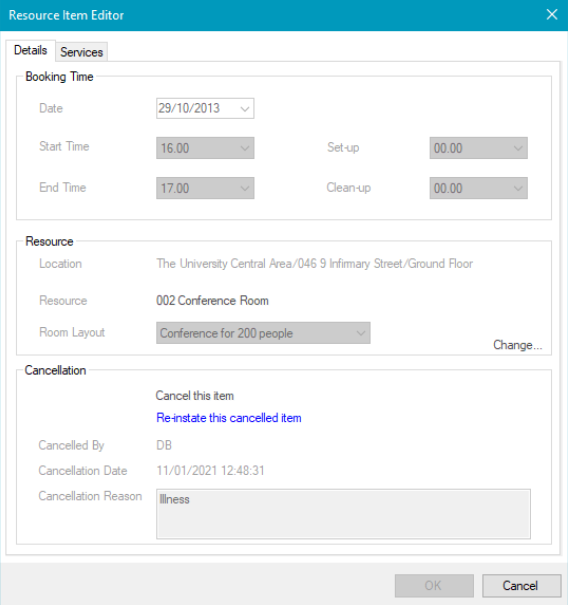
The Resource Item Editor is displayed on the Details tab.
Edit the relevant details.
The fields on the Details tab are described in the following table:
This field… | Holds this information... |
|---|---|
Date | The date of the booking. |
Start Time | The start time of the booking. |
End Time | The end time of the booking. |
Set-up | The set-up time required for the booking. |
Clean-up | The clean-up time required for the booking. |
Location | The location of the resource. |
Resource | The name of the resource. This can be edited by clicking the Change link and selecting from the Resource Picker window. |
Cancel this item | Allows you to cancel the item. Refer to Cancel a Resource Booking Item for further information. |
Re-instate this cancelled item | Re-instates a cancelled item. Refer to Re-instate a Cancelled Resource Booking Item for further information. |
Edit the services, if required.
Click OK.
Edit the Resource Booking Item Services
To edit the resource booking item details:
Select the relevant service item in the Services Manager grid.
Click the Resource Booking Item option in the Associated Items panel.
The Resource Item Editor is displayed.

Edit the details, if required.
Select the Services tab.
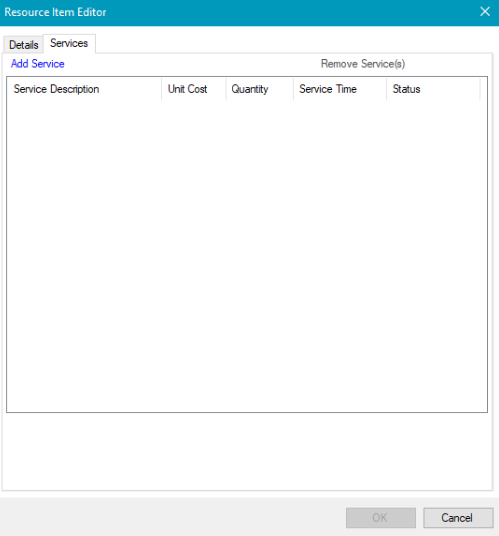
Click the Add Service button.
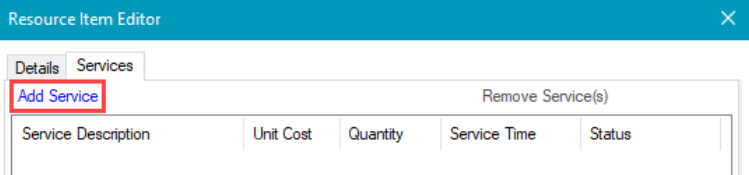
Alternatively, double-click an existing record.
The Service Editor window is displayed.
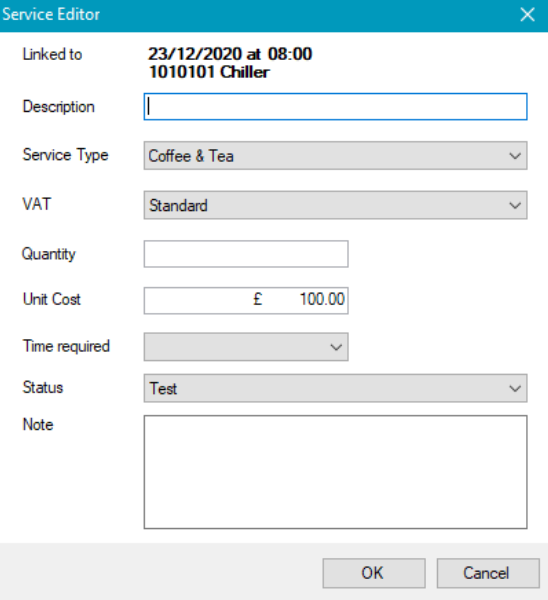
Enter or edit the relevant details.
The fields on the Service Editor window are described in the following table.
This field… | Holds this information... |
|---|---|
Linked to | The resource booking item that the service is linked to. This is populated automatically and cannot be edited. |
Description | A description of the service. |
Service Type | The type of service. These can be defined in Service Types Reference Data (accessed by navigating to Resource Booking > Resource Booking). |
VAT | The VAT or GST rate for the service. |
Quantity | The quantity of the service type. |
Unit Cost | The unit cost. This is populated by default based on the Service Type field but can be edited. These can be defined in Service Types Reference Data (accessed by navigating to Resource Booking > Resource Booking). |
Time required | The time the service needs to be delivered. The times are in 30 minute blocks between the specified booking hours. |
Status | The status of the service. These can be defined in Service Status Reference Data (accessed by navigating to Resource Booking > Resource Booking). |
Note | Any comments on the service requirements. |
Click OK.
Repeat steps 5-7 as necessary then click the OK button.
You can remove services as necessary by selecting the record and then clicking the Remove Service(s) button.
Click OK.
Cancel a Resource Booking Item
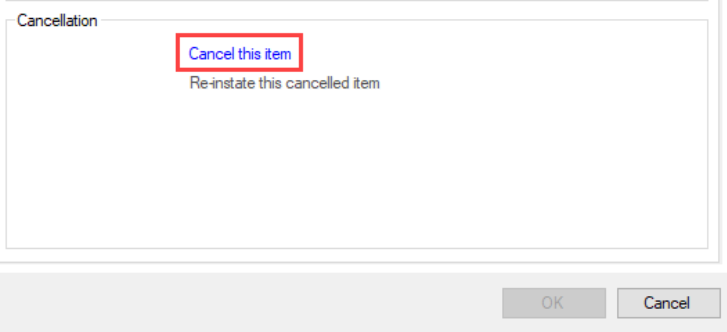
To cancel a resource booking item:
Select the relevant service item in the Services Manager grid.
Click the Resource Booking Item option in the Associated Items panel.

The Resource Item Editor is displayed on the Details tab.
Click the Cancel this item link in the Cancellation section.
The Cancel Booking Item window is displayed.
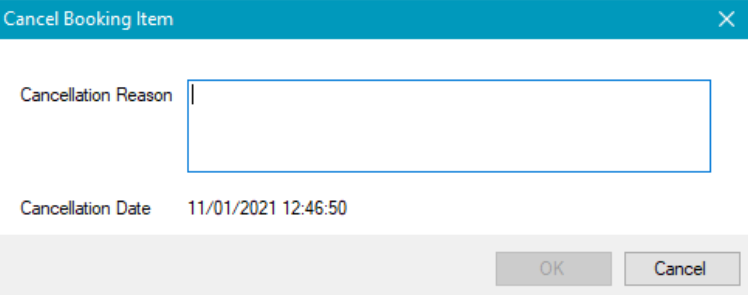
Enter a Cancellation Reason and then click OK. The Cancellation Date is populated automatically with the current date and time.
The Save Resource Booking Item window is displayed.
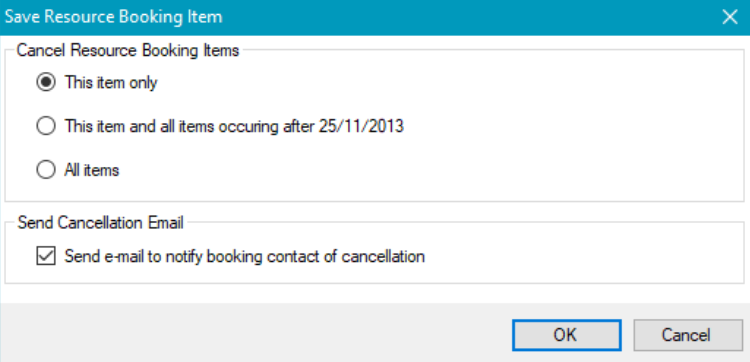
This field | Holds this information... |
|---|---|
This item only | Cancels the selected item only. |
This item and all items occurring after <date> | Cancels the selected item and all other booked items that occur after the selected item. |
All items | Cancels all items linked to the booking (except those in the past). |
Send e-mail to notify booking contact of cancellation | Whether to send an email to the contact associated with the booking (that is: as defined by the Contact field in the Booking Editor) notifying them of the cancellation. |
Click OK.
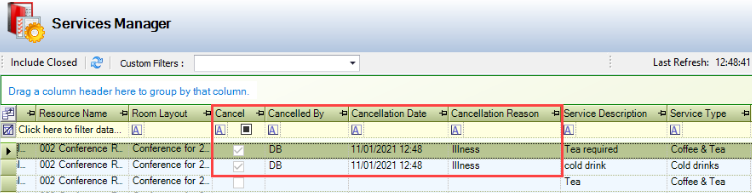
The Cancel, Cancelled By, Cancellation Date and Cancellation Reason fields are then populated in the Services Manager grid.
You can Reinstatate a Cancelled Resource Booking Item if required.
Re-Instate a Cancelled Resource Booking Item
To re-instate a cancelled resource booking item:
Select the relevant service item in the Services Manager grid.
Click the Resource Booking Item option in the Associated Items panel.
The Resource Item Editor is displayed on the Details tab.
Click the Re-instate this cancelled item link in the Cancellation section.
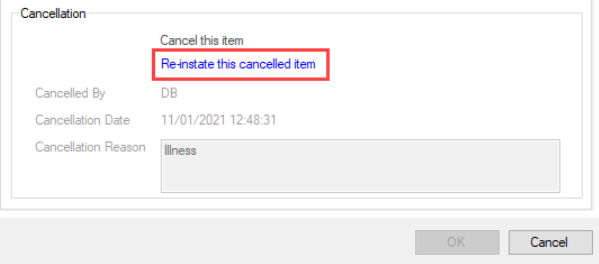
No other fields can be edited on a cancelled item.
The Save Resource Booking Item window is displayed.
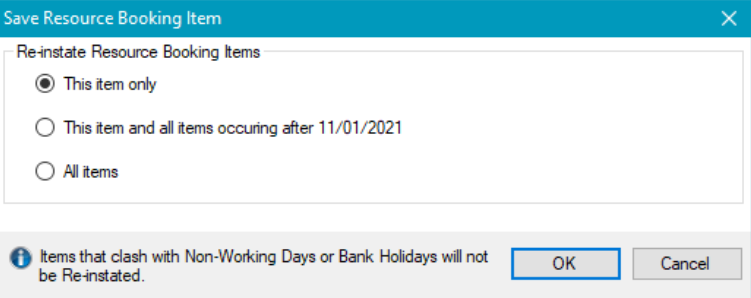
Select from the following:
This item only - re-instates the selected item only
This item and all items occurring after <date> - reinstate the selected item and all other booked items that occur after the selected item
All items - re-instates all items linked to the booking (except those in the past)
Click OK.
Using the Resource Booking Availability Search
The Resource Booking Availability Search screen enables bookable resources to be searched based on defined criteria (for example: date, time, layout, and capacity). All resources that are available and meet the criteria are returned.
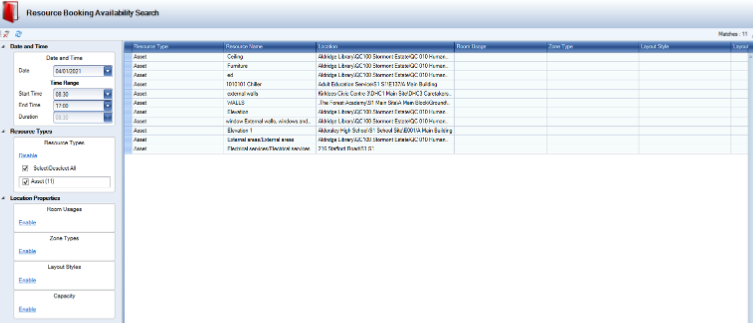
It can be accessed by navigating to Resource Booking > Availability.
Double-click a record in the grid to create a booking for the record. Refer to Add or Edit a Booking for further information.
You can filter the grid by:
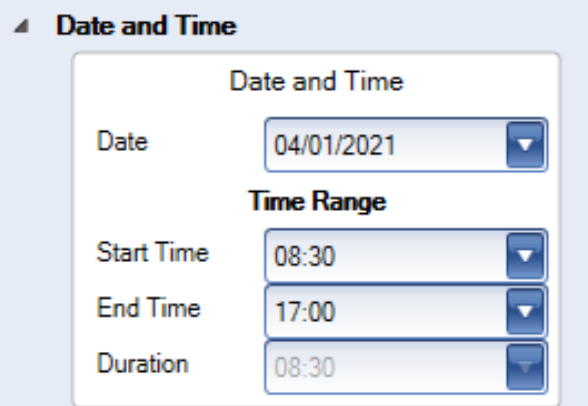
Selecting a date and time.
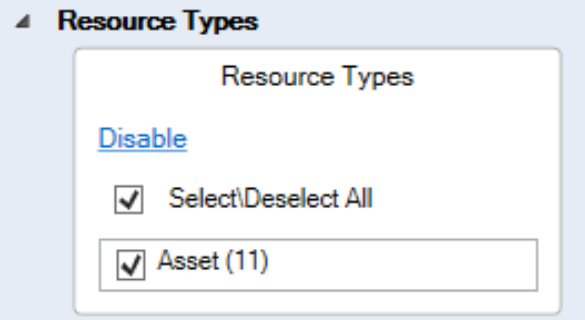
Select the specific resource types by clicking the Enable button and selecting the relevant check boxes.
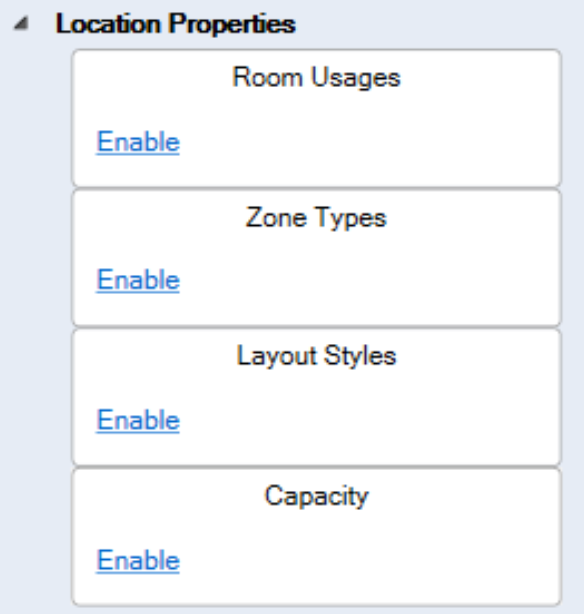
Select the location properties by clicking the relevant Enable button(s) and selecting the relevant check boxes.
Click the Clear Filters button to reset the filters.

Filters are applied immediately.