
The K2 Workflow Manager module enables you to automate repeatable processes that, when triggered, action a sequence of activities.
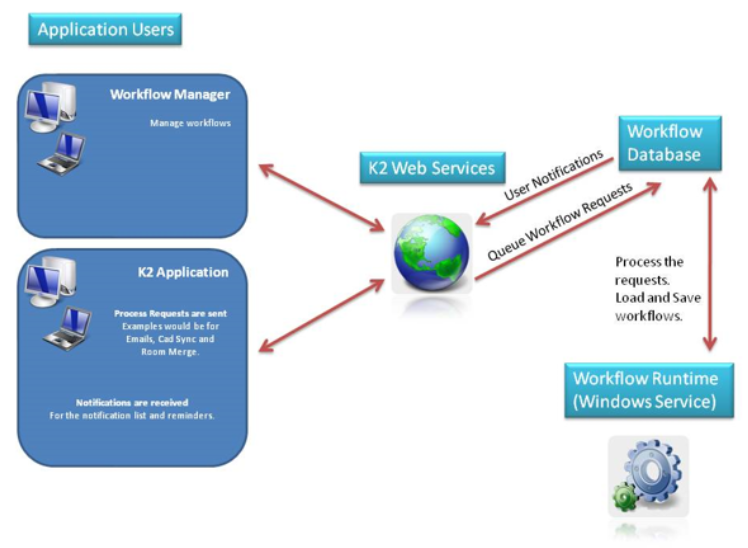
The K2 Workflow module is comprised of the following interacting components:
-
K2 Master - stores requests, messages, workflow definitions, and tracking information
-
Workflows that become idle (while waiting for external factors) will be persisted in the database and later retrieved for continuing the workflow process
-
Historical workflow processing and tracking information is stored
-
From 2.2.1.0 the workflow database has been merged with K2_Master. You may need to re-import workflows that terminate and rerun the latest object scripts for some interfaces.
-
K2 Workflow Runtime Host Service - a Microsoft Windows service that resides on the same server as the application service for K2
-
K2 Workflow Manager Application – creates and manages workflows
-
K2 Web services - queues and queries requests and messages
The following diagram illustrates the interaction between K2 Workflow components.
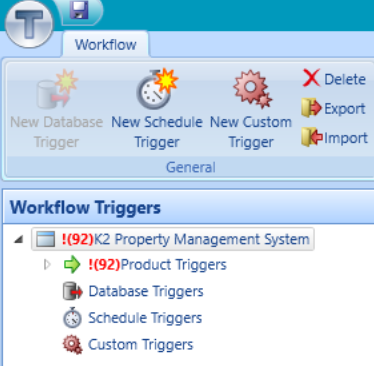
Workflow Screen
The Workflow screen:
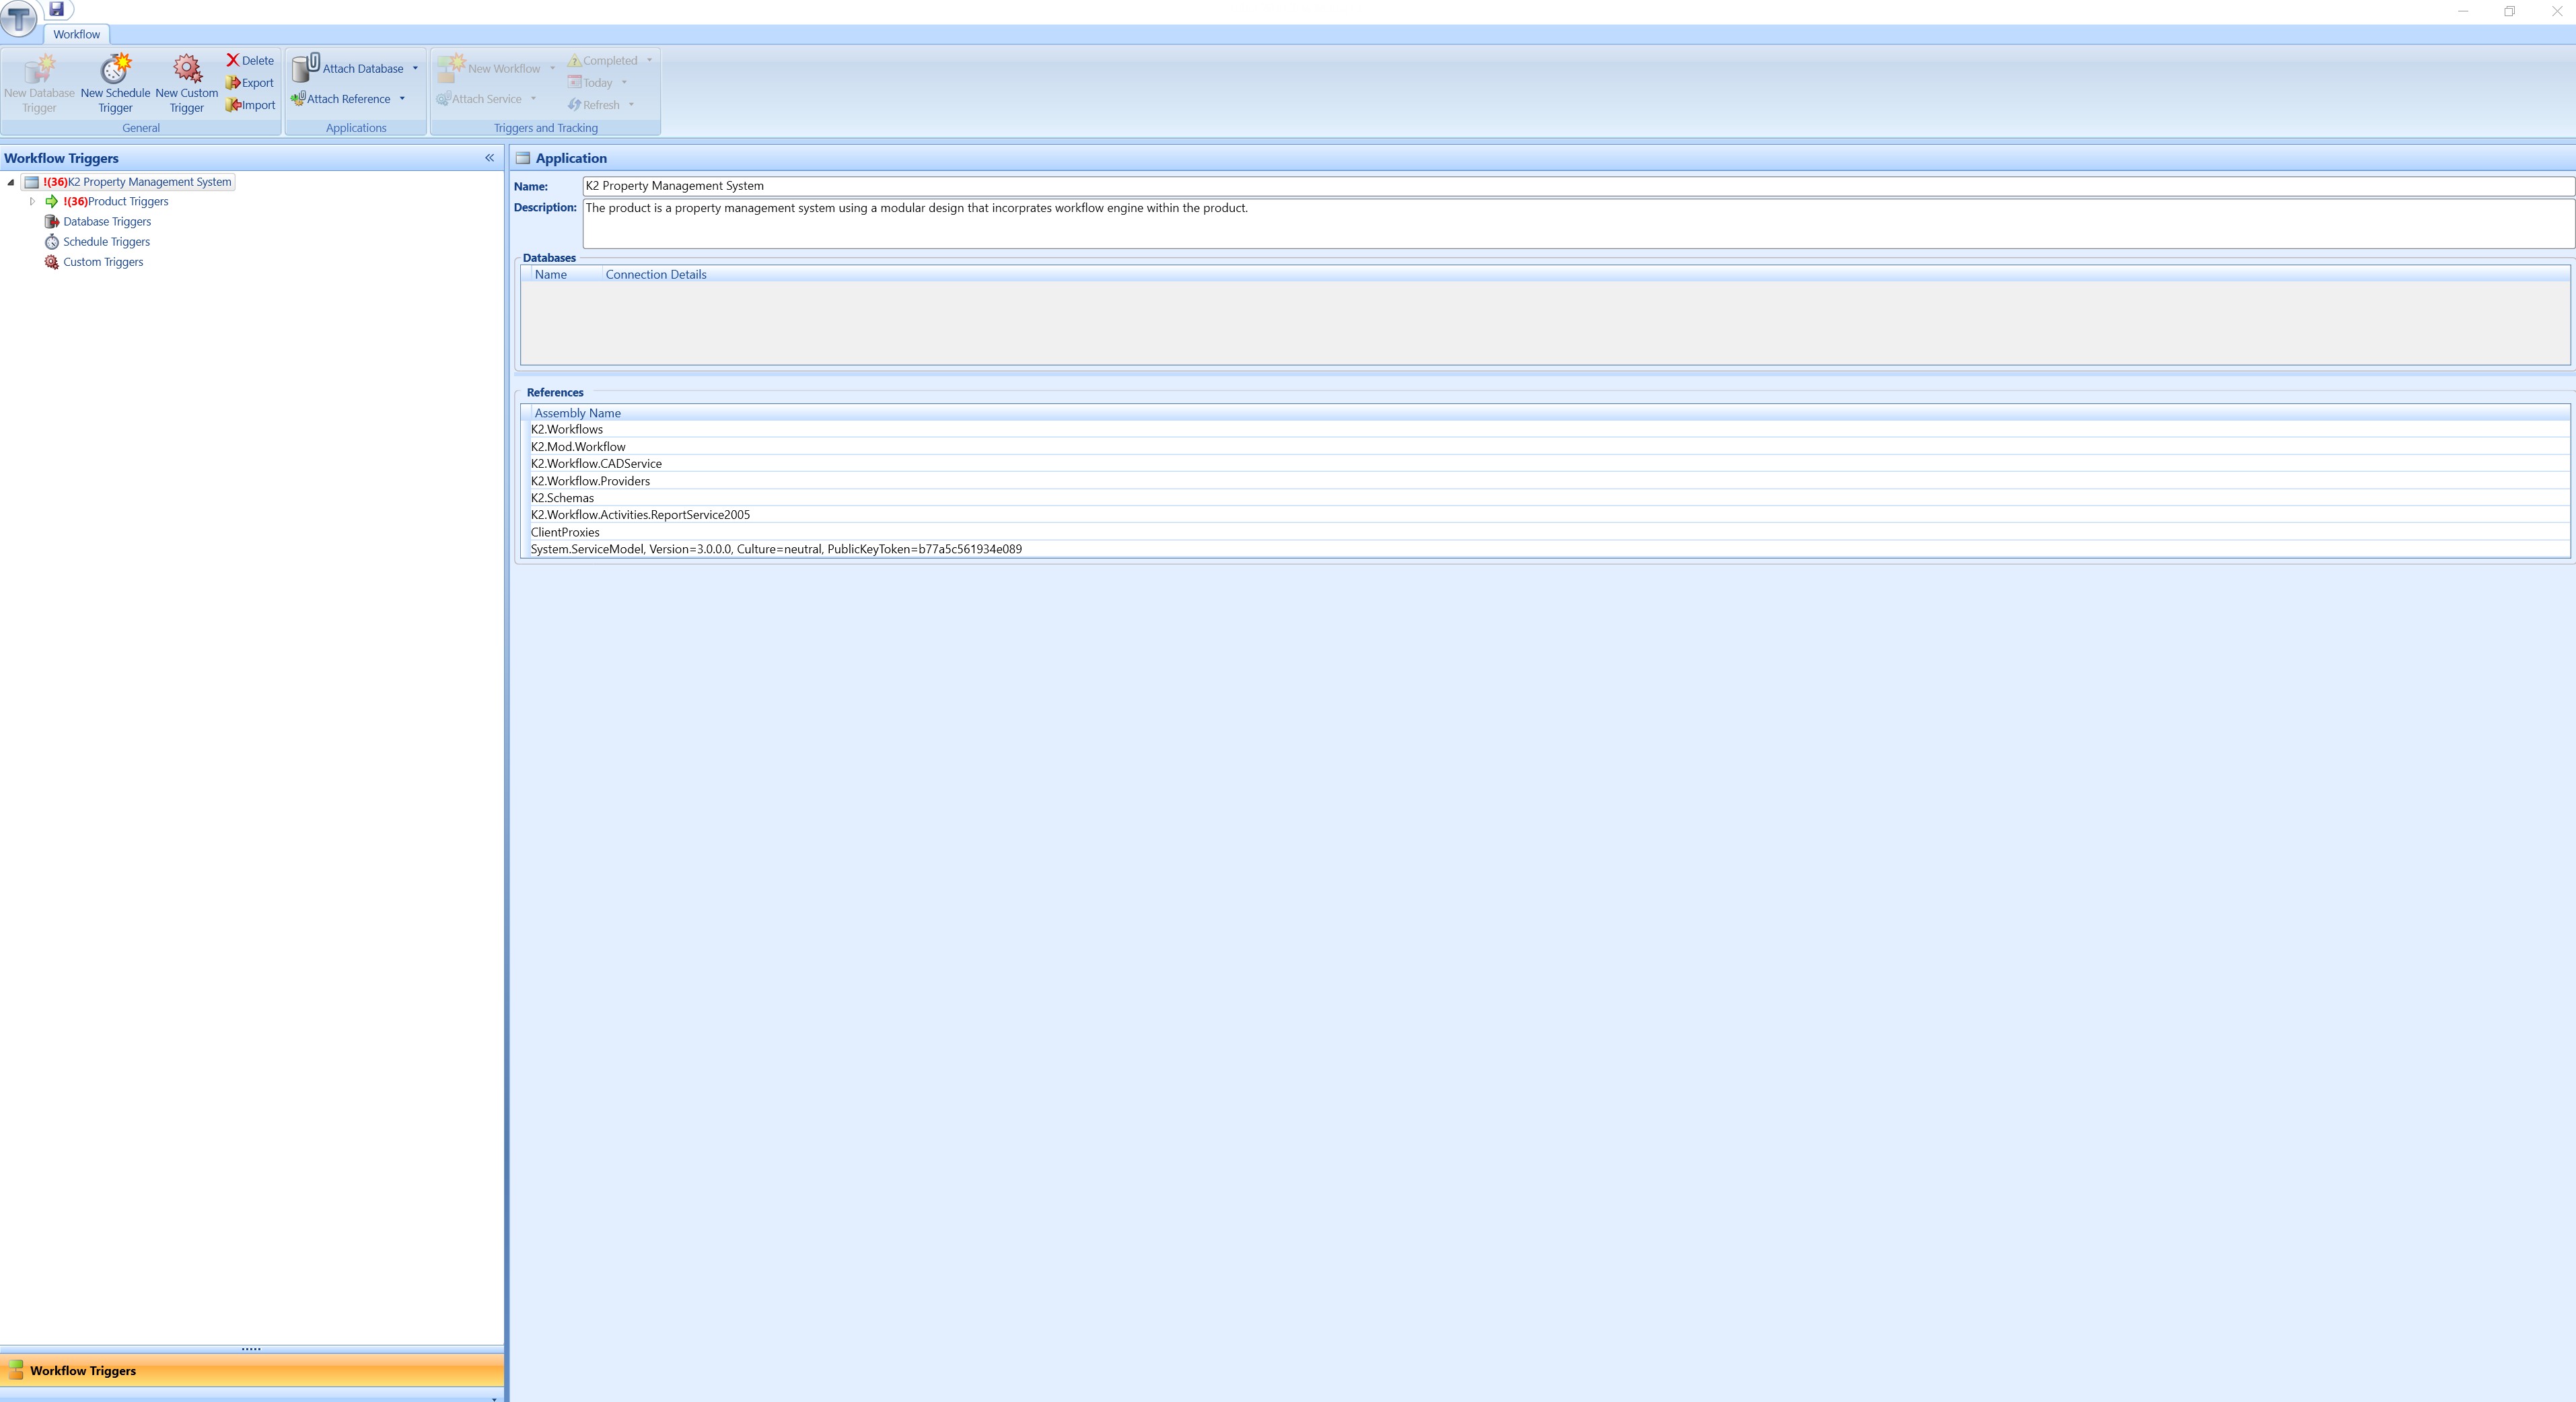
The fields on the Workflow screen are described in the following table:
|
This field… |
Holds this information... |
|---|---|
|
Workflow Triggers |
The workflow trigger structure. The structure includes the following trigger categories:
|
|
Name |
The name of the application associated with Workflow Manager. |
|
Description |
The description of the application associated with Workflow Manager. |
|
Databases |
The database connection details. |
|
References |
The database references. |
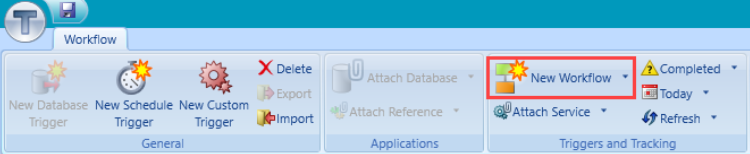
Workflow Screen Ribbon
The Workflow screen ribbon contains the following buttons:

The buttons on the Workflow screen ribbon are described in the following table:
|
This button… |
Does this... |
|---|---|
|
New Database Trigger |
Adds a new database trigger. Refer to Adding a Database trigger for more information. |
|
New Schedule Trigger |
Adds a new scheduled trigger. Refer to Adding a Schedule trigger for more information. |
|
New Custom Trigger |
Adds a new custom trigger. Refer to Adding a Custom trigger for more information. |
|
Delete |
Deletes the selected item. |
|
Export |
Exports a workflow trigger and associated workflows and conditions to the Serialise SER file format. Refer to Export a workflow trigger for more information. |
|
Import |
Imports a workflow trigger in the Serialise SER file format. Refer to Import a workflow trigger for more information. |
|
Attach Database |
Attaches a Database The adjacent arrow button allows you to remove a database. |
|
Attach Reference |
Attaches a Reference The adjacent arrow button allows you to remove a reference. |
|
New Workflow |
Builds a new workflow. The adjacent arrow button displays the following options:
|
|
Attach Service |
Attaches a service to a workflow. The adjacent arrow button allows you to remove a service. |
|
Completed |
Filters the workflow tracking status. The adjacent arrow button displays the following options:
|
|
Today |
Filters the workflow tracking dates. The adjacent arrow button reveals the following options:
|
|
Refresh |
Refreshes the workflow tracking data. The adjacent Arrow button reveals the following options:
|
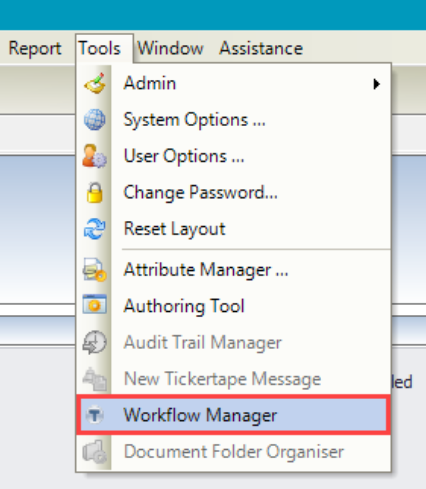
Using Workflow Manager
To use Workflow Manager, navigate to Tools > Workflow Manager.
The Workflow splash screen is displayed, providing version information.
The Workflow screen is then displayed, with two main sections:
Building a Workflow
The Workflow Builder is used to configure your workflow.
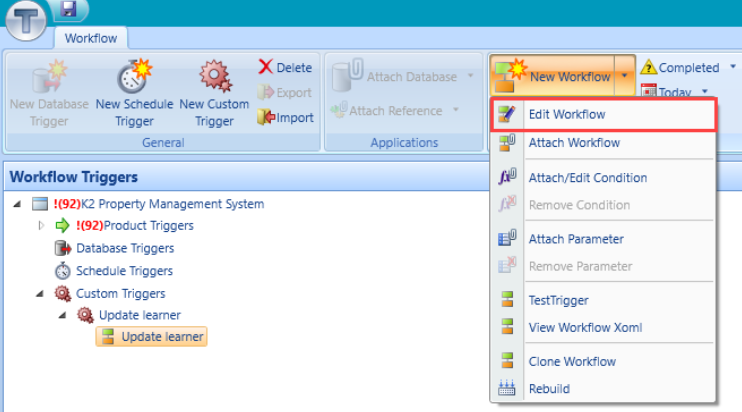
To add or edit a workflow:
-
Select a trigger from the Workflow Triggers panel.
-
Click the New Workflow button in the Workflow ribbon.
Alternatively, select an existing workflow, and then select Edit Workflow from the New Workflow drop-down.
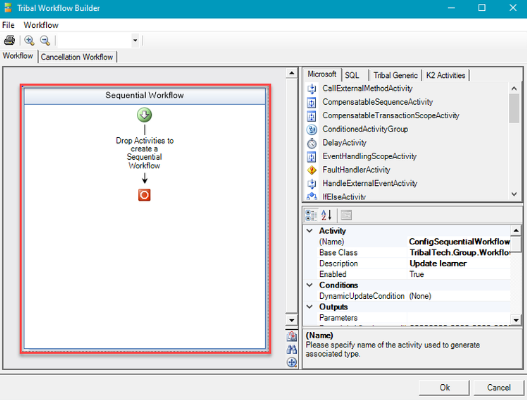
The Tribal Workflow Builder screen is displayed.
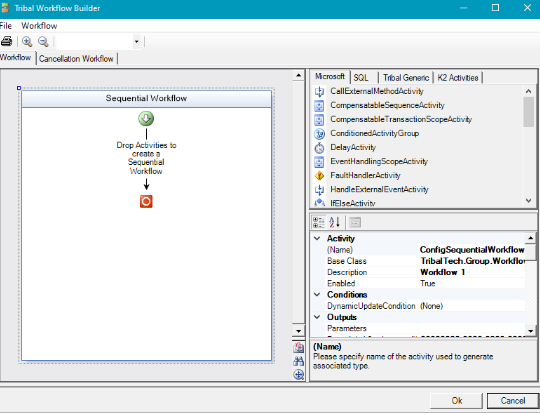
The Workflow Builder screen consists of three main sections where you can configure the workflow:
-
Designer canvas - contains the Sequential Workflow container where you can build and order the sequence of your workflow
-
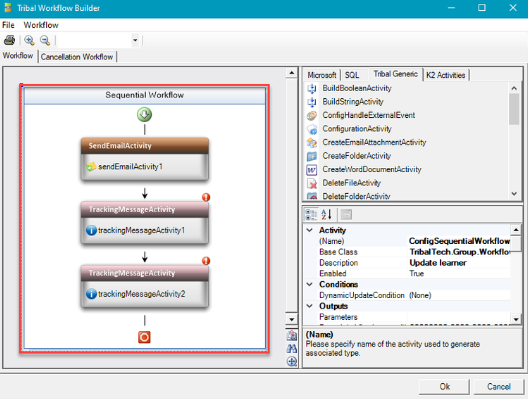
Activity panel- the activities that can be included within a workflow, including:
-
Microsoft - contains all the Microsoft standard workflow activities
-
SQL - Structured Query Language (SQL) workflow activities
-
Tribal Generic - Tribal workflow activities
-
K2 Activities - K2 workflow activities
-
-
Panel properties - defines the properties of each activity
The buttons in the Tribal Workflow Builder are described in the following table:
|
This button… |
Does this... |
|---|---|
|
File |
The File button displays the following options:
|
|
Workflow |
The Workflow button displays the following options:
|
|
|
Displays the Print window. |
|
Zoom In |
Displays a magnifying glass icon enabling the user to zoom in within the Sequential Workflow container. |
|
Zoom Out |
Displays a magnifying glass icon enabling the user to zoom out within the Sequential Workflow container. |
|
Print Preview |
Displays a print preview of the workflow. |
|
Zoom Level |
The zoom level. |
|
Pan |
Toggles the display to fit to screen or workflow size. |
The Designer Canvas section of the Workflow Builder contains a Sequential Workflow container that stores the activities included in your workflow.
-
To add activities to a workflow, select the relevant activity from the Activity panel and drag and drop it into the Sequential Workflow con
You can copy, cut, paste, or delete activities from a sequence by right-clicking the item and selecting from the drop-down list.
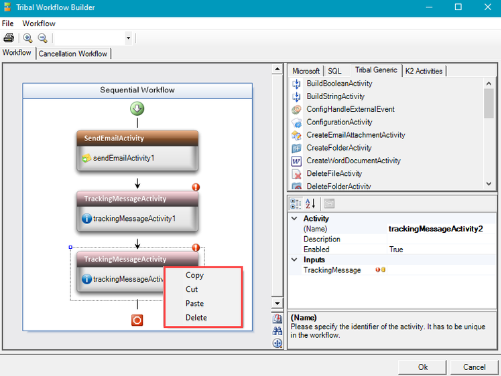
You can also re-order the workflow items by dragging and dropping between the sequence arrows as required.
To set the properties of an activity
-
Select an item from the Sequential Workflow container and adjust the relevant fields in the Panel properties.
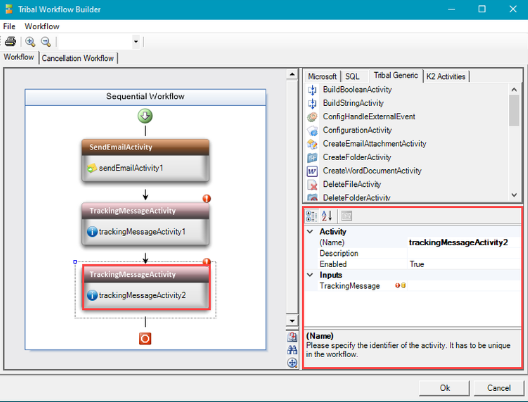
-
Click OK to save and exit the Tribal Workflow Builder.
Related Topics
Click the links below to navigate to the following related topics:
Use caution when building or editing a workflow. For further advice or to arrange training, contact your professional services consultant.