Projects
The Projects module in K2 is used to plan and deliver work programmes, for example, the planning of upgrades and major repair works to buildings and assets. Projects can be set up with a scope of work, defined tasks, and budgetary information. This allows strategic decision-makers and project managers alike to manage a project from its initial stages to completion and target resources effectively.
Navigate to Maintenance > Projects > New Project.
Click the Create Project button on the Project Overview screen (accessed by navigating to Maintenance > Projects > Project Overview).
Search for and open an existing project.
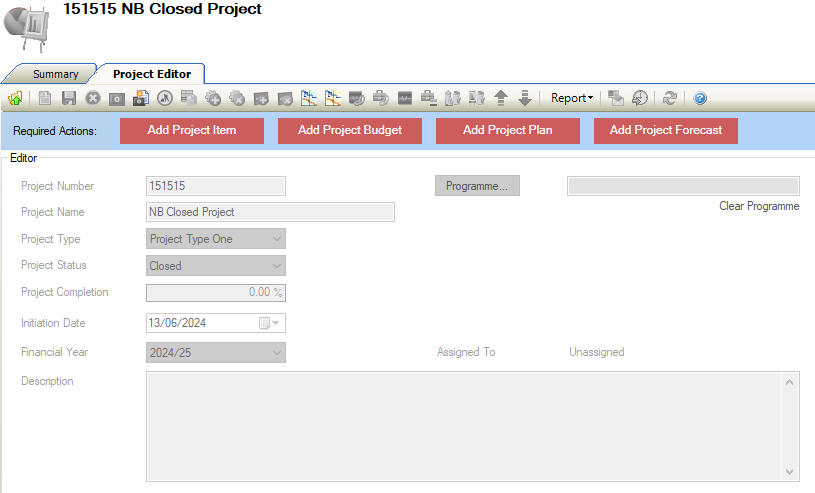
The Project Editor is displayed.
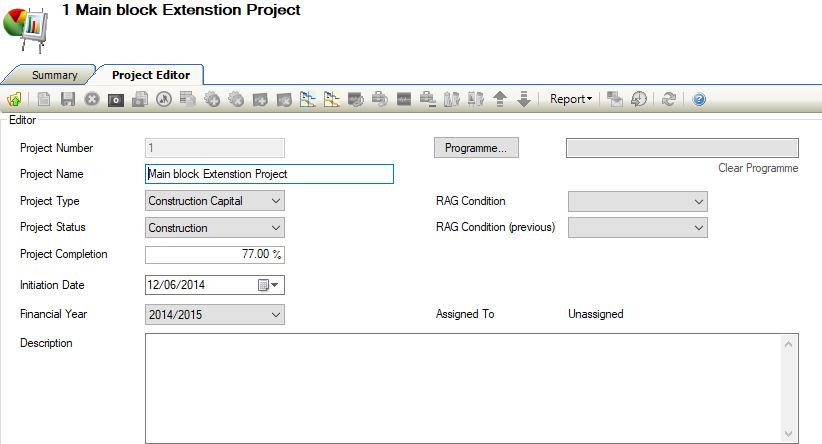
Enter or edit the relevant details.
The fields on the Project Editor are described in the following table:
This field… | Holds this information... |
|---|---|
Project Number | The project number. This is generated automatically if the Project Auto Unique Number setting is set to 'True' in System Options (accessed by navigating to Tools > System Options and then clicking the System Options button). This field is mandatory. |
Project Name | The name of the project. This field is mandatory. |
Project Type | The type of project. These can be defined in Project Type Reference Data (accessed by navigating to Maintenance > Projects > Projects). |
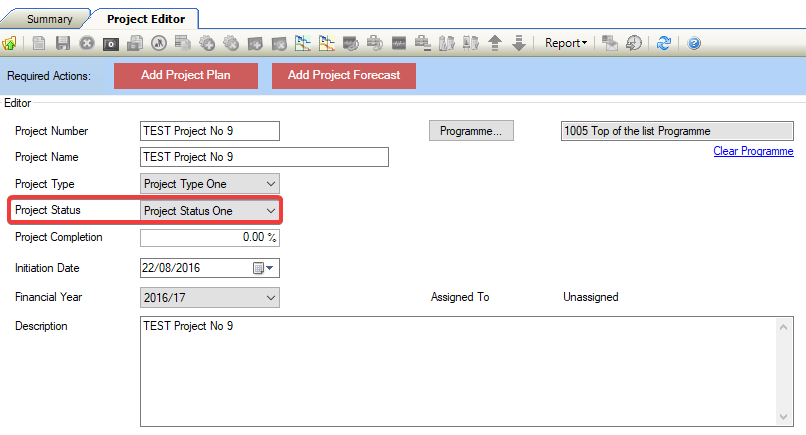
Project Status | The project status. These can be defined in Project Status Reference Data (accessed by navigating to Maintenance > Projects > Projects). |
Project Completion | The progress of the project in percentage. |
Initiation Date | The date that the project began. |
Financial Year | The financial year to which the project belongs. These can be defined in Financial Years Reference Data (accessed by navigating to Functions > Core > Reference Data > Core). |
Programme | The programme to which the project is linked. This is mandatory depending on the Enforce Programme Project Link setting in System Options (accessed by navigating to Tools > System Options and then clicking the System Options button).
|
Description | A description of the project. |
Click Save.
The Project Overview screen lets you view and manage multiple projects from one location.
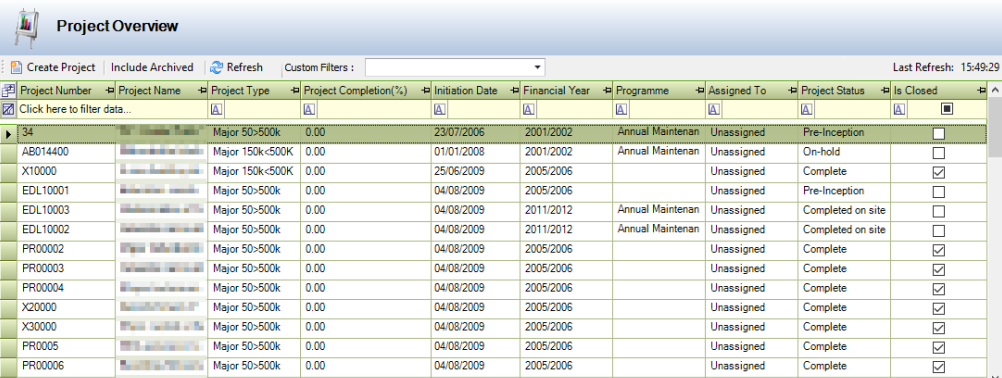
It can be accessed by navigating to Maintenance > Projects > Projects Overview.
The Project Overview screen allows you to do the following:
Click the Create Project button to add a project. Refer to Manage Project Records for further information

Select the Include Archived button to display archived records.

Select from the Custom Filters drop-down,

Custom Filters allows a filter to be set against the grid or create a filter by entering a name and clicking the Save button.
Double-click a record to view further details.
Select from the Initiation Date date picker to change a record's start date.
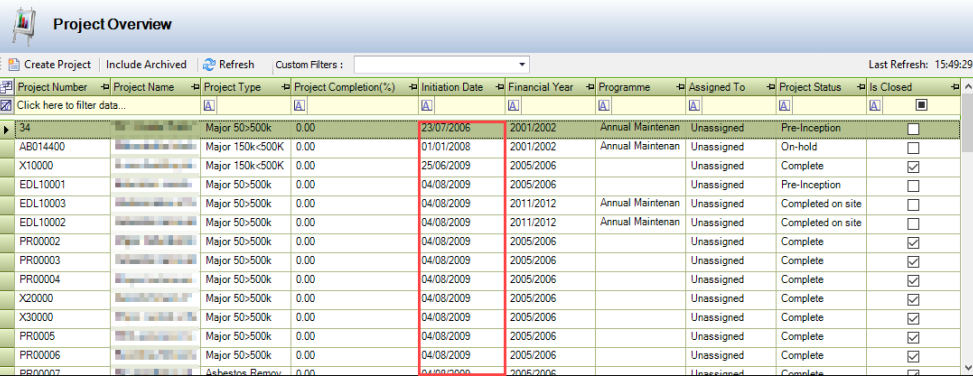
The Initiation Date is the only editable field.
Access to the New Project Item option in the Tasks panel is controlled by the Use Contract Items or Project Items option located in the Maintenance section of System Options (accessed by navigating to Tools > System Options). This option is disabled in System Options by default, contact your professional services consultant for advice on accessing this option.
You can add acquisitions, assets, components, conditions, deeds, disposals, leases, locations, service request maintenance, and trees to a project record.
To add project items:
Open the relevant project record.
Click the New Project Item option in the Tasks panel.
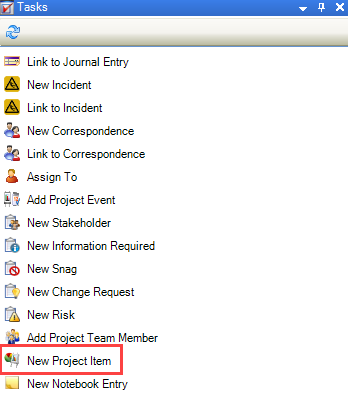
The Select Project Item window is displayed.
Select the Item Type from the drop-down list.
Click the Location button and use the Level selector to select the location of the item.
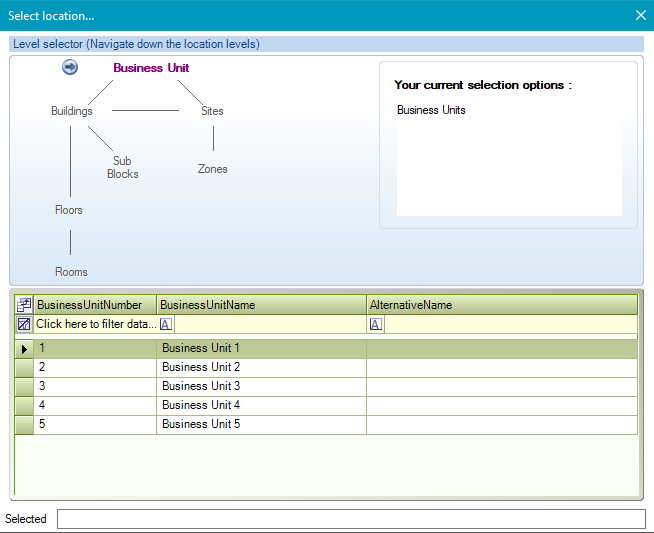
Enter a description for the item, if required.
Select the relevant item(s), or click the Select/De-select All button to select or deselect all items.
Click OK.
The Project Item List is displayed with the items added.
Financial Assets are auto-created when linked to a new Project Item List,
To add a Change Request:
Click the New Change Request option in the Tasks panel of a project record.
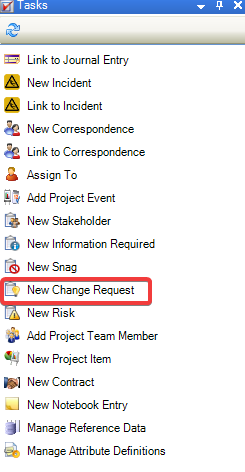
The Change Request Editor is displayed.
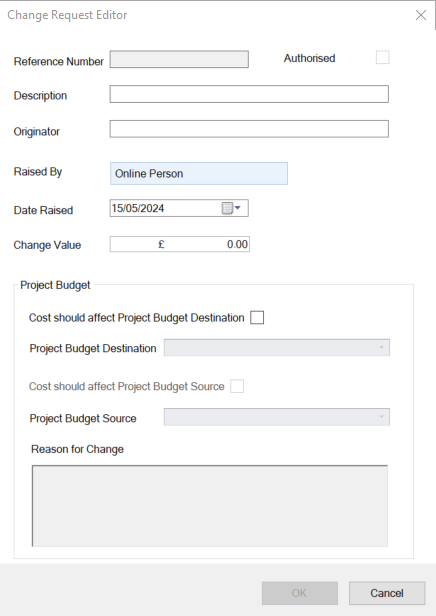
The fields on the Change Request Editor window are described in the following table:
This field… | Holds this information... |
|---|---|
Reference Number | The number is given to the Change Request. |
Authorised | Whether the change request has been authorised or not. |
Description | The description of the change request. |
Originator | The origin of the change request was raised. |
Raised By | The person who raised the change request. |
Date Raised | The date the request was raised. |
Change Value | The value amount of the request. |
Cost Should Affect Project Budget Destination | When selected the Project Budget Destination becomes active. |
Project Budget Destination | The project destination where the budget has been affected. |
Cost Should Affect Project Budget Source | When selected the Project Budget Source becomes active. |
Project Budget Source | The project source where the budget has come from. |
Reason for Change | The reason a change has been made to the budget. |
Click on OK.
The change is displayed on the Change Request Register screen.

Navigate to Associated Items > Project Budget
Select the Project Budget for the change that was made.
Click on the Change Request tab.
The change request details are displayed.

Click on the Submit for Authorisation icon

The following message is displayed:
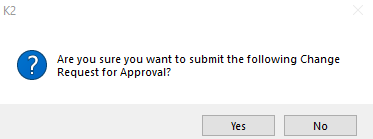
Click on Yes.
The Authorisation Status changes to Pending Approval.

Refresh the Notifications panel.
Check that a Change Request notification is displayed.
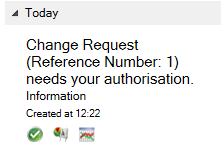
Click on the Approve Change Request icon.

The Authorisation Status changes to Authorised.

Click on the Reject Change Request icon.

The Reject Reason window is displayed.
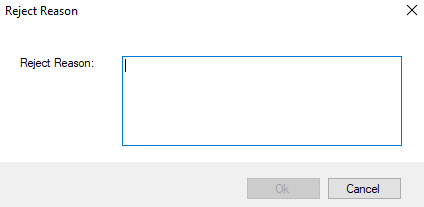
Add a reason to the Reject Reason field.
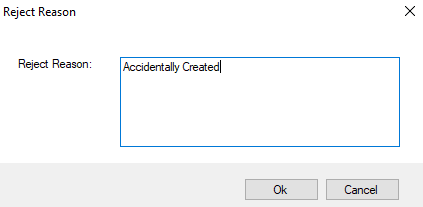
Click on OK.

The Authorisation Status changes to Rejected.
To add a project forecast:
Click the Project Forecast option in the Associated Items panel of a project record.
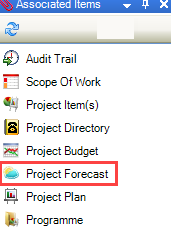
Click the Add Project Forecast button.

The Project Forecast tab is displayed.

The Project Forecast grid will be disabled based on the dates specified on a Project Plan.
Select the relevant Financial Year from the drop-down list.

Enter the relevant forecast amount.
Users can only enter data into the Project Forecast grid based on the specified Project Plan / Checklist Items baseline dates.

Click Save.
The Project Forecast is associated with the project.
Refer to Projects Reference Data to define the status of the project. Example: Is Closed.
To close a Project.
Select the relevant Project Status in the Project Editor.
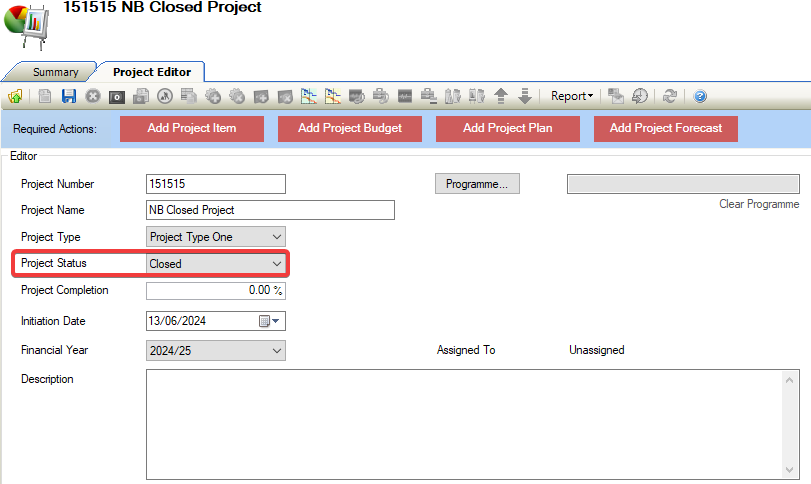
Click on Save.
Click on the Notifications tab.
A Project Closed notification is displayed.
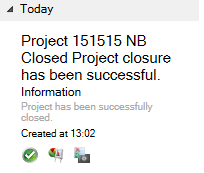
Click on the Project Editor tab.
The closed project is locked down and cannot be edited.
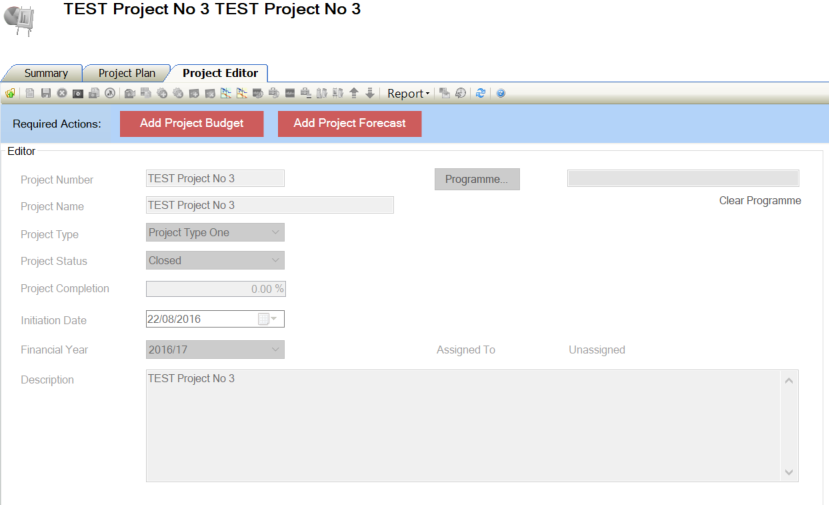
Where closing a project has failed.
Click on the Notifications tab.
A Project Failed notification is displayed.
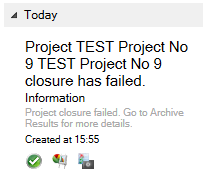
Click on the Go to Archive Results icon.

The Archive Results tab displays the failed reasons.

Click back on the Project Editor.
Refresh the screen.
The Project Status has returned to an active status.
To archive a Project.
Click on the Archive icon.

The Archiving Information window is displayed.
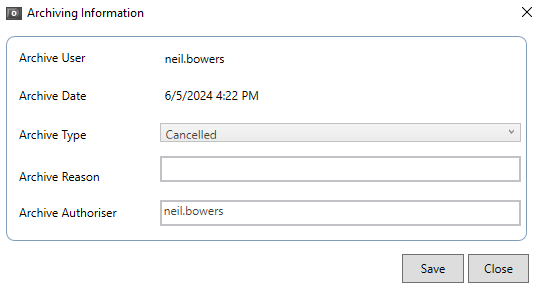
The fields on the Archiving Information window are described in the following table:
This field… | Holds this information... |
|---|---|
Archive User | Displays the name of the user archiving the record. |
Archive Date | Displays the date the record is to be archived. |
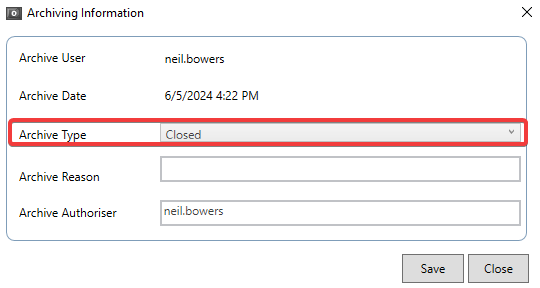
Archive Type | Displays the available archive type. The available Archive Type are Cancelled, Closed, and Rejected. |
Archive Reason | Displays the reason for the project to be archived. |
Archive Authoriser | Displays the person who can authorise and archive the record. |
Select Closed from the Archive Type drop-down.
Click on Save.
Click on the Notifications tab.
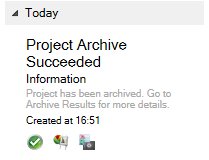
A Project Archive notification is displayed.
Navigate to Maintenance > Projects > Project Overview
Click on Include Archived.

The Project Overview tab is open.
The closed project is displayed with a Project Status of closed and Is Closed selected.

Click on the Project Editor tab.
The archived project is locked down and cannot be edited.
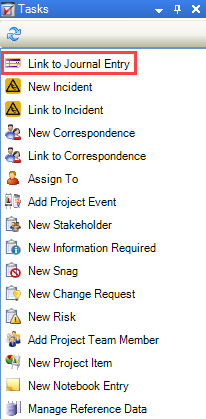
Other Tasks/Associated Items
To link a Project to a Journal Entry.
Click the Link to Journal Entry option in the Tasks panel.
The Add Journal Entry window is displayed.
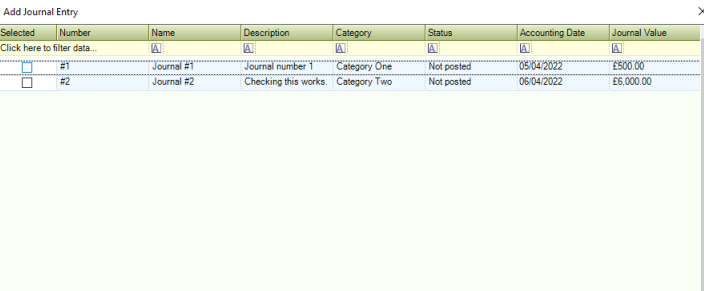
The fields on the Add Journal Entry window are described in the following table:
This field… | Holds this information... |
|---|---|
Selected | The selected journal record. |
Number | The unique journal entry number. |
Name | The individual associated with the journal entry. |
Description | The description of the journal entry. |
Category | The journal category. These can be defined in Category Reference Data (accessed by navigating to Finance > Journal > Journal). |
Status | The journal status. |
Accounting Date | The accounting date. |
Journal Value | The journal value. |
Select the relevant incident and then click OK.
The record is then displayed in the Journal Entry List. This can also be accessed by clicking the Journal Entry(s) option in the Associated Items panel.
Also, refer to Linking a Journal to a Project for further information.
Please refer to Adding or Editing an Incident for further information.
To link a project to an incident:
Click the Link to Incident option in the Tasks panel.
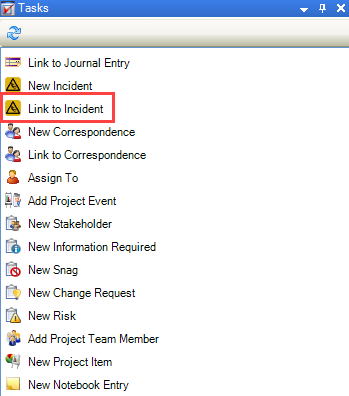
The Select window is displayed.
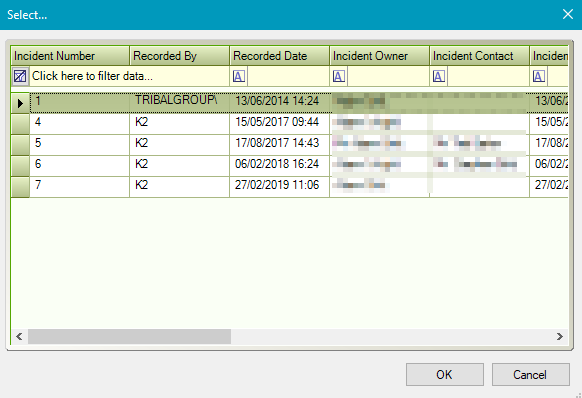
Select the relevant incident and then click OK.
The record is then displayed in the Linked Incident List. This can also be accessed by clicking the Incident(s) option in the Associated Items panel.
Also, refer to Linking an Incident to a Project for further information.
Please refer to Adding or Editing a Correspondence for further information.
To link a Project to Correspondence.
Click the Link to Correspondence option in the Tasks panel.
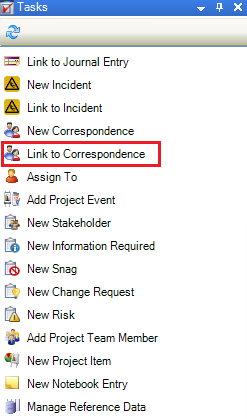
The Select window is displayed.
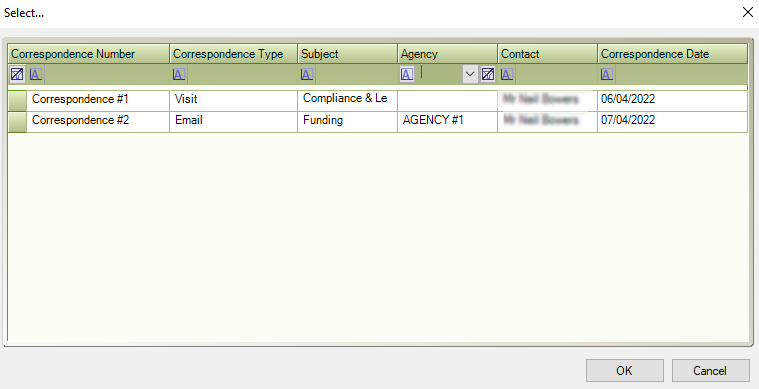
The fields on the Select window are described in the following table:
This Field… | Allows Users To Do… |
|---|---|
Correspondence Number | The unique correspondence number. |
Correspondence Type | The correspondence type (for example visit). |
Subject | The correspondence subject. |
Agency | The correspondence agency. |
Contact | The correspondence contact. |
Correspondence Date | The date of correspondence. |
Select the relevant incident and then click OK.
The record is then displayed in the Linked Incident List. This can also be accessed by clicking the Incident(s) option in the Associated Items panel.
To assign a project to a person:
Click the Assign To option in the Tasks panel.
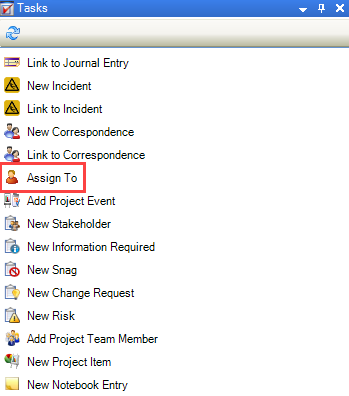
The Assign To window is displayed.
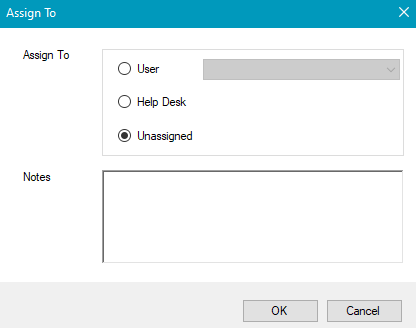
Select who you want to assign the project to using the relevant radio button.
Enter any notes and then click OK.
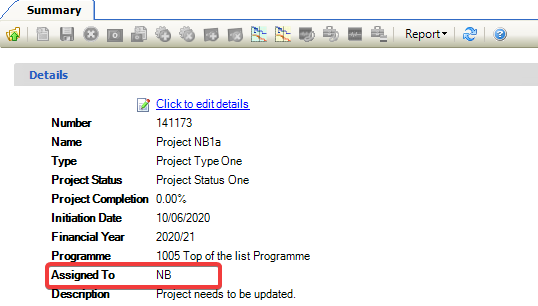
The Assigned To details will appear on the project Summary tab under Details.
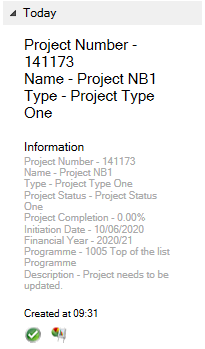
Click on View > Panels > Notification List.
The Assign To notification will be displayed.
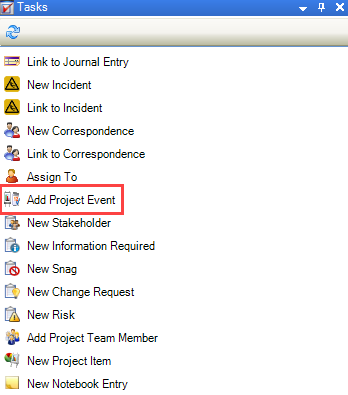
To record a Project Event:
Click the Add Project Event option in the Tasks panel.
The Event window is displayed.
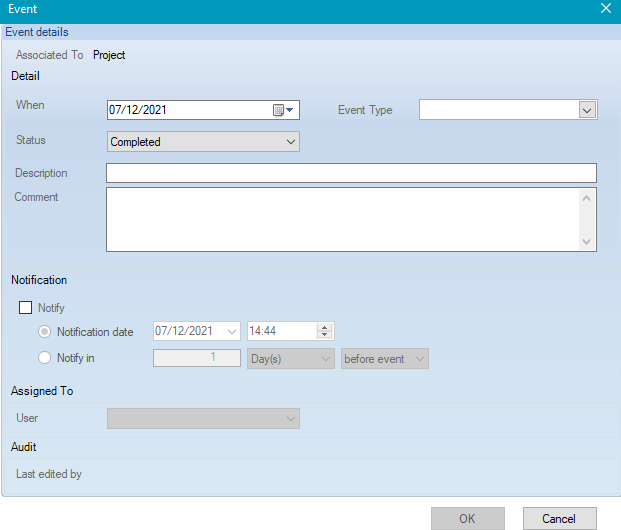
Enter the relevant details.
The fields on the Event window are described in the following table:
This Field… | Holds this information… |
|---|---|
When | The date of the event. |
Status | The status of the event. These can be defined in Incident Status Reference Data (accessed by navigating to Business Continuity > Incident > Incident). |
Event Type | The type of event. These can be defined in Incident Event Type Reference Data (accessed by navigating to Business Continuity > Incident > Incident). |
Description | A description of the event. |
Comment | Any comments on the event |
Notify | Whether to send the user a notification of the event. Selecting this check box enables the remaining Notification fields, where you can select when to send the notification. |
Last edited by | The user who last edited the event. This cannot be edited. |
Click OK.
Click on View > Panels > Notification List.
A Project Event notification will be displayed.
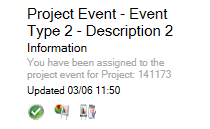
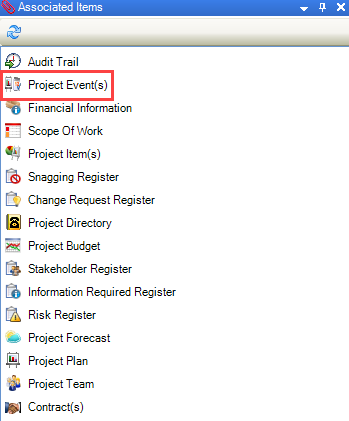
The record is then displayed in the Events List. This can also be accessed by clicking the Project Event(s) option in the Associated Items panel.
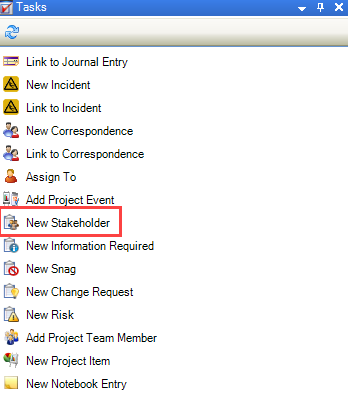
To add or edit a stakeholder:
Click the New Stakeholder option in the Tasks panel.
The Stakeholder Register window is displayed.
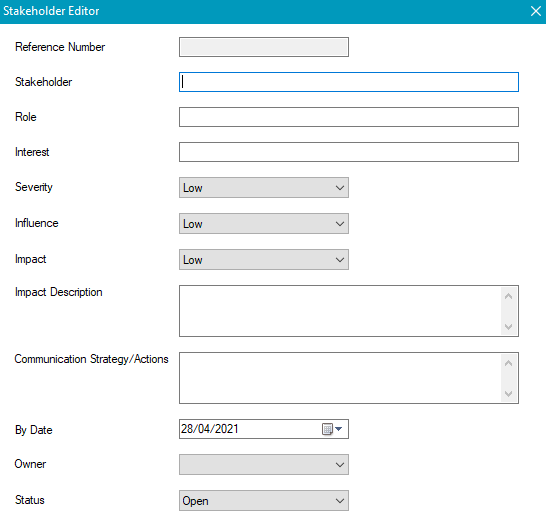
Enter or edit the relevant details.
The fields on the Stakeholder Register are described in the following table:
This Field… | Allows Users To Do… |
|---|---|
Reference Number | The stakeholder reference number. This is populated automatically and cannot be edited. |
Stakeholder | The stakeholder name. This field is mandatory. |
Role | The stakeholder's role. This field is mandatory. |
Interest | The stakeholder's interest level in the project. This field is mandatory. |
Severity | The severity of the stakeholder's interest. |
Influence | The influence of the stakeholder. |
Impact | The stakeholder's impact level in the project. |
Impact Description | A description of the stakeholder's impact. This field is mandatory. |
Communication Strategy/Actions | The stakeholder's communication strategy/actions. |
By Date | The date by which to carry out the communication strategy/actions. |
Owner | The person responsible for the stakeholder. The drop-down list contains Project Team members. |
Status | Whether the stakeholder is an active (that is: Open) stakeholder. |
Click OK.
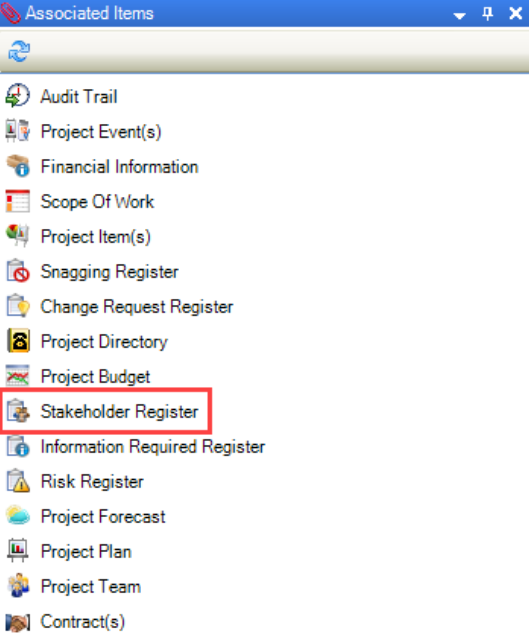
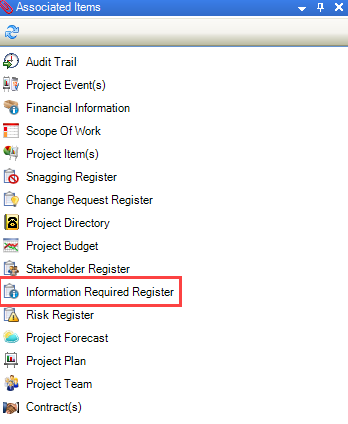
To edit the record navigate to the Associated Items panel and double-click on Stakeholder Register.
Use the Information Required functionality to log information requests from internal (for example: School Board of Trustees) or external parties (for example: media or members of the public) regarding a project.
To add or edit information required:
Click the New Information Required option in the Tasks panel.
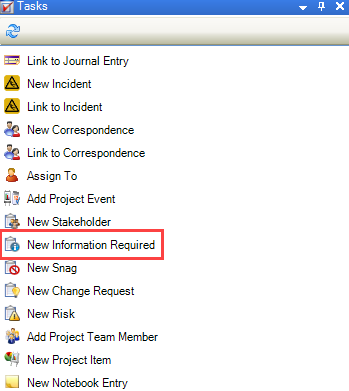
The Information Required Editor is displayed.
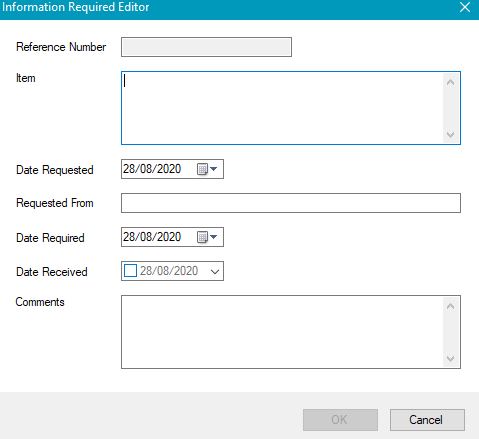
Enter or edit the relevant details.
The fields on the Information Required Editor are described in the following table:
This Field… | Allows Users To Do… |
|---|---|
Reference Number | A reference number for the information required record. This is generated automatically and cannot be edited. |
Item | Information on the request. This field is mandatory. |
Date Requested | The date that the information was requested. |
Requested From | The party that requested the information. This field is mandatory. |
Date Required | The date that the information is required. |
Date Received | The date that the information was received by the party who requested it. |
Comments | Any comments on the information? |
Click OK.
To edit the record navigate to the Associated Items panel and double-click on Information Required Register.
Snags are used to identify minor buildings or asset faults against a project.
To add or edit a snag:
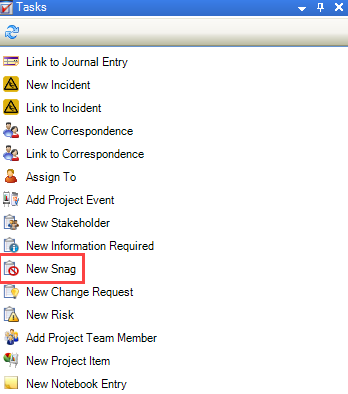
Click the New Snag option in the Tasks panel.
The Snag Editor is displayed.
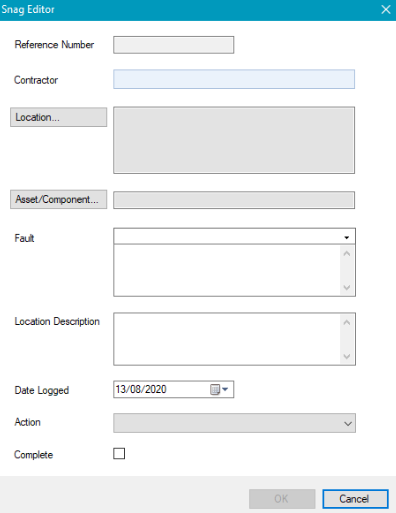
Enter or edit the relevant details.
The fields on the Snag Editor are described in the following table:
This Field… | Allows Users To Do… |
|---|---|
Reference Number | The reference number. This is generated automatically. |
Contractor | The contractor. Start typing their name and select from the drop-down list. This field is mandatory. |
Location | The location of the snag.
|
Asset/Component | The asset or component that the snag relates to.
|
Fault | The fault. This field is mandatory. These can be defined in Faults Reference Data (accessed by navigating to Maintenance > Projects > Projects). |
Location Description | A description of the location. This field is mandatory. |
Date Logged | The date that the snag was logged. |
Action | The action that has been taken to address the snag. This field is mandatory. These can be defined in Condition Actions Reference Data (accessed by navigating to Maintenance > Projects > Projects) |
Complete | Whether the snag has been resolved. |
Click OK.
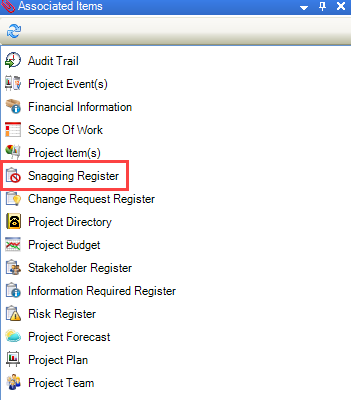
To edit the record navigate to the Associated Items panel and double-click on Snagging Register.
To add a record to the directory:
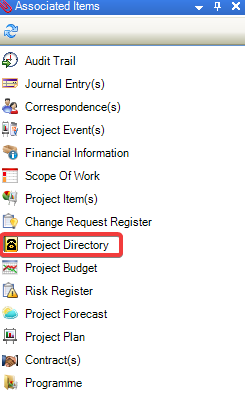
Click on the Project Directory option in the Associated Items panel of a project record.

Click the New button on the ribbon.
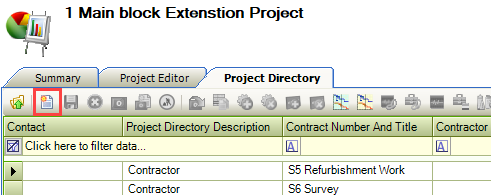
The Project Directory Editor is displayed.

The fields on the Project Directory Editor are described in the following table:
This Field… | Allows Users To Do… |
|---|---|
Contact | Displays the person to be contacted. Refer to Adding or Editing a Contact for further information. |
Description | Defaults to Adhoc |
Contact on Site | Displays the Contact name available onsite. |
Phone | Displays the phone number. |
Fax | Displays the fax number. |
Mobile | Displays the mobile number. |
Pager | Displays the pager number. |
Displays the email address. |
Enter the contact's name and select it from the drop-down list.
Enter any comments on the contact. All other fields are populated automatically.
Click OK.
The record is displayed on in the Project Directory.

The Project Team List allows you to manage the members of the team on the project and their roles.

It can be accessed by clicking the Project Team option in the Associated Items panel of a project record.
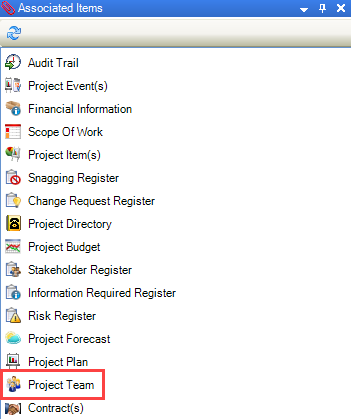
To add a Project Team member:
Click the New button on the Project Team List ribbon.
The Project Team Member window is displayed.
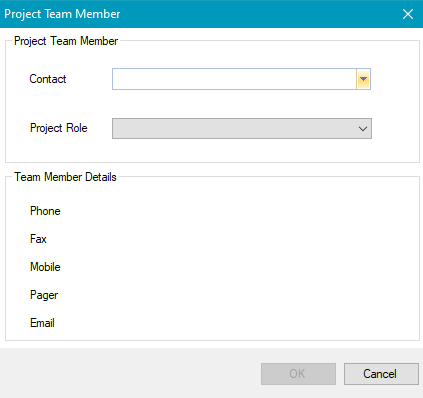
Partially enter the name of the contact and then select them from the drop-down list. This populates the Team Member Details section.
Select the Project Role from the drop-down list.
These can be defined in Project Role Reference Data (accessed by navigating to Maintenance > Projects > Projects).
Click OK.
To view or edit the record navigate to the Associated Items panel and double-click on Project Directory.
The Project Scope of Work allows you to record a textual definition of what a project will and will not deliver.
The Scope of Work differs from Project Plan Items which represent tangible and measurable tasks that must be carried out to complete the project.
The Scope of Work may already be generated depending on the Project Type selected and the Project Template linked to it. This can be set up using Project Templates Reference Data and linking them to Project Type Reference Data (accessed by navigating to Maintenance > Projects > Projects).
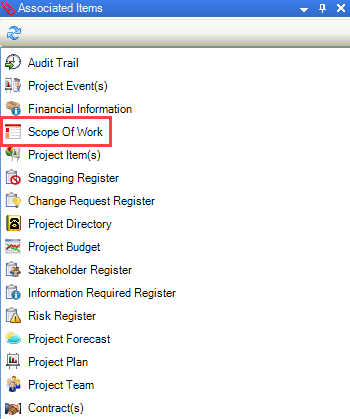
It can be accessed by clicking the Scope of Work option in the Associated Items panel of a saved project record.
To add or edit a row:
Click the Add Row button on the ribbon.
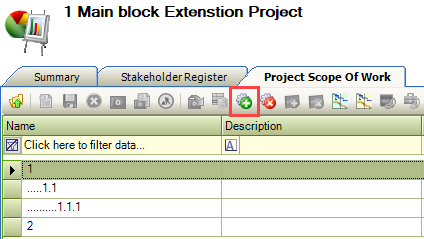
Alternatively, double-click an existing record.
The New Scope Of Work (or Edit Scope of Work) window is displayed.
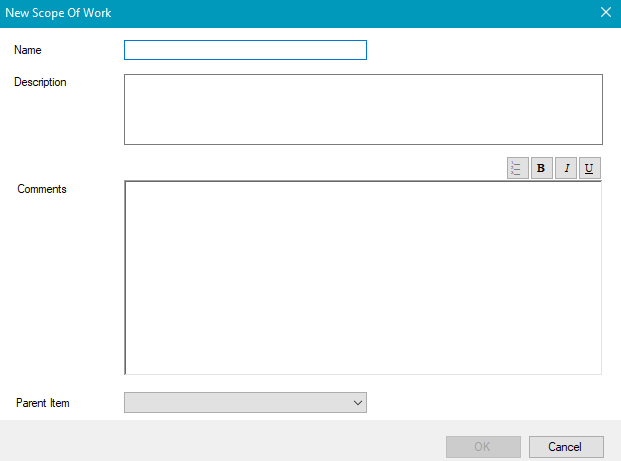
Enter a name, description and any comments about the scope.
Select a parent item, if required
Click OK.
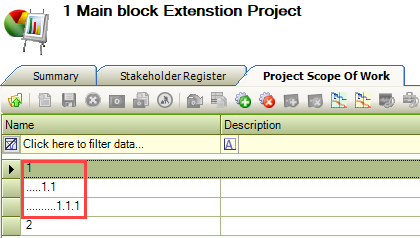
The row is added to the grid. Child items are prefixed with ellipsis to denote a hierarchy.
You can use the Contract Gantt Chart screen to view the target and actual dates of contract events.
You need a role with the ProjectsGanttChart permission to access this screen.
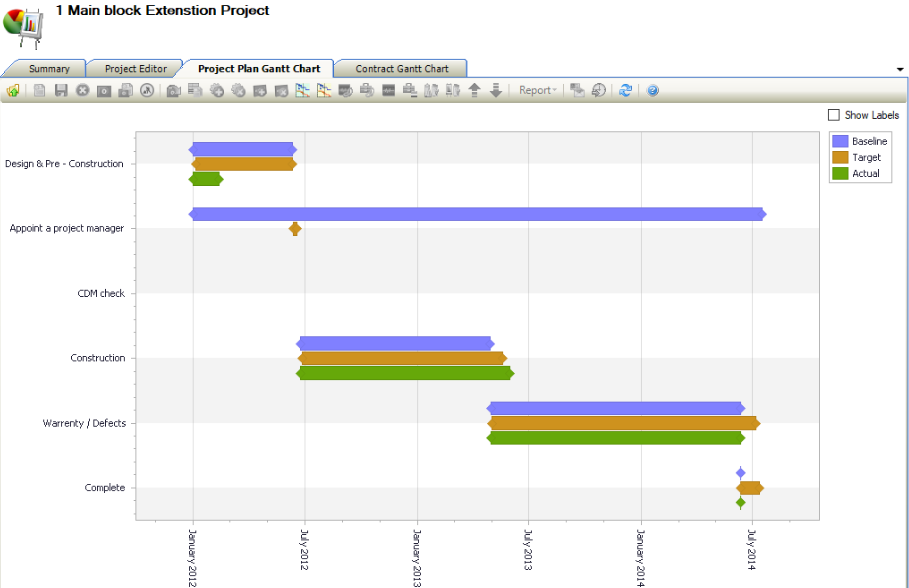
It can be accessed by clicking the View Contract Gantt Chart button on the Project Editor.

Hover over the bars to view specific targets and actual start and end dates.
You need a role with the ProjectsGanttChart permission to access this screen.
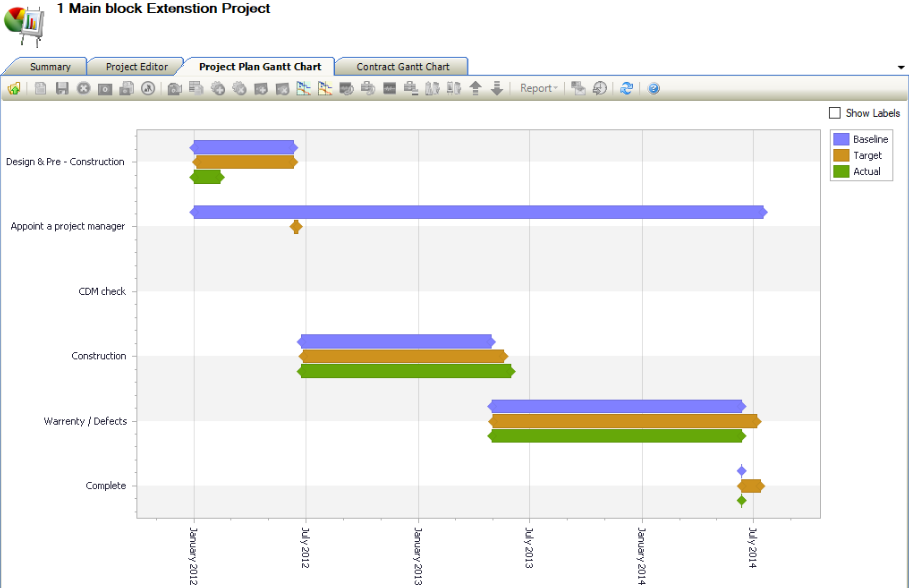
It can be accessed by clicking the View Project Plan Gantt Chart button on the Project Editor.

Use the Project Plan Gantt Chart screen to:
Adjust the start and end dates of baseline, target, and actual dates by clicking and dragging the ends of each bar
Choose whether to display the date tags by selecting or deselecting the Show Labels check-box
You can use the Contract Gantt Chart screen to view the target and actual dates of contract events.
You need a role with the ProjectsGanttChart permission to access this screen.

It can be accessed by clicking the View Contract Gantt Chart button on the Project Editor.

Hover over the bars to view specific targets and actual start and end dates.
Refer to Managing Notes for further information.
