Jobs
A job can be created against maintenance calls and PPM (planned preventative maintenance) Active Tasks.
For maintenance, jobs are used to specify the work required to complete an order against a call, or where works required can be carried out by an internal workforce without needing to involve a contractor. There may be multiple jobs associated with each call. Typically, a job is raised when an internal workforce is required to carry out the work or an internal staff member is gathering quotes (conversely, an order is raised when an external contractor is required).
A job is created from a PPM Active Task if it is going to be undertaken by an internal labour team.
Use K2 to:
To add or edit a job, do one of the following:
Search for and open the relevant job.
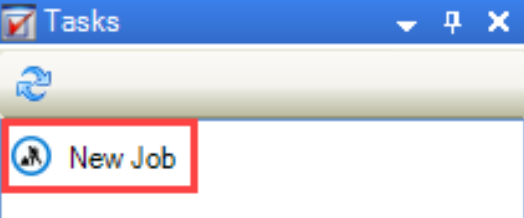
Click the New Job option in the Tasks panel:
When a PPM Active Task, Condition, Maintenance Request or Portering Request record is open
When the Job Allocation screen is open
When the Maintenance Overview screen is open
The Job Editor is displayed.
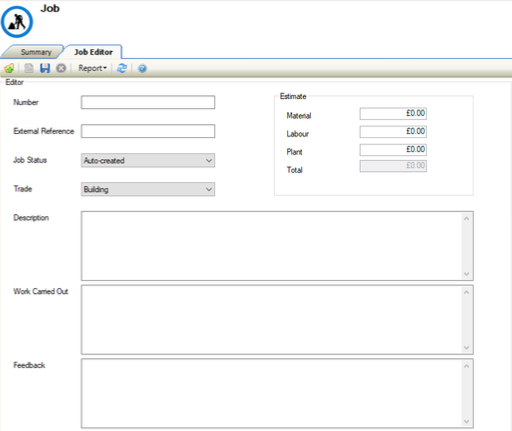
Edit the details, if required.
The fields on the Job Editor are described in the following table:
This field… | Holds this information... |
|---|---|
Number | A unique job number. This can either be entered or populated automatically, depending on the Job Auto Unique Number setting in System Options (accessed by navigating to Tools > System Options and then clicking the System Options button). |
External Reference | A reference from another system, if required. |
Job Status | The job status. This can be populated from the K2 Mobile app. These can be defined in Job Status Reference Data (accessed by navigating to Maintenance > Job). |
Trade | The job's trade. These can be defined in Trade Reference Data (accessed by navigating to Functions > Core > Reference Data > Core). |
Description | A description of the job. |
Work Carried Out | A description of the work carried out. This can be populated from the K2 Mobile app. |
Feedback | Operative feedback on the job. This can be populated from the K2 Mobile app. |
Start Date | The start date of the job. This is populated automatically but can be edited. |
End Time | The end date of the job. |
Material | The estimated material cost. |
Labour | The estimated labour cost. |
Plant | The estimated plant cost. |
Total | The estimated material cost. This is calculated based on the Material, Labour and Plant fields. |
Contract | The related contract. This is populated automatically if the PPM Task is linked to a maintenance contract. This may be mandatory depending on the Maintenance Contract Mandatory setting in System Options (accessed by navigating to Tools > System Options and then clicking the System Options button). |
Contractor | The contractor taking out the job. This is populated automatically if the PPM Task is linked to a maintenance contract. |
Add any Job items or Cost Codes, as required.
Click Save.
To add or edit a job item:
Search for and open the relevant job.
The Job Editor is displayed.
Click the Add Item button in the Job Items section.

Alternatively, double-click an existing job record.
The Edit Job Item window is displayed.
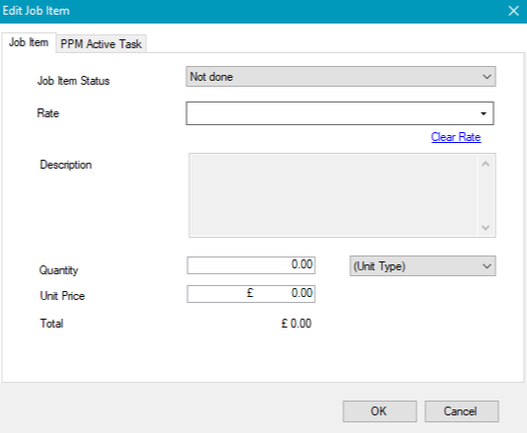
Enter or edit the relevant details on the Job Item tab.
The fields on the Job Item tab are described in the following table:
This field… | Holds this information... |
|---|---|
Job Item Status | The status of the job item. This is to identify whether a specific PPM Instruction has been completed. These can be defined in Job Item Status Reference Data (accessed by navigating to Maintenance > Job). |
Rate | The rate item, if the cost of the Job Item is being generated from a Schedule of Rates (SoR). These can be defined in Rate Types Reference Data (accessed by navigating to Functions > Schedule of Rates > SOR). |
Description | A description of the rate. This is populated automatically but can be overridden. |
Quantity | The quantity of the job item. These can be defined in Measurement Unit Types Reference Data (accessed by navigating to Functions > Core > Reference Data > Core). |
Unit Price | The price per unit of the job item. |
Total | The total cost. This is calculated automatically and cannot be amended. |
Click OK.
If the job was generated from a PPM Active Task, the cost code is assigned to the job automatically based on the PPM Active Task.
To manually add or edit cost codes:
Search for and open the relevant job.
The Job Editor is displayed.
Click the Add Cost Code button in the Cost Codes section.

Alternatively, double-click an existing cost code record.
The Cost Code Editor window is displayed.
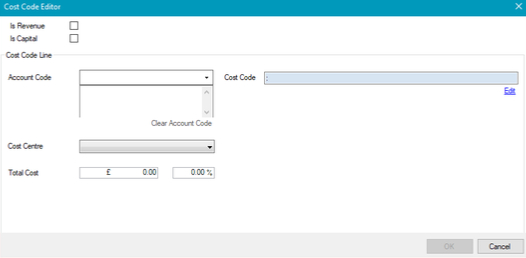
Enter or edit the relevant details.
The fields on the Cost Code Editor are described in the following table:
This field… | Holds this information... |
|---|---|
Is Revenue | Whether the cost code is revenue. |
Is Capital | Whether the cost code is capital. |
Account Code | The account code. Select from the drop-down list. These can be defined in the Chart of Accounts Reference Data (accessed by navigating to Finance > Finance). |
Cost Code | The cost code.
 |
Cost Centre | The cost centre.
These can be defined in Cost Centre Reference Data (accessed by navigating to Functions > Core > Reference Data > Core). |
Total Cost | The total cost. |
Other Tasks/Associated Items:
To request stock for a job:
Click the Request Stock option in the Tasks panel.
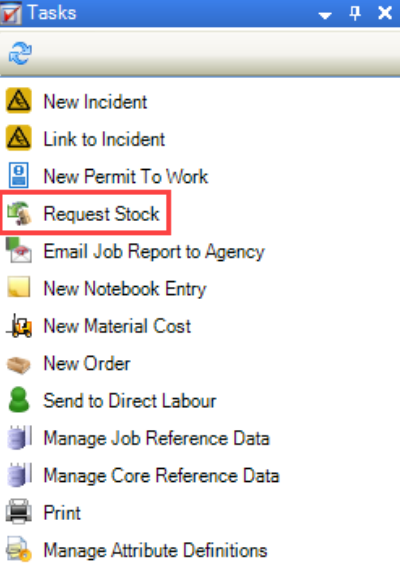
The Request Stock window is displayed.
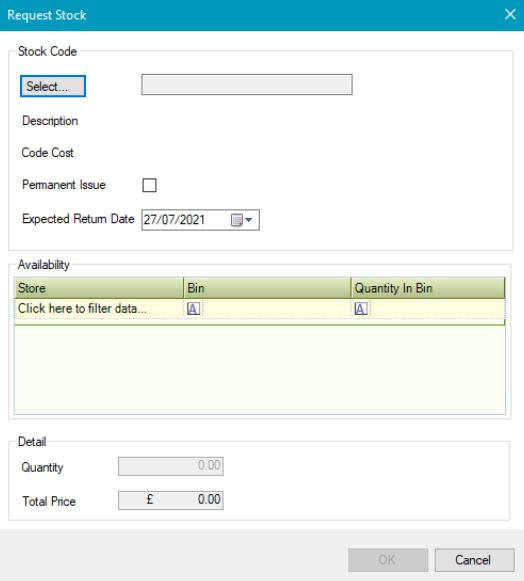
Enter the relevant details.
The fields on the Request Stock window are described in the following table:
This field… | Holds this information... |
|---|---|
Select | The required stock.
|
Description | A description of the item. This is populated automatically. |
Code Cost | The cost of an individual item. This is populated automatically. |
Permanent Issue | Whether the item is to be permanently issued. |
Expected Return Date | The date that the item is expected to be returned. This is only enabled if the Permanent Issue check box is deselected. |
Store | The store that contains the item. |
Bin | The store bin that contains the item. |
Quantity In Bin | The number of items in the store bin. |
Quantity | The number of items required. |
Total Price | The total price of the items. |
Click OK.
To send an email of the job report to an agency:
Click the Email Job Report to Agency option in the Tasks panel:
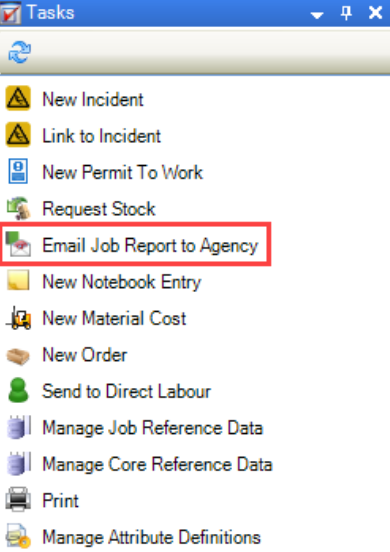
The Select Agency to Email window is displayed.
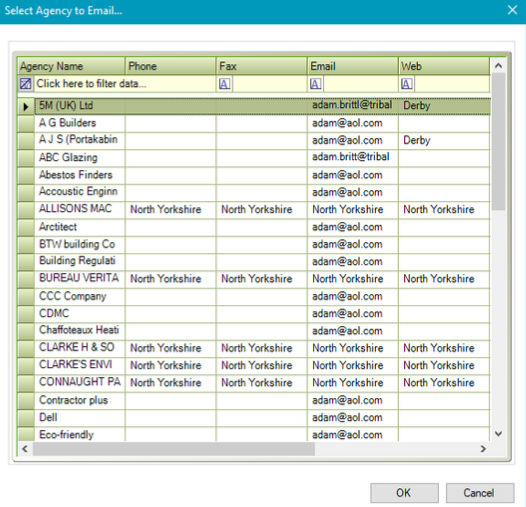
Select the relevant record and then click OK.
To manage material costs:
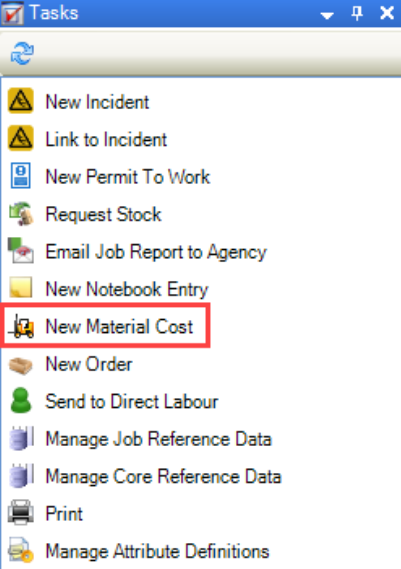
Click the New Material Cost option in the Tasks panel.
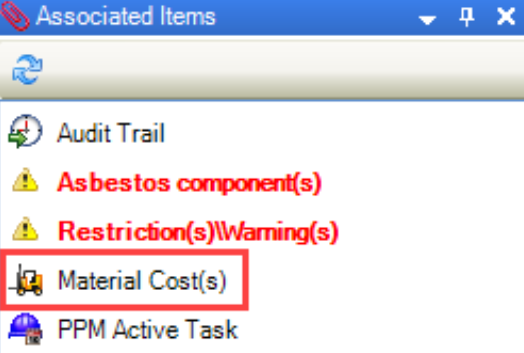
Alternatively, click the Material Cost(s) option in the Associated Items panel and then double-click an existing record to open it.
The Edit Material Cost window is displayed.
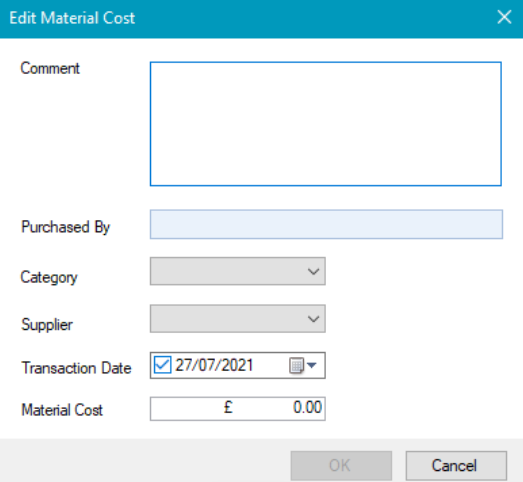
Enter or edit the relevant details.
The fields on the Edit Material Cost window are described in the following table:
This field… | Holds this information... |
|---|---|
Comment | Any comments to record what was purchased. |
Purchased By | The person who purchased the material. |
Category | The category of material. These can be defined in Material Category Reference Data (accessed by navigating to Maintenance > Job). |
Supplier | The supplier. The drop-down list is populated with agencies with the Is Supplier check box selected. |
Transaction Date | The date of the transaction. |
Material Cost | The cost of the material. |
Click OK.
Permits to work are records created from a job or order to ensure that the appropriate risk assessment and control measures have been put in place to ensure a safe working environment.
To add or edit a work permit:
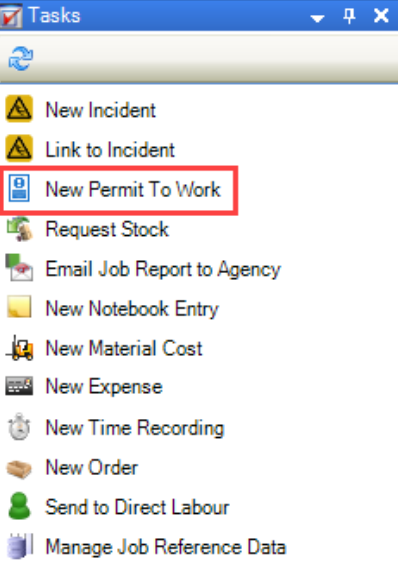
Click the New Permit To Work option in the Tasks panel.
Alternatively, click the Permit(s) To Work option in the Associated Items panel to display the Permit To Work List, and then double-click an existing record to open it.

The Permit To Work window is displayed.
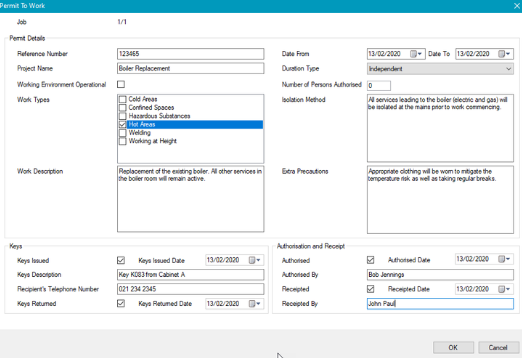
Enter or edit the relevant details.
The fields on the Permit To Work window are described in the following table:
This field… | Holds this information... |
|---|---|
Reference Number | The permit reference number. This is either populated automatically or a free-text field depending on the Permit To Work Auto Unique Number option in System Options (under Job). 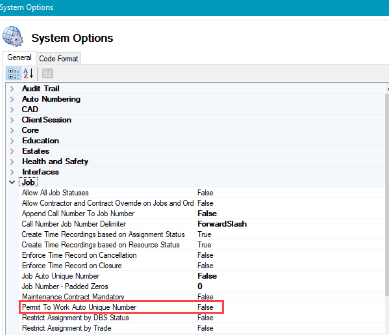 |
Project Name | The name of the project or job being undertaken. This field is mandatory. |
Working Environment Operational | Whether the area that the permit applies to is operational. |
Work Types | The type(s) of work to be undertaken.
These can be defined in Permit To Work - Work Type Reference Data (accessed by navigating to Functions > Core > Reference Data > Core). |
Work Description | A description of the project or job to be undertaken. This field is mandatory. |
Date From | The date that the permit applies from. |
Date To | The date that the permit applies to. |
Duration Type | The duration that the work permits apply for. These can be defined in Permit To Work - Duration Type Reference Data (accessed by navigating to Functions > Core > Reference Data > Core). |
Number of Persons Authorised | The number of people authorised to work on the job as part of the permit to work. |
Isolation Method | Details of any isolation methods employed. |
Extra Precautions | Details of any further precautions required. |
Keys Issued | Whether keys are to be issued as part of the permit-to-work procedure. |
Keys Issued Date | The date that the keys were issued. |
Keys Description | A description of the keys. |
Recipient's Telephone Number | The recipient of the key's phone number. |
Keys Returned | Whether the keys have been returned. |
Keys Returned Date | The date that the keys were returned. |
Authorised | Whether the permit to work is authorised. |
Authorised Date | The date that the permit was authorised. |
Authorised By | The person who authorised the permit. |
Receipted | Whether the permit to work is receipted. |
Receipted Date | The date that the permit was receipted. |
Receipted By | The person who receipted the permit. |
Click OK.
You can assign individual Jobs to Direct Labour from a job record.
You can also assign jobs to operatives en masse using the Job Allocation screen.
To assign a job to an operative:
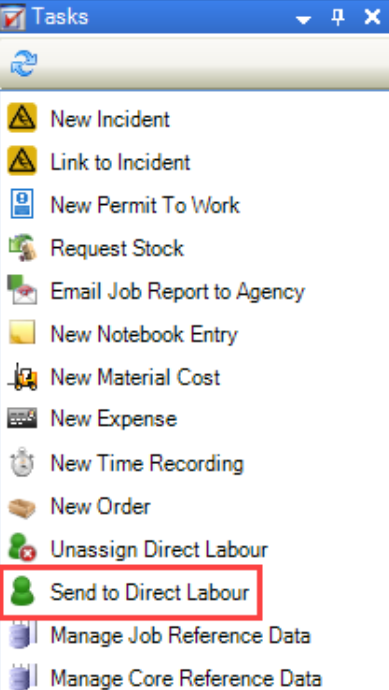
Click the Send to Direct Labour option in the Tasks panel.
The Select Contact window is displayed.
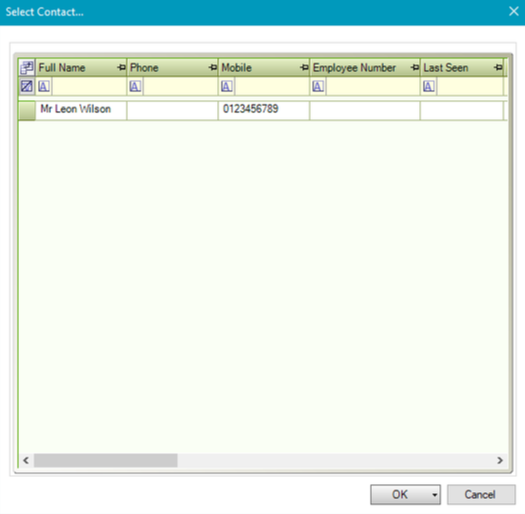
The Direct Labour are displayed in the order in which they are likely to undertake the job. That is:
Supervisors (that is: those in bold) with the correct trade
Direct Labour with the correct trade and location
Direct Labour with the correct trade and are available
Direct Labour with the correct trade and is not available
All other Direct Labour
Direct Labour in grey is unavailable, as defined in the Employee Calendar.
Click OK.
A confirmation message is displayed.
Once at least one job time record has been recorded against a job record, the Time Recording(s) option is displayed in the Associated Items panel.
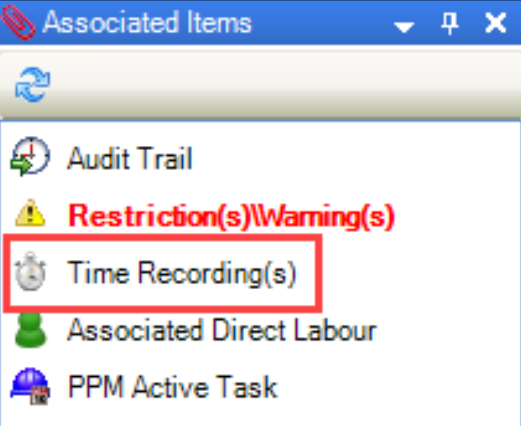
Click this option to display the Time Recording List screen.

The fields on the Time Recording List screen are described in the following table:
This field… | Holds this information... |
|---|---|
Start Date | The start date of the work. |
End Date | The end date of the work. |
Direct Labour | The direct labour operative. |
Action Type | The type of activity being undertaken. |
Recorded Time | The recorded time is in minutes. |
Approved Time | The time that has been approved, either by a user with a role with the TimeApproval permission or automatically (based on the Timesheet Administrator setting in User Options, accessed by navigating to Tools > User Options). If the time record spans across two labour rate bands, one of which is automatically approved, then only part of the 'Recorded Time' will be 'Approved Time'. |
Recorded Labour Cost | The cost of the Recorded Time record, is based on the Labour Rate Band and Labour Rate. |
Approved Labour Cost | The cost of the Approved Time record is based on the Labour Rate Band and Labour Rate. |
Double-click a record to display its details and edit it, if required. Refer to Record Working Hours for further information.
Once a job has been assigned to an operative, you can record times against it.
Time records can be configured to be automatically recorded using K2 Mobile.
To record job times:
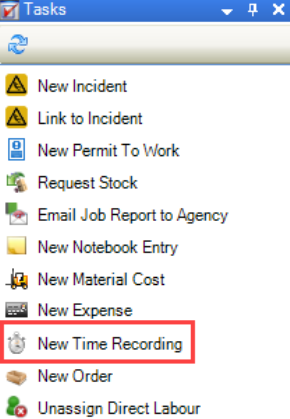
Click the New Time Recording option in the Tasks panel.
Alternatively, click the Time Recording(s) option in the Associated Items panel to display the Time Recording List screen, and then double-click an existing record to open it.
The Job Time Recording window is displayed.
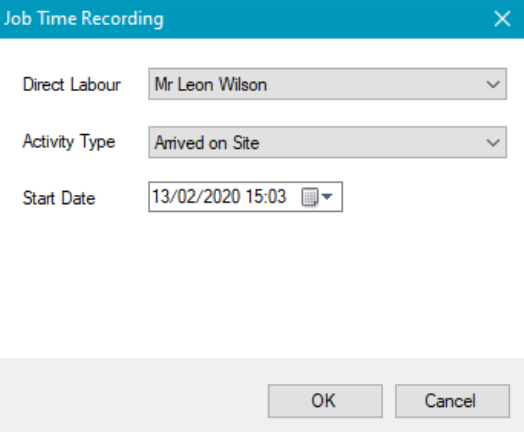
Enter or edit the relevant details.
The fields on the Job Time Recording are described in the following table:
This field… | Holds this information... |
|---|---|
Direct Labour | The operative who carried out the work.
This field only displays operatives who are assigned to the job. Refer to Job Allocation for further information. |
Activity Type | The type of activity being undertaken. These can be defined in Job Status Reference Data (accessed by navigating to Maintenance > Job). |
Start Date | The start date of the work. |
Duration | The duration of the work. This field is only enabled if 'Time Working' is selected from the Activity Type field. |
End Date | The end date of the work. This is populated automatically based on the Start Date and Duration fields. This field is only enabled if 'Time Working' is selected from the Activity Type field. |
Click OK.
Refer to Jobs Reference Data and Core Reference Data for further information.
Refer to Managing Notes for further information.
Refer to Using Attribute Manager for further information.
Related Topics
Click the links below to navigate to the following related topics:
